Armoury Intelligent Documentation

Documentation Center

Find the right Armoury Intelligent workflow quickly.

Browse by workflow, then follow the guide that matches your task.
Foundation

Introduction to Armoury Intelligent

Learn what Armoury Intelligent is, how its testing workflow is structured, and where to begin.

Introduction to Armoury Intelligent

Armoury Intelligent is a quality management tool built around test case management. It helps teams centralize test cases, test execution records, test results, defect records, and test reports in one structured workflow.

In real-world testing work, many teams start by managing test cases with spreadsheets, document systems, or internal note-taking tools. These methods are convenient in the early stage. However, when product features grow, releases become more frequent, and testers begin working in parallel, management issues usually appear.

Common situations include:

  1. Test cases are scattered across different files, and no one is sure which version is the latest.
  2. Test results are recorded only in chat messages or temporary sheets, making them difficult to trace later.
  3. Before every release, the team has to copy test cases and reorganize the test scope again.
  4. Test leads have difficulty quickly understanding current progress, failed items, and blocking issues.
  5. AI can help generate testing content, but if the content is not stored back into the official system, it easily becomes a one-time text output.

The purpose of Armoury Intelligent is to move testing work from distributed management to centralized management. Teams can manage test cases, execute tests, track results, and use AI assistance when needed to organize and create testing content.

What you can do with Armoury Intelligent

With Armoury Intelligent, you can perform the following tasks:

  1. Manage testing projects
    Use Projects to manage different products, systems, or client projects.
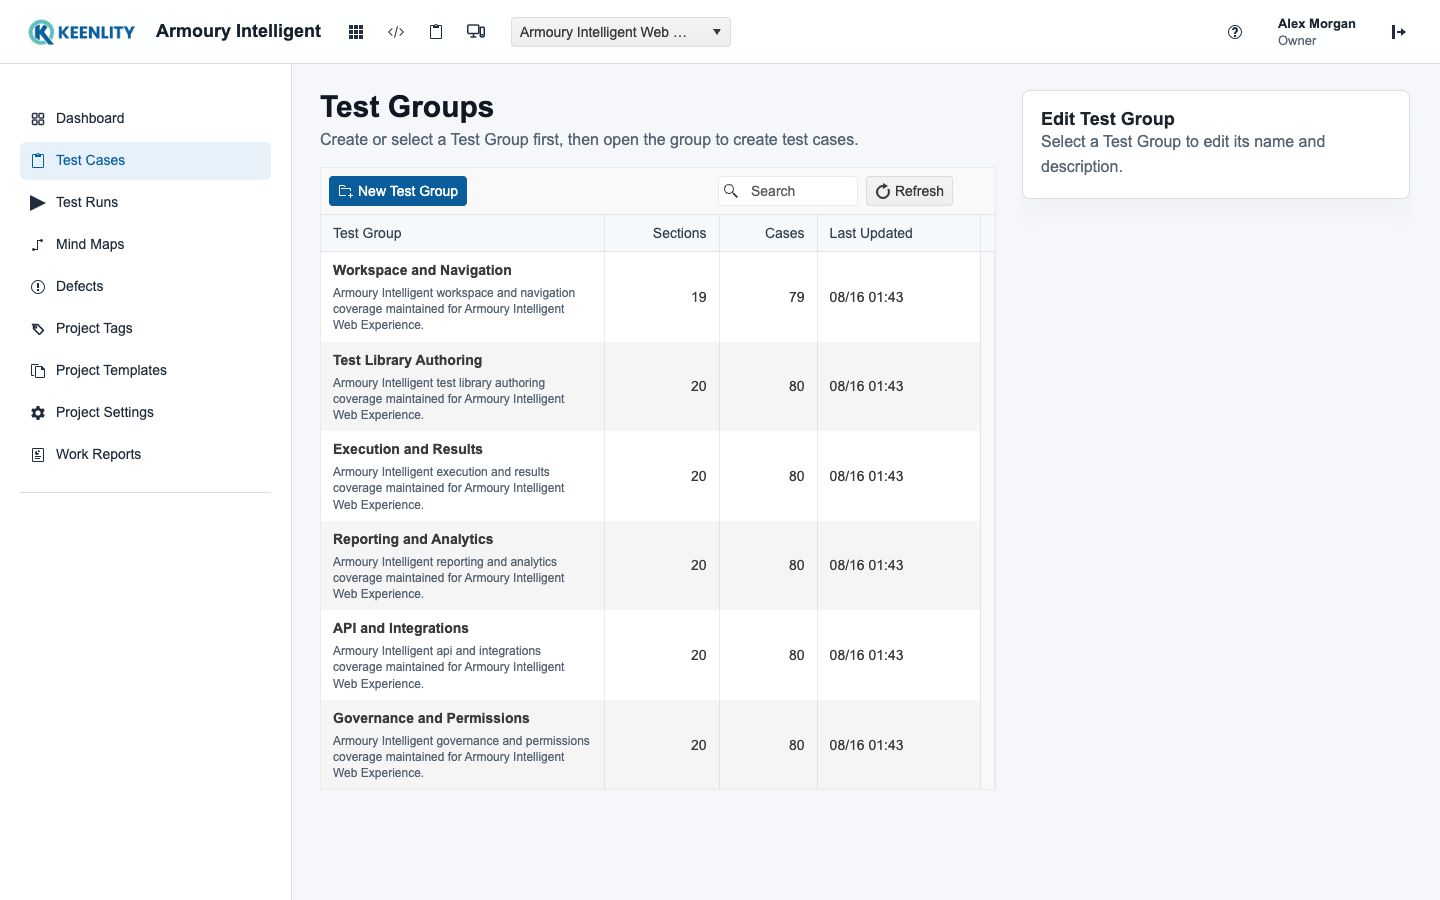
  2. Create Test Groups
    Use Test Groups to manage a specific collection of test cases, such as a member system, back-office management, payment flow, or a release-specific scope.
  3. Organize test categories
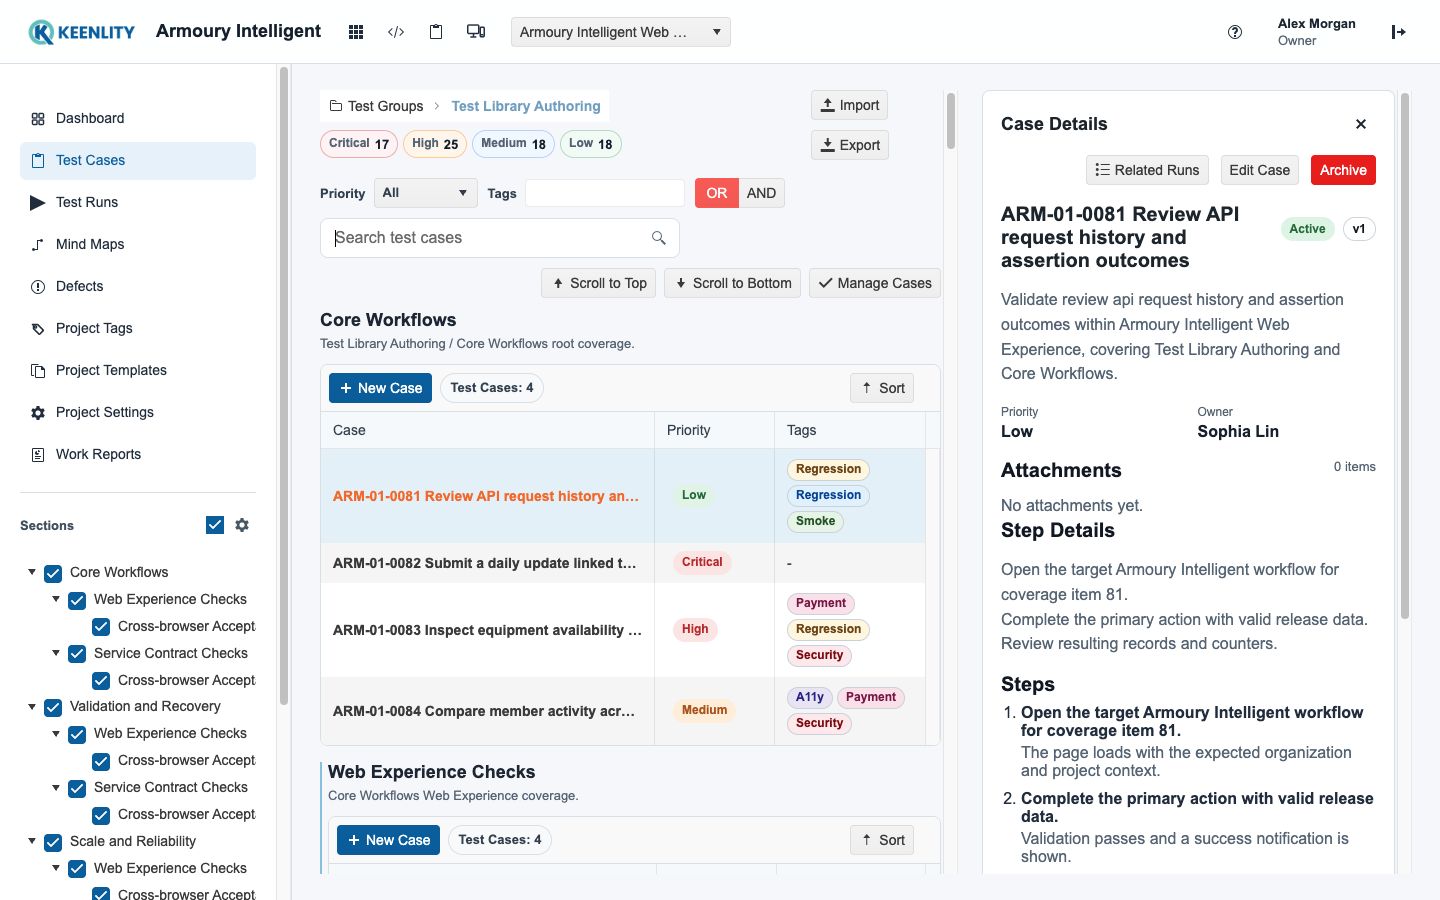
    Use Sections to classify Test Cases by feature, page, or workflow, making them easier to find and maintain.
  4. Create and maintain Test Cases
    Create Test Cases with titles, preconditions, test steps, expected results, priorities, and notes.
  5. Create test execution records
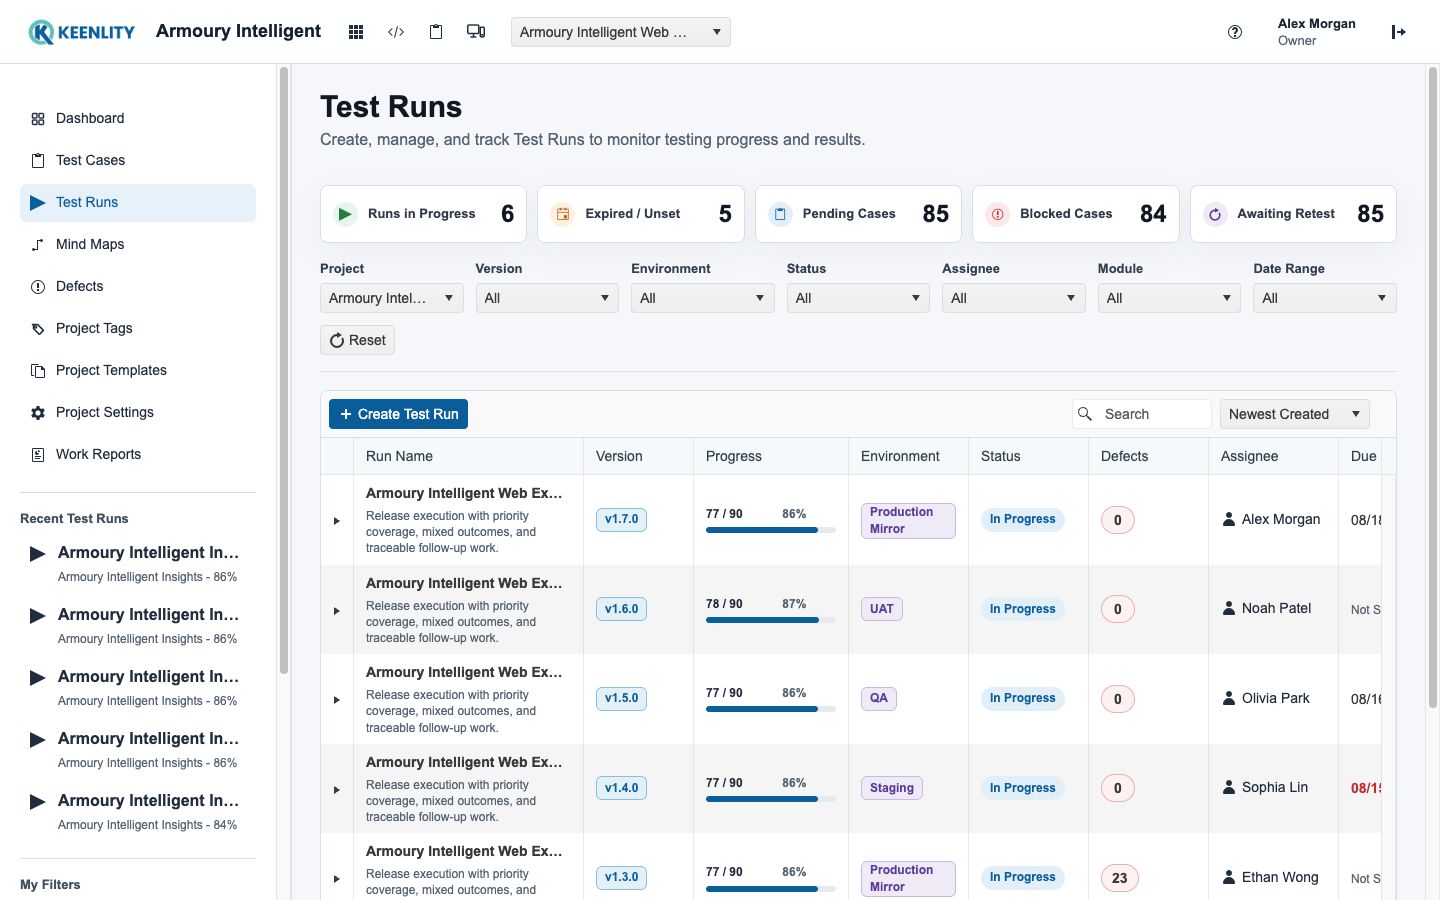
    Use Test Runs to manage a specific testing activity, such as smoke testing, regression testing, or release validation.
  6. Update test results
    After execution, record results with statuses such as Pass, Fail, Untest, Block, Flaky, and Deprecate.
  7. Review test reports
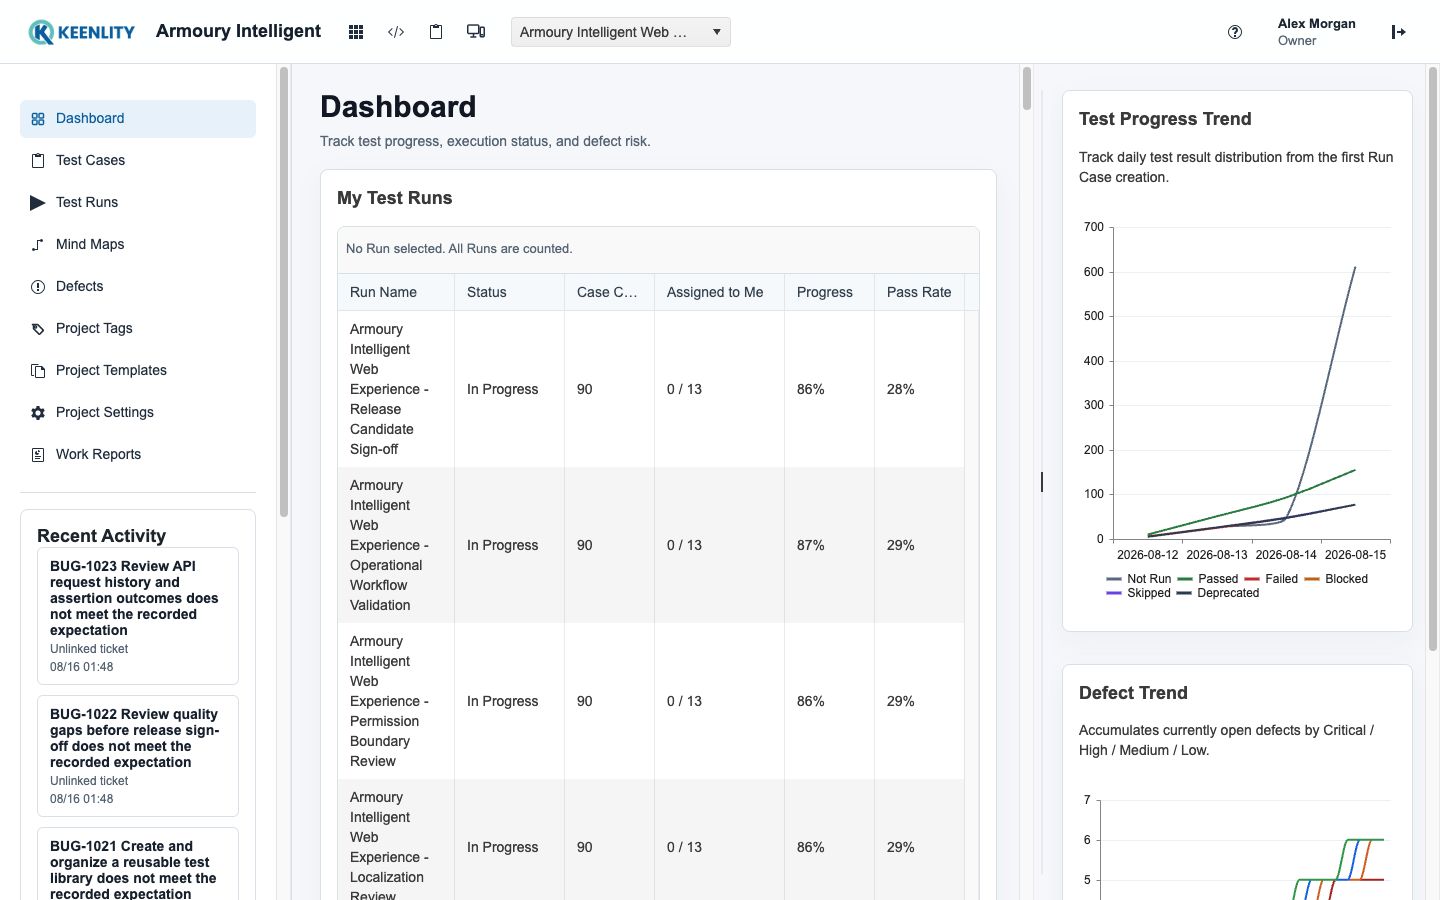
    Use test reports to track testing progress, failed cases, blocked items, and overall release risk.
  8. Create defect records
    When a test fails, create a Defect based on the test result so that the issue can be linked back to the related Test Case.
  9. Use AI-assisted operations
    Armoury Intelligent can work with AI to assist with creating Test Cases, organizing Test Cases, translating content, reviewing case quality, performing batch updates, and querying data. The role of AI is to support test management, not to replace testing judgment.

Basic structure

The basic structure of Armoury Intelligent is as follows:

  • Project
    • Test Group
      • Section
        • Test Case
          • Test Run
            • Test Result
              • Test Report / Defect

You can understand each level as follows:

NamePurpose
ProjectManages a product, system, or large-scale project
Test GroupManages a collection of Test Cases
SectionClassifies Test Cases by feature or workflow
Test CaseContains the actual testing content
Test RunRepresents a specific testing activity
Test ResultRecords the result after test execution
Test Report / DefectSupports test conclusions and issue tracking

The most important concept is:

A Test Case is a reusable testing asset.
A Test Run is a specific testing activity.
A Test Report is the basis for assessing progress and risk.

For example, "Verify that a user can log in with a valid account and password" is a Test Case. This Test Case may be executed repeatedly in different releases:

  • Version 1 smoke test
  • Version 2 regression test
  • Version 3 release validation

Each execution produces a different test result, and these results are eventually summarized in the Test Report.

Basic workflow

When using Armoury Intelligent for the first time, it is recommended to start with a simple workflow:

  1. Enter or create a Project.
  2. Create a Test Group.
  3. Create Sections based on product features.
  4. Create Test Cases under each Section.
  5. Set priorities or tags for important cases.
  6. Create a Test Run.
  7. Execute the tests and update the results.
  8. Add notes for failed or blocked cases.
  9. Create Defects when necessary.
  10. Review the Test Report to confirm progress and risk.

It is not recommended to build an overly complex structure at the beginning. A better approach is to let the team complete one full workflow first, then adjust the structure based on actual usage.

This first workflow is important because it teaches the relationship between reusable testing content and execution evidence. A Test Case should be maintained as a reusable asset. A Test Run should represent one concrete testing activity. A Defect should be created when a failed result needs product triage. A report should help the team decide whether the release can move forward. If the team understands this flow early, later features such as import, export, role management, entitlement control, and AI-assisted operations become easier to use correctly.

Practical example

Assume your team is testing a member system. You can structure it as follows:

  • Project: Member System
  • Test Group: Core Features
  • Sections:
    • Login
    • Forgot Password
    • User Profile
    • Permission
    • Notification

In the Login Section, you can create the following Test Cases:

  • Verify that a user can log in with a valid email and password.
  • Verify that a user cannot log in with an incorrect password.
  • Verify that a locked account cannot log in.
  • Verify that the login error message is displayed correctly.
  • Verify that the user is redirected to the home page after login.

When the release is ready for testing, you can create:

  • Test Run: Member System Version 2.4 Regression Test

After execution, testers can update each case with one of the following statuses:

  • Pass
  • Fail
  • Block
  • Flaky
  • Untest
  • Deprecate

The test lead or testing owner can then quickly confirm the following from the Test Report:

  1. Which cases have passed.
  2. Which cases have failed.
  3. Which cases are blocked.
  4. Which important features have not been tested.
  5. Whether the release is ready to move to the next stage.

This example is intentionally simple. The goal is not to create the perfect structure on the first day. The goal is to give the team a complete path: create reusable Test Cases, execute them in a Test Run, record results, create Defects when needed, and review the outcome in a report. Once the team can complete this path confidently, you can refine Section structure, add tags, import larger libraries, and introduce AI assistance in a controlled way.

Summary

The core value of Armoury Intelligent is that it helps testing teams centralize Test Cases, execution records, results, Defects, and reports.

It is not merely a tool for writing Test Cases. It helps teams clearly answer the following questions:

  • What do we need to test?
  • How much testing has been completed?
  • Which areas have failed?
  • Which areas are blocked?
  • What risks remain in this release?

When a team can answer these questions with the same source of data, test management is no longer just document maintenance. It becomes a traceable, discussable, and decision-oriented part of the product delivery process.
Foundation

Glossary

Understand the core terms and data relationships used throughout Armoury Intelligent.

Glossary

Before using Armoury Intelligent, it is important to understand the core terms and data relationships used throughout the system. Armoury Intelligent is not only a place to store test cases. It is designed to connect test case management, test execution, result reporting, and defect tracking into one continuous workflow.

The overall data structure can be understood as:

Project -> Test Group -> Section -> Test Case -> Test Run -> Run Case -> Test Run Report / Defect

In simple terms, a Project is the highest-level workspace. A Test Group is used to separate testing scopes. A Section organizes test cases into a clear structure. A Test Case defines what should be tested. A Test Run represents one testing task or execution cycle. A Run Case is the actual execution record of a test case inside a specific Test Run. Finally, Test Run Report and Defect help the team review results and track issues.

2.1 Project

Project is the highest-level workspace in Armoury Intelligent.

A Project usually represents a product, a system, a client project, or an independent product line. All Test Groups, Sections, Test Cases, Test Runs, Run Cases, Defects, and reports belong to a specific Project.

Operational Understanding

When using Armoury Intelligent, the first step is usually to enter the correct Project.

If the wrong Project is selected, the Test Groups, test cases, test runs, and reports you see will also be different. Therefore, confirming the Project is the first checkpoint before performing any testing-related operation.

Common Use Cases

  1. When a company has multiple products, each product can be created as a separate Project.
  2. When one product contains a frontend system, backend system, and admin system, they can be separated into different Projects depending on the management approach.
  3. When client project data must not be mixed, each client project should be managed as an independent Project.
  4. When different teams own different systems, Projects can be used to separate data scope and permissions.

2.2 Test Group

Test Group is the main container under a Project for organizing testing content.

It is usually used to represent a testing scope, such as a product module, release scope, testing phase, or a group of test cases that need to be managed together.

Operational Understanding

After entering a Project, users usually select a Test Group before managing Sections and Test Cases.

The purpose of a Test Group is to prevent all test cases from being placed in one large, unstructured area. As the number of test cases grows, Test Group becomes the first layer of organization that keeps the test assets manageable.

Common Use Cases

  1. Create Test Groups by product module, such as Member System, Payment System, or Admin Portal.
  2. Create Test Groups by release, such as Release 2026.06.
  3. Create Test Groups by testing purpose, such as Regression, Smoke Test, or Hotfix Verification.
  4. Create Test Groups by client, project phase, or delivery milestone.

2.3 Section

Section is the hierarchical structure under a Test Group for organizing Test Cases.

If a Test Group is a large testing scope, Sections are the chapters and subchapters inside it. Sections help the team organize test cases by feature, page, workflow, or risk area.

Operational Understanding

Before creating Test Cases, it is recommended to plan the Section structure first.

The clearer the Section structure is, the easier it will be to search for test cases, move cases in bulk, and create Test Runs later.

Common Use Cases

  1. Organize by page, such as Login Page, Registration Page, or Member Center.
  2. Organize by feature, such as Forgot Password, Permission Settings, or Payment Flow.
  3. Organize by workflow, such as Order Flow, Refund Flow, or Approval Flow.
  4. Organize by risk area, such as Payment Validation, Permission Validation, or Data Synchronization.

Section Hierarchy Example

  • Member System
    • Login
      • Standard Login
      • Third-Party Login
      • Login Failure Handling
    • Registration
      • Mobile Registration
      • Email Registration
      • Verification Code Handling

2.4 Test Case

Test Case is the most important testing asset in Armoury Intelligent.

Each Test Case describes a scenario that needs to be verified. It is not just a simple task item. It is a reusable testing specification that can be organized, executed, tracked, and reported.

Operational Understanding

A Test Case is the source test asset.

When a user creates a Test Run, Armoury Intelligent generates corresponding Run Cases based on the selected Test Cases. Testers then execute those Run Cases and record the actual result for that specific testing task.

Common Fields

  1. Title: The title of the test case.
  2. Priority: The importance level of the test case.
  3. Steps: The actions required to execute the test.
  4. Expected Result: The expected behavior or outcome.
  5. Tags: Labels used for filtering and classification.
  6. Attachment: Supporting files, screenshots, or references.
  7. Note: Additional information or remarks.

Writing Guidelines

A good Test Case should be understandable by different roles.

Testers need to know how to execute it. Developers need to understand the verification criteria. Managers need to understand the testing purpose. AI should also be able to understand the content in order to assist with organizing, translating, or rewriting the test case.

2.5 Test Case Version

Test Case Version is the historical record of a Test Case.

When a Test Case is modified, Armoury Intelligent can preserve its previous content. This helps the team track how the test case has changed over time.

Operational Understanding

If a test case is modified incorrectly, or if the team needs to compare the content before and after a change, Test Case Version can be used to review the history.

When necessary, a previous version can also be restored.

Common Use Cases

  1. Test steps were accidentally deleted.
  2. Expected results were updated incorrectly.
  3. The product workflow changed and the team needs to compare the old and new versions.
  4. AI helped rewrite the test case and the team needs an audit reference.
  5. The team needs to track test case maintenance history.

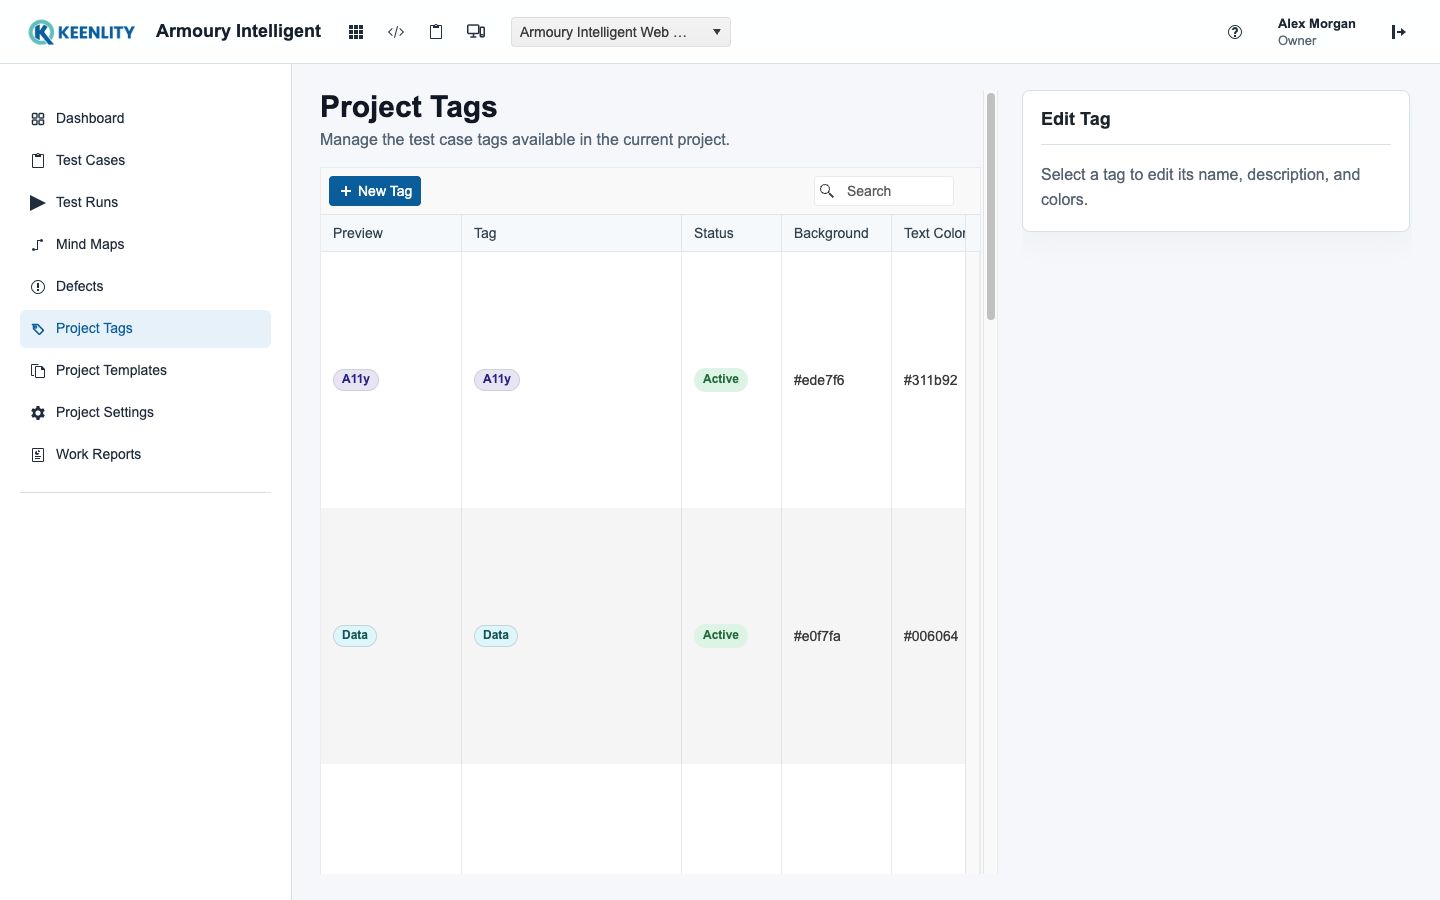
2.6 Tag

Tag is a cross-Section and cross-feature classification method.

A Section provides a tree-based structure, while a Tag provides a horizontal classification. A single Test Case can have multiple Tags, making it easier to search, filter, and manage cases in bulk.

Operational Understanding

If you want to find the same type of test cases across different Sections, Tags are usually more suitable than Sections.

For example, payment-related test cases may be located under Orders, Wallet, Refunds, and Invoices. By applying the Payment Tag to all of them, the team can quickly locate this group of cases when creating a Test Run.

Common Use Cases

  1. Smoke: Test cases for smoke testing.
  2. Regression: Test cases for regression testing.
  3. Payment: Payment-related test cases.
  4. Mobile: Test cases related to mobile devices.
  5. High Risk: High-risk test cases.
  6. API: API-related test cases.
  7. Frontend: Frontend-related test cases.

2.7 AI Context

AI Context is the information provided to AI so it can understand the project background.

It may include product rules, test case writing standards, naming conventions, field usage rules, team practices, and project limitations. When AI assists with creating, rewriting, translating, or organizing test cases, it can use AI Context to generate output that better matches the project's needs.

Operational Understanding

If you want AI-generated Test Cases to be more stable and consistent, you should not rely only on one-time prompts.

Stable rules should be maintained in AI Context so AI can apply the same project knowledge repeatedly across different operations.

Common Use Cases

  1. Define the required Test Case writing format.
  2. Explain the core product workflow.
  3. Define how Priority should be used.
  4. Explain common Tag rules.
  5. Provide the team's preferred language or terminology.
  6. Tell AI what content should not be automatically changed.

2.8 Test Run

Test Run is a testing execution task.

When the team is ready to test a specific version, Sprint, regression scope, hotfix, or pre-release checklist, a Test Run can be created.

Operational Understanding

A Test Run is not the Test Case itself. It represents which test cases need to be executed in this specific testing cycle.

When creating a Test Run, users usually select Test Cases from a Test Group, Section, Tag, or other defined conditions. The selected Test Cases will then generate corresponding Run Cases for testers to execute and update.

Common Use Cases

  1. Sprint 52 Regression.
  2. Release 2026.06 Pre-release Testing.
  3. Payment Hotfix Verification.
  4. Mobile Smoke Test.
  5. New Feature Acceptance Testing.

2.9 Run Case

Run Case is the actual execution item of a Test Case inside a specific Test Run.

A Test Case is the source case, while a Run Case is the execution record. The same Test Case can be included in different Test Runs multiple times, and each execution will have its own status and result.

Operational Understanding

When testers update testing results, they are working on Run Cases, not directly modifying the original Test Cases.

This design keeps the Test Case as a long-term standard asset, while each testing result is recorded separately in the related Run Case.

Run Case Statuses

  1. Pass: The test passed.
  2. Fail: The test failed.
  3. Untest: The test has not been executed yet.
  4. Block: The test cannot continue due to environment, data, dependency, or other blocking conditions.
  5. Retest: The test needs to be executed again.
  6. Deprecate: The case is no longer applicable or no longer used in this Test Run.

2.10 Test Run Report

Test Run Report is the summarized result of a Test Run.

It is generated based on the statuses of all Run Cases in a Test Run. It helps the team review testing progress, pass rate, failed cases, and overall release risk.

Operational Understanding

Managers or project owners do not need to open every Run Case one by one.

Through the Test Run Report, they can quickly understand whether the testing work is complete and whether the result is strong enough to support a release decision.

Common Use Cases

  1. Daily testing progress reporting.
  2. Pre-release result confirmation.
  3. Sprint testing completion review.
  4. Regression testing result summary.
  5. External testing status communication.

2.11 Defect

Defect is the issue record created when a problem is found during testing.

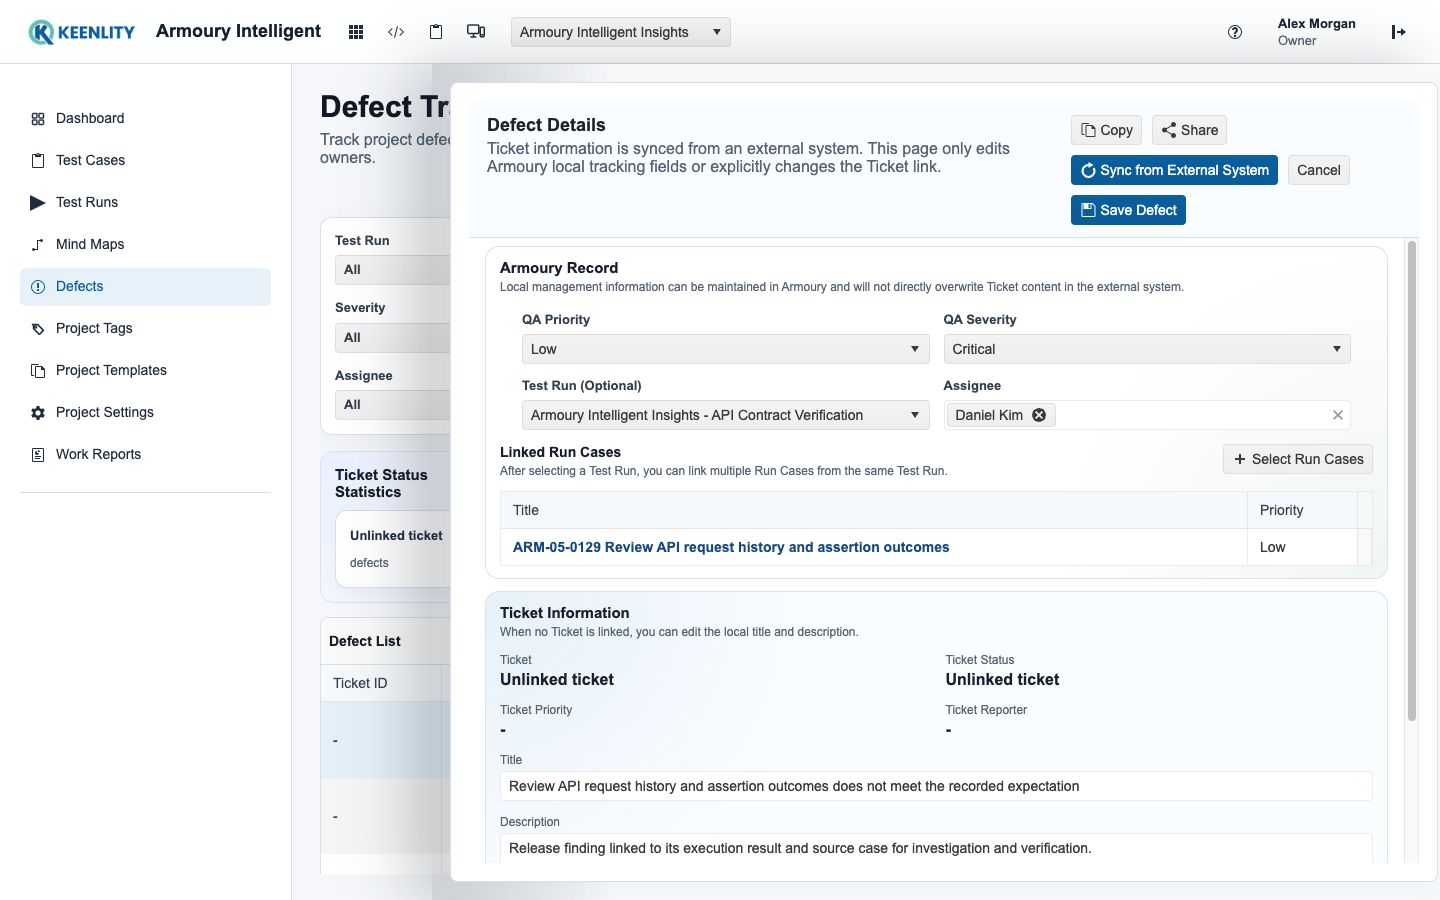
When a Run Case is marked as Fail, or when a tester finds that the product behavior does not match the expected result, a Defect can be created. A Defect is used to describe the problem, reproduction steps, actual result, expected result, and related attachments.

Operational Understanding

A Defect should be linked back to the related Run Case or Test Case whenever possible.

This allows the team to understand which Test Run, which test case, and which functional area exposed the issue. It also makes issue tracking and communication more efficient.

Common Content

  1. Defect title.
  2. Reproduction steps.
  3. Actual result.
  4. Expected result.
  5. Severity.
  6. Screenshots or attachments.
  7. Related Run Case.

2.12 Role and Permission

Role and Permission control what users can do in Armoury Intelligent.

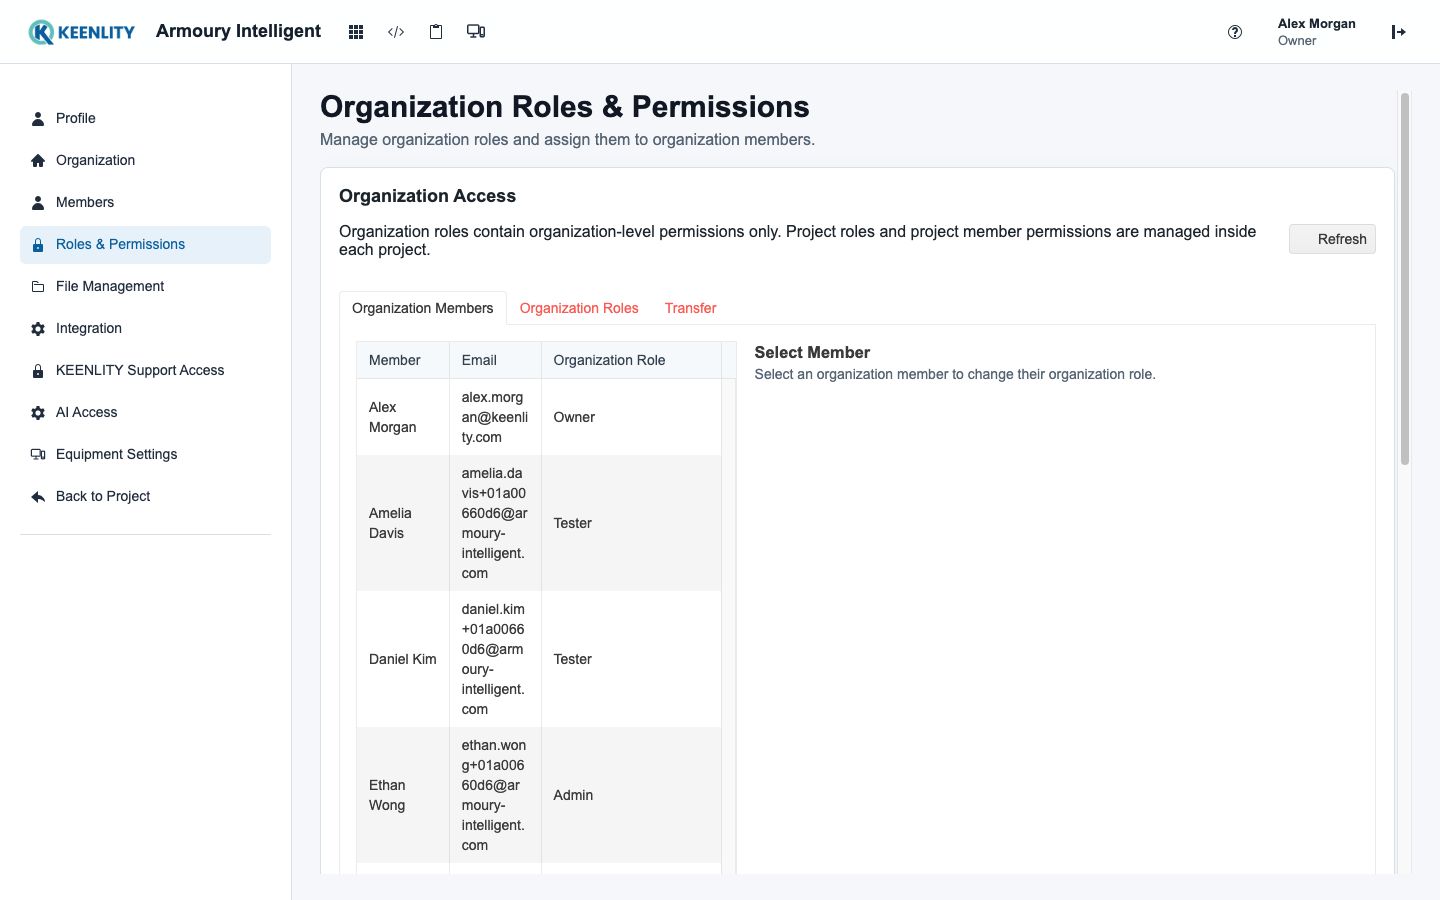
Different roles can have different permissions, such as reading Projects, creating Test Cases, updating Test Cases, creating Defects, viewing Test Run Reports, or managing Sections.

Operational Understanding

The purpose of permission design is not to slow the team down. It is to prevent incorrect or risky operations.

For example, a tester may need to execute Run Cases and create Defects, but may not need permission to modify the Project structure or move a large number of Test Cases. A manager or administrator may be responsible for managing Test Groups, Sections, Test Runs, and permission-related settings.

2.13 Practical Example

Assume the team needs to test a new version of a member system. The workflow in Armoury Intelligent can be arranged as follows:

  1. Create or enter the Member System Project.
  2. Create a Release 2026.06 Test Group under the Project.
  3. Create Sections under the Test Group, such as Login, Registration, and Forgot Password.
  4. Create Test Cases under each Section to describe the scenarios that need to be verified.
  5. Apply Tags such as Smoke, Regression, and High Risk to classify important cases.
  6. Before release, create a Release 2026.06 Pre-release Check Test Run.
  7. Select Test Cases from important Sections and Tags.
  8. Armoury Intelligent generates Run Cases based on the selected Test Cases.
  9. Testers execute each Run Case and update the result as Pass, Fail, Block, Retest, or another applicable status.
  10. If an issue is found, create a Defect from the failed Run Case.
  11. After testing is completed, review the overall result through the Test Run Report.
  12. The project owner uses the testing result to decide whether the release can proceed or whether additional fixes are required.

This is the core operating logic of Armoury Intelligent: build a clear testing data structure first, execute testing in a controlled way, and then connect results, reports, and defects into one complete testing workflow.

Foundation

Workspace

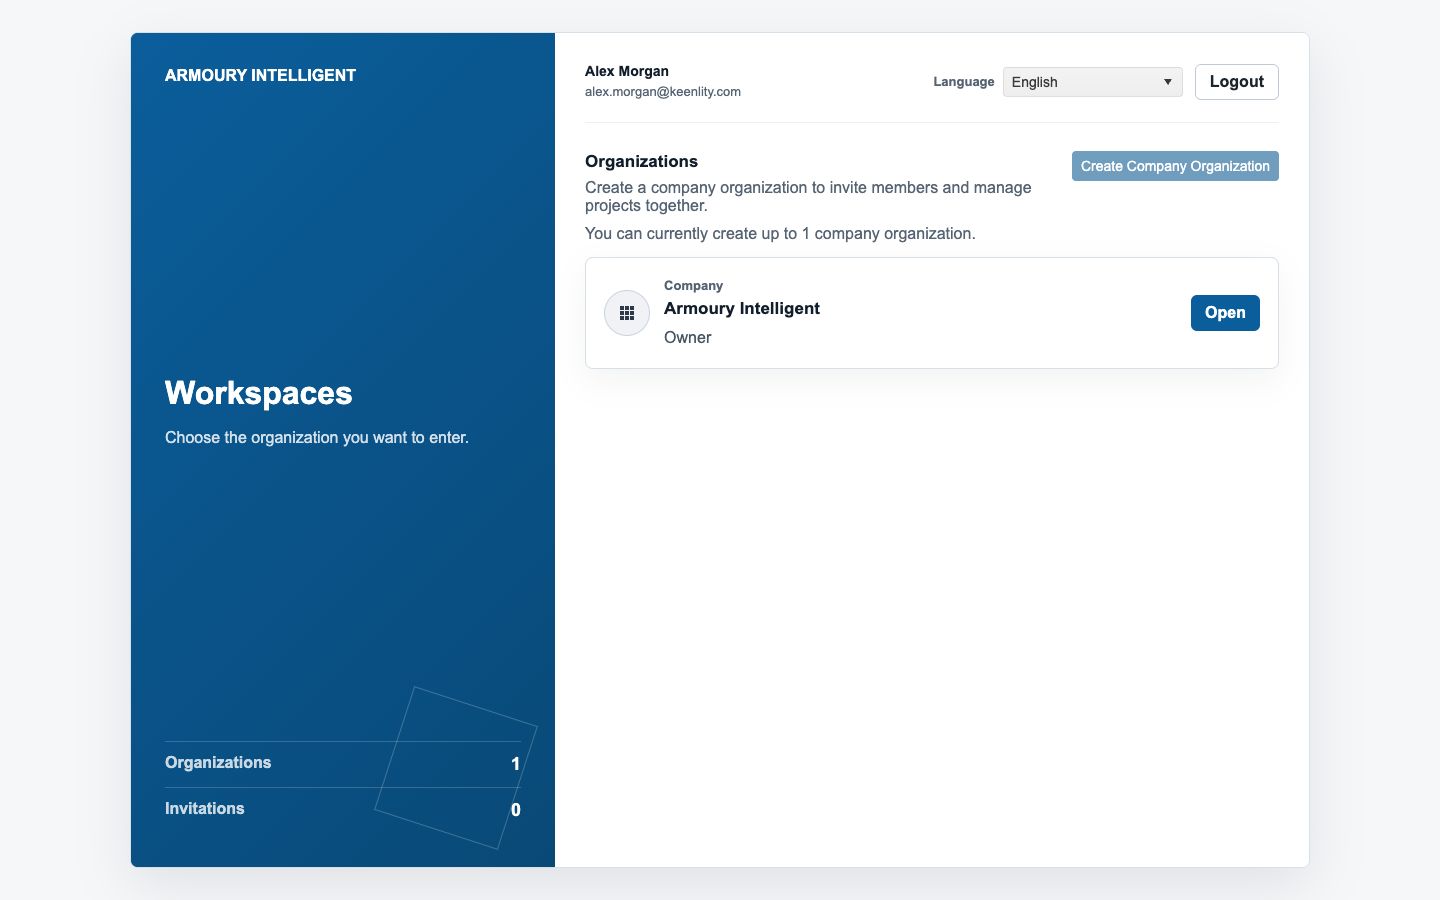
Use Workspace as the first entry point for choosing an organization, changing language, and signing out.

Workspace

The Workspace page is the account-level entry point. Confirm the organization type, pending invitations, selected language, and signed-in identity before opening work that belongs to a company or personal organization.

Workspace selector with personal and company organizations
Choose the correct organization and language before entering product work.

Workspace is the first entry point after a user signs in to Armoury Intelligent. It is not used to manage test cases, execute test runs, or review defects directly. Its purpose is to help users confirm which organizations are available under the current account before entering the main testing workspace.

In Armoury Intelligent, one account may belong to one or more organizations. Each organization has its own projects, test groups, sections, test cases, test runs, run cases, reports, defects, members, and permissions. Because of this structure, choosing the correct organization is the first important step before starting any operation.

Workspace can be understood as the entrance lobby of Armoury Intelligent. Before working on a project, the user first confirms which organization to enter. Once an organization is selected, all following operations will happen inside that organization.

Purpose of Workspace

Workspace is designed for three primary actions:

  1. View the organizations available to the current account.
  2. Change the interface language.
  3. Sign out from Armoury Intelligent.

These actions are simple, but they are important for daily operation.

If a user enters the wrong organization, the projects, test cases, test runs, and defects shown on the screen will also be different. This does not mean the data is missing. In most cases, it means the user is viewing another organization.

Workspace helps prevent this confusion by making the organization selection clear before the user enters the main system.

Viewing Available Organizations

After signing in to Armoury Intelligent, the user will see the Workspace page. This page displays the list of organizations that the current account can access.

Each organization represents an independent working area. Data is separated between organizations. For example:

  1. Projects created in one organization will not appear in another organization.
  2. Test cases created in one organization will not be visible in another organization.
  3. Test runs executed in one organization will not affect reports in another organization.
  4. Defects reported in one organization will not be mixed with defects in another organization.
  5. Members and permissions can be different for each organization.

This design is useful when a user works with multiple teams, products, clients, or business units.

For example, a QA manager may have access to multiple organizations for different product lines. A tester may only have access to one organization assigned by the company. A system administrator may need to enter different organizations to confirm user access or project setup.

The organization list in Workspace allows each user to clearly understand which working areas are available before continuing.

Entering an Organization

To enter an organization, follow these steps:

  1. Sign in to Armoury Intelligent.
  2. Open the Workspace page.
  3. Review the organization list.
  4. Find the organization you want to work in.
  5. Click the organization.
  6. Enter the selected organization.
  7. Continue to the Project area.

After entering an organization, the user can start working with the functions available under that organization.

The usual structure is:

  • Workspace
    • Organization
      • Project
        • Test Group
        • Section
        • Test Case
        • Test Run
        • Run Case
        • Report
        • Defect

Workspace decides which organization the user enters. Project decides which product, system, module, or testing scope the user works on. Test Group and Section help organize test cases. Test Run and Run Case are used for execution. Defect is used to record issues found during testing.

This means Workspace is not an isolated page. It is the starting point of the entire Armoury Intelligent workflow.

Relationship Between Workspace and Project

Workspace and Project are closely connected, but they serve different purposes.

Workspace answers this question:

  1. Which organization do I want to enter?

Project answers this question:

  1. Which product, system, or testing scope do I want to manage?

A user must first enter an organization from Workspace before selecting a project. Without entering the correct organization, the user may not find the expected project.

For example, if a company has separate organizations for different business units, each organization may contain different projects. Selecting the wrong organization will lead to the wrong project list.

A recommended habit is to always confirm the organization name before creating or updating any test data. This is especially important when working across multiple organizations.

Changing the Interface Language

Workspace also provides the language setting for the Armoury Intelligent interface. Users can change the display language before entering an organization.

The language setting affects system interface text, such as:

  1. Menu labels.
  2. Button names.
  3. Page titles.
  4. System messages.
  5. Operation prompts.
  6. Navigation items.

This is useful for international teams. Different members can use the same organization and the same project data while choosing the interface language that is most suitable for them.

For example, one tester may use the English interface, while another member may use another supported language. Their interface language may be different, but the project data remains the same.

It is important to understand that changing the interface language does not automatically translate user-created content.

The following content will usually remain in the language entered by the user:

  1. Project names.
  2. Test Group names.
  3. Section names.
  4. Test Case titles.
  5. Test steps.
  6. Expected results.
  7. Notes.
  8. Defect descriptions.

In other words, language switching changes the Armoury Intelligent interface. It does not rewrite or translate the actual testing content created by users.

Signing Out from Armoury Intelligent

Workspace is also the exit point for signing out from Armoury Intelligent.

Users should sign out when they finish their work, especially in the following situations:

  1. The user is using a shared computer.
  2. The user is using a public device.
  3. The user needs to switch to another account.
  4. The user's organization permission has recently changed.
  5. The user has completed the current working session.
  6. The user is no longer actively using Armoury Intelligent.

Signing out protects organization data and prevents other people from using the same browser session by mistake.

After signing out, the user must sign in again before accessing Workspace, organizations, projects, and testing data.

For teams that handle client projects, production systems, or confidential testing information, signing out properly is an important operational habit.

Workspace and Permissions

The organizations shown in Workspace depend on the permissions of the current account.

If a user does not see an expected organization, the possible reasons include:

  1. The account has not been added to the organization.
  2. The account was removed from the organization.
  3. The user signed in with the wrong account.
  4. The organization administrator has not completed the member setup.
  5. The permission was recently changed, but the user has not signed in again.
  6. The account is not allowed to access that organization.

When this happens, the user should first confirm whether the signed-in account is correct. If the account is correct but the organization is still missing, the user should contact the organization administrator.

The administrator should check whether the user has been added to the correct organization and whether the assigned role is appropriate.

Workspace only displays organizations that the account can access. It does not display organizations where the user has no permission.

Practical Case

Assume a QA engineer has access to two organizations in Armoury Intelligent:

  1. KEENLITY Demo Organization.
  2. Product Team Organization.

The QA engineer signs in to Armoury Intelligent and enters Workspace. Both organizations are displayed on the page.

Today, the QA engineer needs to update test cases for the KEENLITY demo project. The correct operation should be:

  1. Sign in to Armoury Intelligent.
  2. Enter Workspace.
  3. Select KEENLITY Demo Organization.
  4. Open the related Project.
  5. Find the correct Test Group.
  6. Open the target Section.
  7. Update the required Test Cases.
  8. Confirm the changes.
  9. Sign out after finishing the work.

If the QA engineer accidentally selects Product Team Organization, the expected project may not appear. Even if some projects are visible, they belong to Product Team Organization, not KEENLITY Demo Organization.

In this case, the user should return to Workspace, select the correct organization, and continue the operation.

Another example is language switching.

If the QA engineer needs to record an English training video, the user can change the interface language in Workspace before entering the organization. After switching the interface language, the menus, buttons, and system messages will be displayed in the selected language. The test case content itself will remain unchanged.

This makes Workspace useful not only for organization selection, but also for preparing the correct operation environment before starting actual work.

Key Points

Workspace is the starting point of Armoury Intelligent. It helps users confirm where they are before they begin working.

The most important points are:

  1. Workspace shows the organizations available to the current account.
  2. Each organization has independent projects and testing data.
  3. Users must select the correct organization before managing projects or test cases.
  4. Interface language can be changed from Workspace.
  5. Language switching affects the system interface, not user-created test content.
  6. Workspace is also the place where users can sign out from Armoury Intelligent.
  7. If an organization is missing, the user should check the account and contact the organization administrator.

Workspace may look simple, but it protects the accuracy of every following operation. Once the user enters the correct organization, the rest of the workflow becomes clear: select a Project, manage Test Groups and Sections, maintain Test Cases, execute Test Runs, review Run Case results, and report Defects when needed.

Foundation

Organizations

Understand Organizations as the highest data boundary for access, collaboration, and testing resources in Armoury.

Organizations

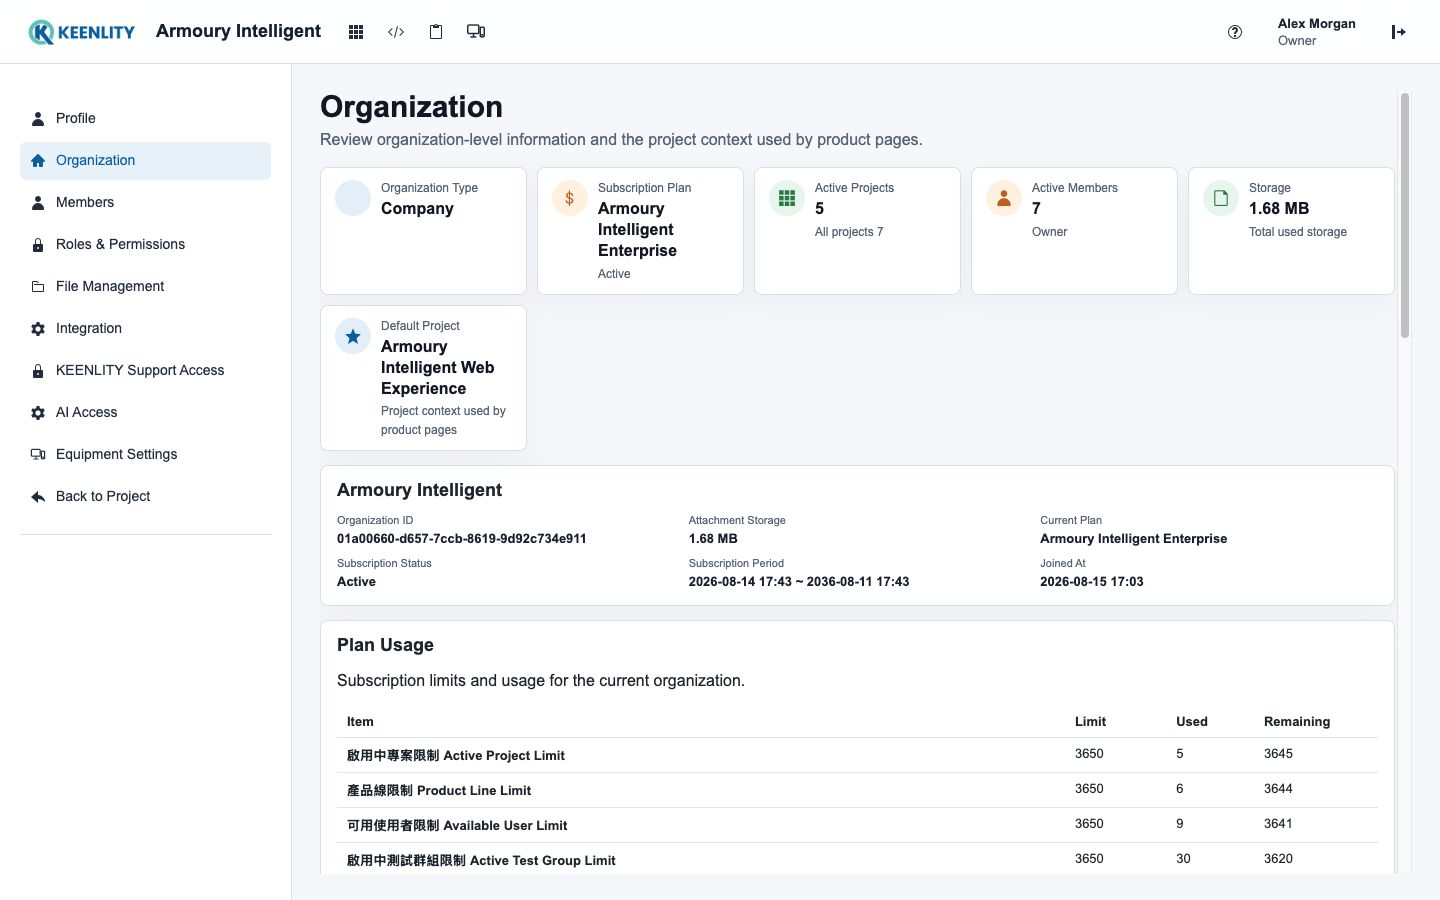
The Organization page summarizes the shared boundary, member and project usage, and plan capacity. Review it before changing organization-wide settings so the action is applied to the intended company rather than only the current project.

Organization overview and plan usage
Confirm organization identity, shared usage, and plan capacity before administrative changes.

An Organization is the highest level of data separation in Armoury. It defines the boundary of what a team can access, manage, and collaborate on. Users from different Organizations cannot view, search, edit, or reuse each other's data. Only users who belong to the same Organization can work together and share the resources inside that Organization.

In practical use, an Organization usually represents one company or one independent business unit. It is not designed for separating product versions, test cycles, platforms, or testing activities. Those should be managed inside the Organization through Projects, Test Groups, Sections, Test Runs, Tags, and related testing resources.

The purpose of an Organization is simple: keep the data boundary clear, protect team information, and make sure users only work with the resources they are allowed to access.

Purpose of an Organization

An Organization in Armoury is mainly used for three operational purposes:

  1. Data isolation
  2. Team collaboration
  3. Resource ownership

These purposes are closely connected. Before a user can manage Test Cases, execute Test Runs, or review Defects, the user must first enter the correct Organization.

Data Isolation

Data isolation is the most important function of an Organization.

Each Organization has its own independent data scope. Resources created in one Organization do not appear in another Organization. This includes Projects, Test Cases, Test Runs, Run Cases, Defects, Tags, and related records.

For example:

  1. A Project created in Organization A will not appear in Organization B.
  2. A Test Case created in Organization A cannot be searched by users in Organization B.
  3. A Test Run executed in Organization A cannot be reviewed by members of Organization B.
  4. A Defect recorded in Organization A cannot be accessed from Organization B.
  5. Tags created in Organization A are not shared with Organization B.

This design prevents data from being mixed across different companies or independent units. It also reduces the risk of users accidentally viewing or modifying information that does not belong to their working scope.

For day-to-day operation, users should always confirm that they are working inside the correct Organization before creating or editing important testing resources.

Team Collaboration

An Organization is also the collaboration space for members who work on the same testing resources.

After a user joins an Organization, the user can work with other members based on the permissions assigned to the account. The actual available actions may vary depending on role and access level, but the collaboration flow usually includes the following activities:

  1. QA members create and maintain Test Cases.
  2. QA Leads organize test coverage and prepare Test Runs.
  3. Testers execute Run Cases and update execution results.
  4. Team members create Defects when failed results need to be tracked.
  5. Managers review testing progress and reports.
  6. Teams use Tags to classify and filter Test Cases.

The Organization provides the shared data foundation. Instead of passing test files between team members or maintaining separate spreadsheets, everyone works from the same controlled workspace inside Armoury.

This is especially important when a team needs to maintain long-term test assets. Test Cases, execution history, Defects, and reports should not depend on personal files or individual storage. They should remain inside the Organization so the team can continue using them even when members change roles or leave the project.

Resource Ownership

All major testing resources in Armoury belong to an Organization.

Common resources include:

  1. Projects
    Used to manage testing work for products, systems, or major work areas.
  2. Test Cases
    Used to document test conditions, steps, and expected results.
  3. Test Runs
    Used to plan and execute a specific testing activity.
  4. Run Cases
    Test Cases included in a Test Run for actual execution.
  5. Defects
    Used to record issues found during testing.
  6. Tags
    Used to classify and filter Test Cases.

Because these resources are owned by the Organization, users must first enter an Organization before they can work with them.

This also means that creating data in the wrong Organization can cause confusion. For example, if a user creates a Test Case in the wrong Organization, other members in the intended Organization will not be able to see or use it. The same rule applies to Test Runs, Defects, and Tags.

Entering an Organization from Workspace

Workspace is the entry point after login. It shows which Organizations the current account can access.

The operation flow is:

  1. Log in to Armoury.
  2. Open the Workspace page.
  3. Review the list of available Organizations.
  4. Select the Organization you want to enter.
  5. Confirm that the selected Organization is correct.
  6. Start working with the resources inside that Organization.

Workspace is used for selection. Organization is where the actual testing work begins.

If a user belongs to only one Organization, the operation is straightforward. The user simply enters that Organization and starts working.

If a user belongs to multiple Organizations, the user should confirm the selected Organization before performing any important action, especially before creating Test Cases, Test Runs, or Defects.

When to Create Separate Organizations

In most cases, one company only needs one Organization.

Even if the company has multiple products, multiple teams, or multiple testing scopes, it usually does not need multiple Organizations. Those differences should normally be handled with Projects, Sections, Test Runs, or Tags.

A separate Organization should only be created when the data must be completely independent.

Suitable situations include:

  1. Different companies using Armoury
    Each company should have its own Organization. Data should not be shared across companies.
  2. Independent business units inside the same company
    This is suitable when business units have different teams, different management ownership, and different data boundaries. If members from one business unit should not access the testing content of another business unit, separate Organizations can be used.
  3. Group companies with independent subsidiaries
    If subsidiaries manage their own products, teams, and testing data independently, each subsidiary can have its own Organization. If the same central team manages all products together, using one Organization with multiple Projects is usually more appropriate.

Separate Organizations should not be created only because of the following reasons:

  1. A product has multiple versions.
  2. A system has frontend and backend areas.
  3. A product includes Web, Mobile, API, or Backoffice testing.
  4. A team has multiple release cycles.
  5. A team wants to separate Smoke Test, Regression Test, or Release Test.
  6. A team wants to separate different Test Runs.

These are testing management needs, not Organization-level data isolation needs. They should be handled inside the same Organization by using the appropriate Armoury features.

Practical Scenario: A Company Using One Organization

A company uses Armoury to manage testing for several internal products. The company has QA members, developers, product managers, and managers who need to access testing information.

The recommended setup is:

  1. Create one Organization for the company.
  2. Add the company members to the Organization.
  3. Create Projects for different products or systems.
  4. Create Test Cases under the appropriate Project structure.
  5. Create Test Runs for each testing activity.
  6. Execute Run Cases and update results.
  7. Create Defects for failed test results.
  8. Review reports to understand testing progress.

In this scenario, the company does not need multiple Organizations. All testing data belongs to the same company, and the main need is to manage different products and testing activities. Projects, Test Runs, Sections, and Tags are enough for this purpose.

Practical Scenario: Independent Business Units

A large company has two business units. Each business unit has its own products, QA members, management team, and testing data. Members from one business unit should not view or manage the testing resources of the other business unit.

The recommended setup is:

  1. Create one Organization for Business Unit A.
  2. Create another Organization for Business Unit B.
  3. Add members of Business Unit A only to its own Organization.
  4. Add members of Business Unit B only to its own Organization.
  5. Let each business unit create its own Projects, Test Cases, Test Runs, Defects, and Tags.

This setup is suitable because the two business units require complete data separation. They are not only testing different products; they also have different ownership and access boundaries.

By separating them into different Organizations, Armoury ensures that each unit works in its own independent data space.

Practical Scenario: One Product with Multiple Testing Areas

A team is testing one product platform. The testing scope includes Web, Mobile, API, and Backoffice. The same QA team manages all testing work, and the data does not need to be hidden from other members of the same team.

The recommended setup is:

  1. Use one Organization.
  2. Create one Project for the product platform.
  3. Use Sections to separate Web, Mobile, API, and Backoffice Test Cases.
  4. Use Test Runs to manage different execution cycles.
  5. Use Tags to classify test types such as Smoke, Regression, or Release.
  6. Create Defects from failed execution results when needed.

This scenario should not be split into multiple Organizations. The data belongs to the same team and the same product scope. The correct approach is to keep the data together and use Armoury's testing structure to organize it.

Summary

An Organization is the highest data boundary in Armoury. It decides who can access which testing resources and keeps data separated between different companies or independent units.

For normal usage, one company usually needs only one Organization. Multiple products, platforms, versions, and test cycles should be managed inside the Organization through Projects, Test Runs, Sections, Tags, and related features.

Create multiple Organizations only when the data must be completely independent. This keeps Armoury clear, secure, and easy to operate for real testing teams.

Foundation

Projects

Understand Projects as product-level management boundaries for daily testing work.

Projects

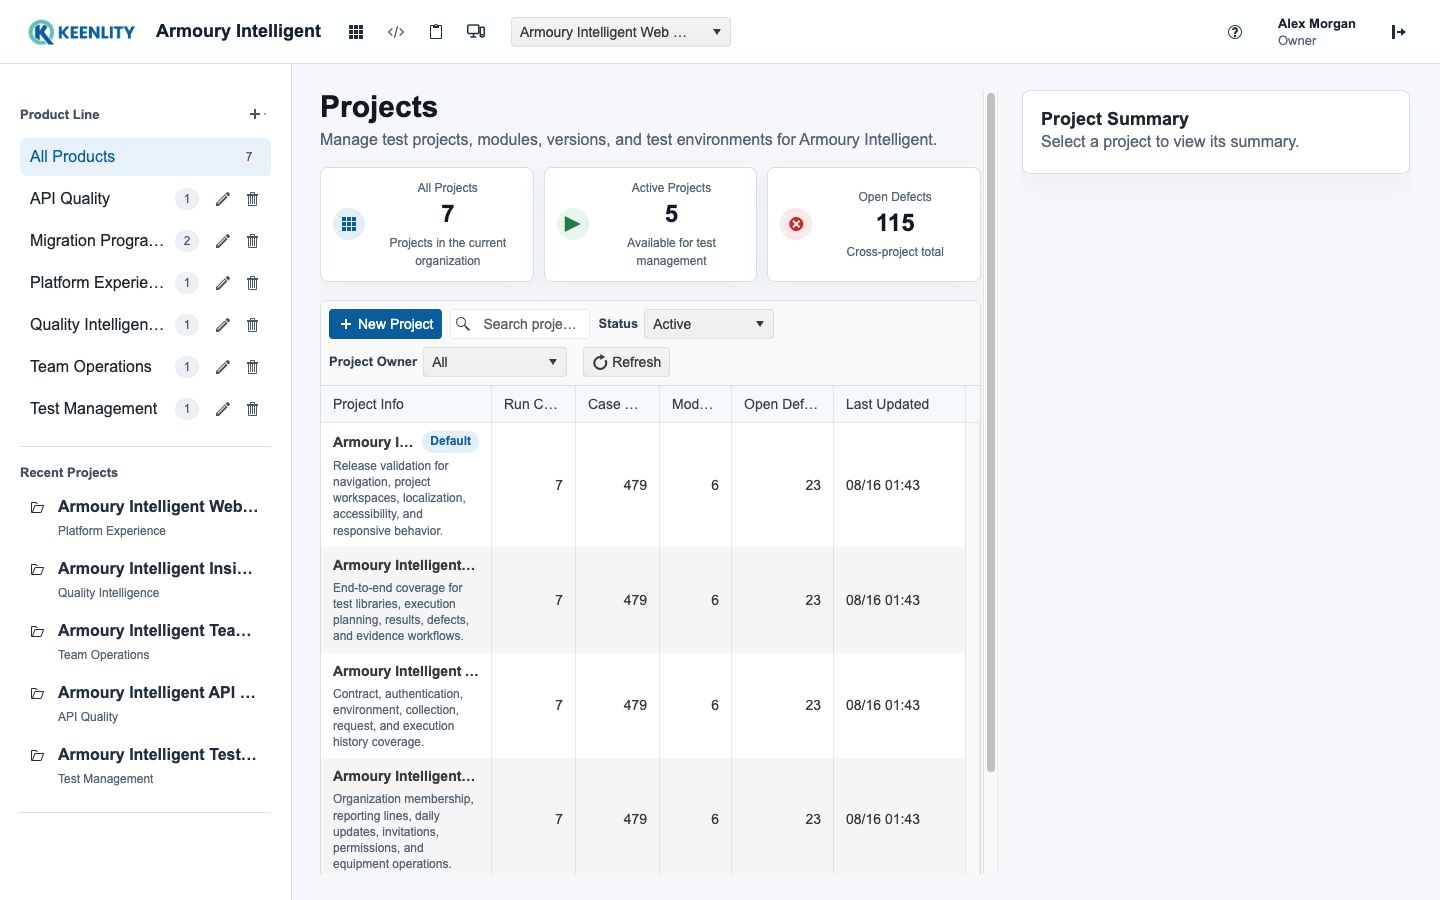
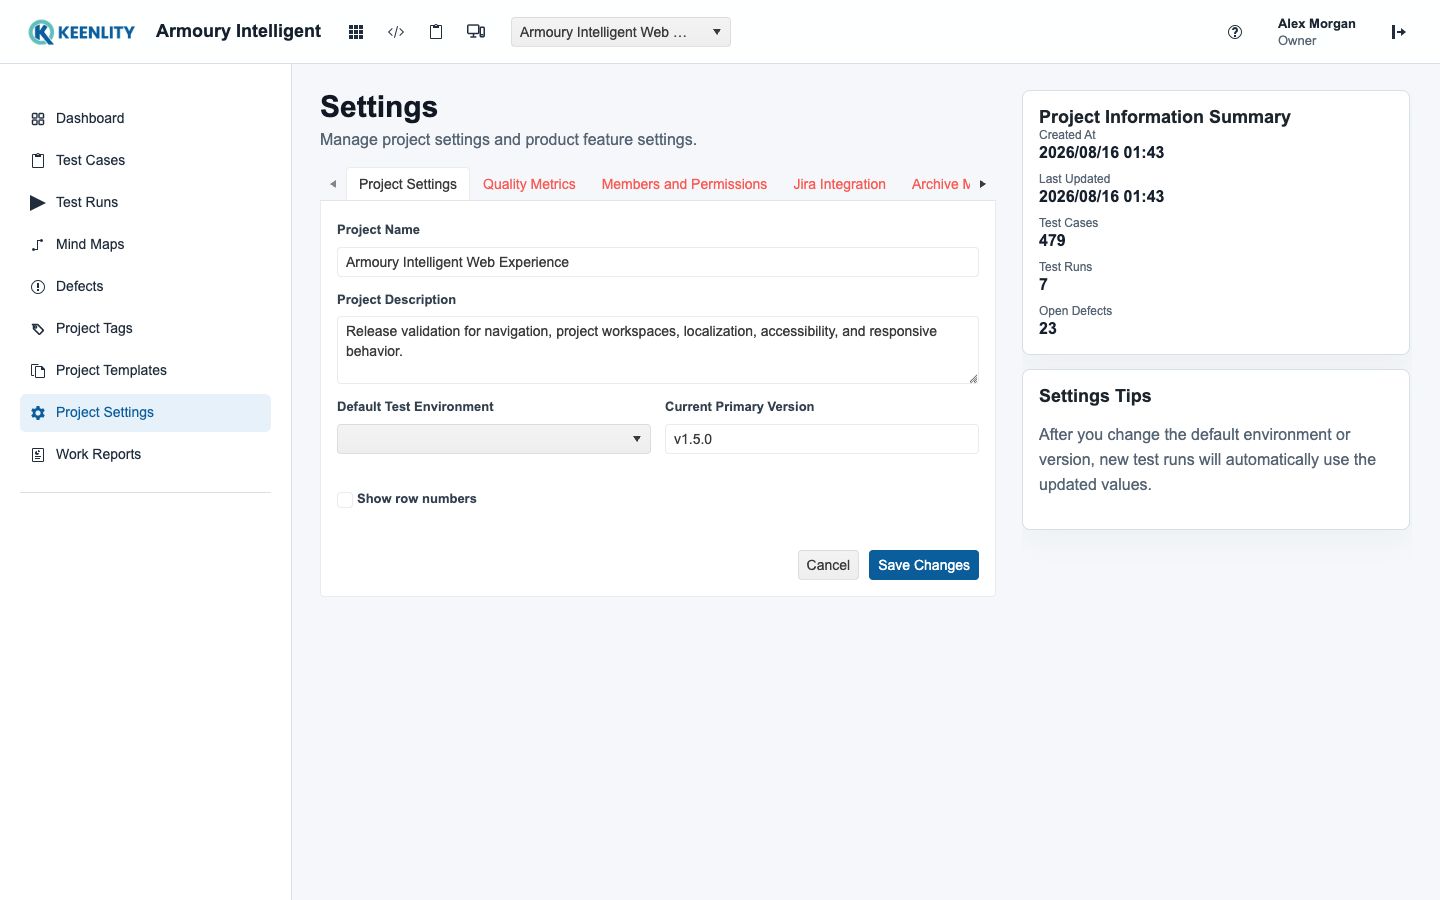
A Project is the main working space created under an Organization. In Armoury, it is the core unit for managing product-level testing activities.

If an Organization is the highest boundary for data isolation, then a Project is the practical boundary for daily test management. Teams usually create Projects based on products, brands, product series, major systems, or service lines. This allows test cases, test runs, defects, reports, members, and permissions to stay within the correct management scope.

A well-structured Project helps the team find test cases faster, arrange testing more clearly, and generate reports that reflect the real status of a product. On the other hand, if too many unrelated testing assets are placed inside one large Project, the team will eventually face problems in maintenance, permissions, execution, and reporting.

Purpose of a Project

A Project is used to manage testing content that belongs to the same product, system, or testing scope.

A Project may include the following items:

  • Test Groups
  • Sections
  • Test Cases
  • Test Runs
  • Run Cases
  • Defects
  • Test reports
  • Project members
  • Project permissions
  • Project settings

Content does not automatically flow between different Projects. This means that test cases in Project A will not directly appear in Project B. Test run results from Project A will also not be mixed into the reports of Project B.

This design keeps each product or system under a clear management boundary.

For example, if a company manages both a customer-facing website and an internal admin console, these two systems may have different users, release schedules, testing scopes, and permission requirements. In this situation, creating two separate Projects is usually better than placing everything inside one shared Project.

When to Split a Project

When a Project becomes too large, the team should review whether the current structure is still suitable.

You may consider splitting a Project when:

  • Different teams are already managing different product areas independently.
  • The number of test cases becomes too large to search and maintain efficiently.
  • Members frequently see test content that is unrelated to their work.
  • Different product areas have different release schedules.
  • Test reports become too broad and no longer show the real product status clearly.
  • Permissions need to be separated more strictly.
  • Project Managers need independent control over different product scopes.

The decision should not be based only on size.

The key question is whether the content still shares the same management model.

If the team, permissions, test workflow, release schedule, and reporting target are still the same, keeping the content in one Project is usually the better choice.

If these conditions are already different, splitting the content into multiple Projects will make the workflow cleaner and easier to maintain.

Project Manager

A Project can be assigned to a Project Manager for detailed project-level management.

A Project Manager is usually responsible for:

  • Managing Project members
  • Configuring Project permissions
  • Adjusting Project settings
  • Maintaining Test Group and Section structures
  • Supporting test case organization
  • Tracking test execution progress
  • Reviewing defects and reports inside the Project
  • Coordinating daily Project-level testing activities

When an Organization contains multiple Projects, the Organization administrator does not need to handle every operational detail personally. Each Project can be managed by a Project Manager who understands the product, team structure, and daily testing workflow.

This keeps management closer to the actual work.

For example, an Organization may contain three Projects:

  • Customer Website
  • Mobile App
  • Admin Console

Each Project can have its own Project Manager. The Customer Website manager focuses on website testing. The Mobile App manager focuses on app releases. The Admin Console manager focuses on internal system validation.

The Organization administrator can still oversee the full Organization, but daily management can be delegated to the correct Project owner.

Project Members and Permissions

Project members are users who can access and operate within a specific Project.

A member under the same Organization does not always need access to every Project. Project-level permissions allow the team to control who can view, create, edit, execute, or manage testing content inside each Project.

The recommended operation is:

  1. Add the user to the correct Organization.
  2. Add the user only to the Projects they need to work on.
  3. Assign permissions based on the user's actual role.
  4. Avoid giving every member full access to every Project by default.
  5. Review Project permissions regularly when team responsibilities change.

Permission design should be clear, not just convenient.

When members only see the content they need, the team can reduce accidental changes, avoid unnecessary confusion, and keep Project management safer.

This is especially important when a Project contains sensitive testing information, external collaborators, junior members, or different levels of responsibility.

Relationship Between Projects and Test Groups

After creating a Project, the next step is usually to create Test Groups.

A Project defines the product or system boundary. A Test Group defines a more detailed testing collection inside the Project.

Example:

  • Organization
    • Project: Mobile App
      • Test Group: Login
      • Test Group: Payment
      • Test Group: Profile
      • Test Group: Notification

This structure helps the team understand where each test case should be placed.

A Project should not become a container filled with random test cases. It should have a clear Test Group structure so that searching, maintaining, executing, and reporting test cases becomes easier.

If users often cannot decide where a test case should go, it usually means the Project or Test Group structure needs to be reviewed.

Relationship Between Projects, Sections, and Test Cases

Inside a Test Group, Sections are used to organize test cases into more detailed categories. Test Cases are then placed under the appropriate Sections.

A common structure is:

  • Project
    • Test Group
      • Section
        • Test Case

Each layer has a different purpose:

LayerMain Purpose
ProjectDefines the product or system scope.
Test GroupDefines the feature module or testing collection.
SectionOrganizes test cases into a clear structure.
Test CaseDescribes the actual item that needs to be verified.

When these layers are used correctly, the team can maintain test cases more efficiently and select the correct scope more quickly when creating a Test Run.

A clean structure also improves long-term scalability. As the product grows, the team can add new Test Groups, Sections, and Test Cases without losing control of the overall Project.

Relationship Between Projects and Test Runs

A Test Run is usually created from Test Cases within the same Project.

This means that the Project also acts as the boundary for test execution and reporting. When the team needs to test a specific product version, they can create a Test Run inside the corresponding Project and select the required Test Cases from that Project.

After execution, Run Case results are recorded under the same Project and can be used for reporting and defect tracking.

This prevents test results from different products from being mixed together.

For example, if the Mobile App team is preparing for a release, they should create the Test Run under the Mobile App Project. The execution results should not be mixed with Admin Console testing results. This makes the report more accurate and easier for stakeholders to understand.

Copying and Transferring Content Between Projects

Content between Projects is not automatically shared. However, Armoury can still support content reuse through controlled methods.

Common methods include:

  • Export and import
  • Manual copy
  • AI-assisted generation of similar test cases
  • Rebuilding a new Project based on an existing Project structure
  • Moving selected content when permissions and workflow allow it

This is useful when creating similar products, new brands, or a new Project based on an existing testing model.

For example, a company may already have a Project for one game product. Later, the company launches a new game from the same series. In this case, the team can create a new Project and refer to the existing test case structure. They can then use import tools or AI-assisted tools to quickly generate the initial test coverage.

The key principle is:

Reuse content when it improves efficiency, but do not mix management scopes only for convenience.

If two products need to be managed separately, they should be placed in separate Projects.

Practical Case

Assume a company uses Armoury to manage testing for three major systems:

  • Customer Website
  • Mobile App
  • Admin Console

The recommended setup is to create three Projects under the same Organization:

  • Organization: Example Company
    • Project: Customer Website
    • Project: Mobile App
    • Project: Admin Console

The Customer Website Project may include the following Test Groups:

  • Registration
  • Login
  • Product Browsing
  • Checkout
  • Order History

The Mobile App Project may include the following Test Groups:

  • App Launch
  • Login
  • Push Notification
  • In-App Purchase
  • Profile Settings

The Admin Console Project may include the following Test Groups:

  • User Management
  • Role Permission
  • Report Dashboard
  • System Settings
  • Audit Log

These three Projects each have their own members, permissions, test cases, test runs, defects, and reports.

The Mobile App testing team does not need to see all Admin Console test cases. The Admin Console Project Manager does not need to manage Mobile App test execution. The Organization administrator can still monitor the overall Organization, but daily operations can be handled by the responsible Project Managers.

This is the core value of Projects.

A Project is not just a folder. It is a product-level management boundary. When Projects are designed correctly, the team can manage test cases, execute testing, control permissions, and analyze reports with much greater clarity.

Getting Started

Create an Organization

Create the first organization from the workspace and understand owner responsibility and transfer rules.

Create an Organization

An organization is the first management unit when using Armoury. After signing in, users first enter the workspace, where they can see the organizations they can currently access. If an account has not created an organization and has not been added to any organization, the user must create the first organization before creating projects, inviting members, managing test cases, and executing tests.

In Armoury, one account can create only one organization. The person who creates the organization automatically becomes its Owner. The Owner is the highest-level owner of the organization and is responsible for organization-level administration and handover.

Rules to Know Before Creating an Organization

Before you begin, confirm these rules:

ItemDescription
Creation limitEach account can create only one organization
Creator identityThe person who creates the organization automatically becomes its Owner
Organization purposeAn organization usually represents a company, department, or team that needs independent data management
Owner permissionsThe Owner is the highest-level owner and can manage important organization-level settings
Owner transferThe Owner can transfer organization ownership to another member
Transfer restrictionThe recipient must not already be the Owner of any organization

These limits keep organization ownership clear. When one person holds the highest authority for multiple organizations, management responsibility can become unclear and handover can become more complex. Armoury therefore limits each account to creating one organization and also restricts who can receive an Owner transfer.

Create an Organization from the Workspace

After signing in to Armoury, follow these steps to create an organization:

  1. Enter the Armoury workspace.
  2. Confirm whether the current account already has an available organization.
  3. If no organization has been created, click "Create organization."
  4. Enter the organization name.
  5. Confirm that the organization name matches the official company or team naming.
  6. Submit the creation request.
  7. After the system completes creation, it automatically sets you as the Owner of the organization.
  8. After entering the organization, you can start creating projects and managing members.

When creating an organization, use an official and recognizable name. Avoid temporary names such as "Test," "My organization," or "First organization." The organization is the highest level of data isolation in Armoury. All later projects, test groups, test cases, test executions, and defect data are created under the organization.

Recommended naming patterns:

ScenarioRecommended naming
Company-wide useUse the official company name
Single department useUse the company name plus the department name
Independent product team useUse the company name plus the product line name
Internal test management useUse the official internal unit name

You Become the Owner After Creation

After the organization is created, the creator automatically becomes its Owner. The Owner is not a regular member. The Owner is the highest-level owner of the organization.

The Owner usually needs to handle these responsibilities:

  1. Confirm the organization name and actual purpose.
  2. Create the first projects after the organization is created.
  3. Invite team members who need to use Armoury.
  4. Assign suitable people to manage projects.
  5. Review organization members and permissions.
  6. Transfer Owner status when the responsible person changes.
  7. Ensure organization data is maintained by the right people.

In practice, do not use a temporary account, test account, or short-term external user to create an official organization. A better approach is for someone inside the company who is responsible for quality management, testing process, engineering management, or system administration to create the organization. After creation, invite members and assign project managers according to team responsibilities.

How the Organization Connects to Other Features

After the organization is created, Armoury's main features expand from the organization as the starting point.

A common operating sequence is:

  1. Create the organization.
  2. Enter the organization.
  3. Create the first project.
  4. Invite organization members.
  5. Assign project members and permissions.
  6. Create test groups inside the project.
  7. Create sections inside test groups.
  8. Create test cases inside sections.
  9. Create test executions.
  10. Fill in test results and track defects.

The organization is therefore not just a folder. It is the starting point for Armoury's permissions, data, and project management. Data does not flow between organizations. Use different organizations only when the company wants testing data for different departments to be completely independent.

Owner Transfer Rules

If you are the Owner of an organization, you can transfer Owner status to another member when handover is needed.

Common transfer scenarios include:

  1. The original Owner leaves the company.
  2. Testing management responsibility moves to a new person.
  3. The organization moves from trial use to formal adoption.
  4. The company wants system administrators to manage organization ownership centrally.
  5. The original creator is no longer responsible for daily Armoury administration.

There is one important restriction during Owner transfer: the recipient must not already be the Owner of any organization.

For example, if you want to transfer organization ownership to a colleague but that colleague is already the Owner of another organization, the system will not allow the transfer. In that case, the colleague must first complete the Owner handover for the original organization so they are no longer the Owner of any organization. Only then can they receive the new Owner status.

Practical Example

Assume a company is adopting Armoury for the first time, and the test lead is responsible for setting up the environment. The process can be arranged like this:

  1. The test lead signs in to Armoury.
  2. After entering the workspace, the test lead confirms that no available organization exists.
  3. The test lead clicks "Create organization."
  4. The organization is named with the company's official name.
  5. After creation, the test lead automatically becomes the Owner of the organization.
  6. The test lead invites engineering leads, product managers, and testers to join the organization.
  7. Projects are created according to product lines.
  8. Project owners are assigned for each product line.
  9. Project owners then create test groups, sections, and test cases inside their projects.

Six months later, if the test lead is no longer responsible for Armoury, they can transfer Owner status to the new quality owner. Before transferring, they must confirm that the recipient is not already the Owner of any organization. If the recipient is already the Owner of another organization, they must first complete the Owner handover for that organization before receiving ownership of the new one.

With this process, organization ownership stays clear, and later project management, member permissions, and testing data maintenance are more stable.

Getting Started

Invite the First Member

Invite the first member into the organization and understand invitation email, KEENLITY ID, roles, and member quota behavior.

Invite the First Member

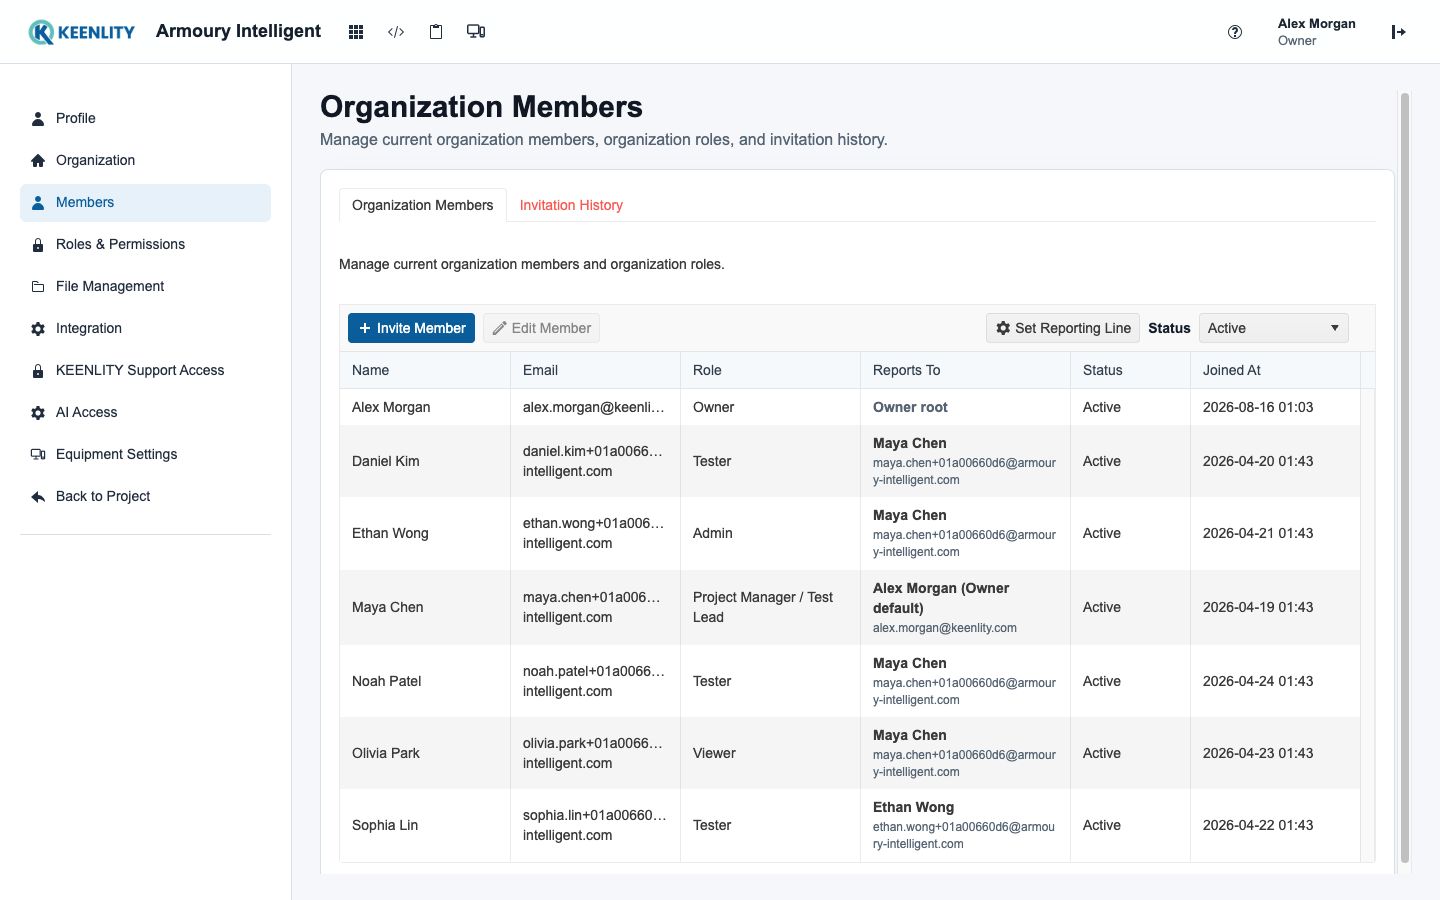
The populated Members page shows active accounts, invitations, and reporting context in one place. Check whether the person already exists before sending another invitation or changing access.

Organization members and reporting context
Review current members and reporting relationships before inviting or changing access.

An organization is the collaborative environment in Armoury Intelligent. After creating an organization, the next step is usually to invite the first member so project management, test case maintenance, test execution, and defect tracking can be handled by more than one person.

In Armoury Intelligent, inviting a member does not mean unilaterally adding a user to the organization. An administrator can send an invitation, but the invited person still needs to receive the invitation email, complete KEENLITY ID registration, and accept the invitation in the workspace before officially joining the organization.

This flow means organization membership requires confirmation from both sides. Administrators cannot directly add strangers into an organization without consent, and invited users clearly know which collaborative environment they are about to join.

Rules to Know Before Inviting a Member

Before inviting the first member, understand these rules:

ItemDescription
Invitation methodSent by an administrator or a member with invitation permission
Joining methodThe invited person must actively accept the invitation before officially joining
Account requirementThe invited person must register a KEENLITY ID
Invitation email sourceThe invited person receives an invitation email from KEENLITY
Quota calculationAfter the invitation is sent, it reserves one seat from the organization member limit
Quota releaseIf the invited person rejects the invitation, the system releases that member quota

The most important concept is: sending an invitation does not mean the person has joined the organization.

An invitation only creates eligibility to join. The invited person still needs to register, sign in, and accept the invitation in the workspace.

Step 1: Enter the Organization

First, enter the organization you want to manage from the workspace.

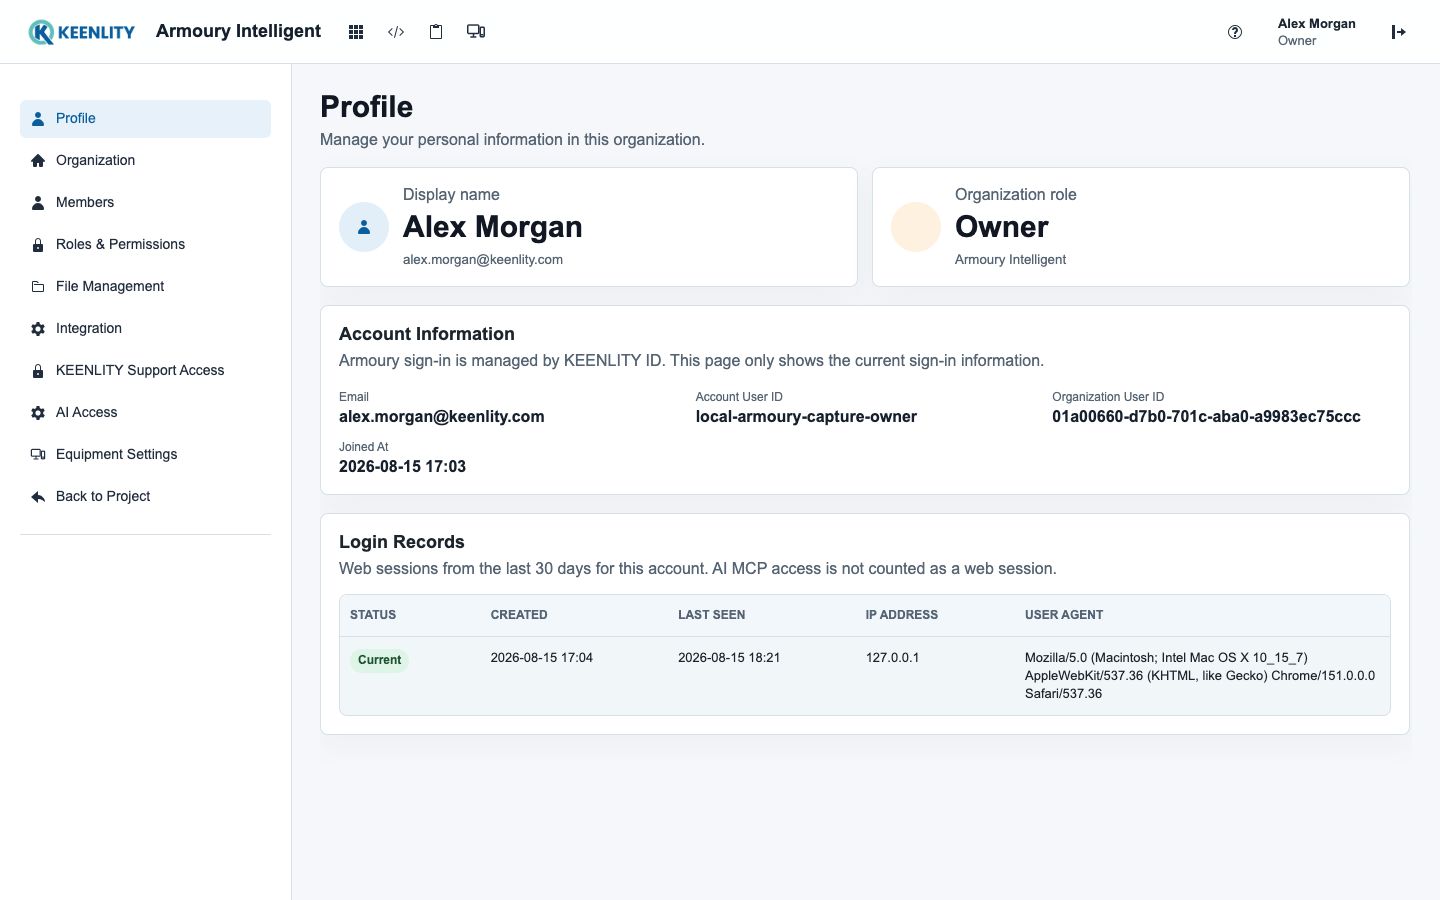
After entering the organization, click the account name in the upper-right corner. The system opens the profile page. In the left sidebar of the profile page, you can find the members page.

If your account belongs to multiple organizations, confirm that you are currently in the correct organization. An organization is an independent collaboration unit in Armoury Intelligent. Members, projects, and permissions are separated by organization. If you send an invitation after entering the wrong organization, the invited person will receive an invitation to the wrong organization.

In practice, administrators should check the current organization name before every invitation and then open the members page. This is a simple but important habit, especially when you manage multiple brands, departments, or product lines.

Step 2: Open the Member Management Page

In the left sidebar of the profile page, click the members page to open member management.

The members page shows the invite member button. It also lets you manage existing organization members and review previous invitation records.

The member management page is mainly used to:

  1. View members who have already joined the organization.
  2. Invite new members into the organization.
  3. Review invitation records and invitation status.
  4. Confirm the role currently applied to each member.
  5. Adjust member roles or permissions later.

Before sending an invitation, confirm the organization's current member count and plan quota. Armoury Intelligent reserves one member seat after the invitation is sent. Even if the invited person has not accepted yet, the invitation temporarily uses part of the organization member limit.

This design ensures that a seat is still available when the invited person accepts the invitation. It prevents a situation where an invitation has been sent but the recipient cannot accept because the quota is already full.

Step 3: Enter the Invited Person's Email and Choose a Role

After clicking the invite member button, enter the invited person's email address.

Make sure the email address is correct because the invitation email will be sent to that address. If the email is wrong, the real recipient will not receive the invitation and cannot complete the joining flow. When inviting internal company members, use company email addresses when possible. This helps administrators identify members and reduces the risk of inviting the wrong person.

In addition to entering the email address, choose the role the invited person will receive after joining the organization. Armoury Intelligent provides five default roles so administrators can quickly apply common permission sets.

RoleSuitable for
AdministratorPeople responsible for organization management, member management, and overall settings
ContributorPeople who participate in test case maintenance and daily collaboration
Project ManagerPeople responsible for project settings, project members, and project-level permission management
TesterPeople mainly responsible for executing tests, reporting results, and creating defects
ViewerPeople who only need to view content, reports, or testing status

Roles let administrators apply a common permission set based on responsibility instead of configuring every permission one by one at the beginning.

For example, if the first member is a test lead, you can start with Project Manager. If the person mainly performs daily test execution, use Tester. If the person is a manager or stakeholder who only needs to review testing progress and results, use Viewer.

If the member's responsibilities change later, you can return to member management and adjust the role or permissions. The first invitation does not need to be perfect. The priority is to choose the role closest to the person's current work.

Step 4: Send the Invitation

After confirming that the email address and role are correct, send the invitation.

After sending, the system creates an invitation record and sends an invitation email from KEENLITY to the invited person. At this point, the invitation reserves one seat from the organization member limit.

For example, if your plan allows up to five members and the organization already has four active members, sending an invitation for the fifth member reserves that seat even before the invited person accepts. The organization quota is temporarily treated as full.

This prevents the same organization from sending more invitations than the plan allows in a short period of time. As long as the invitation remains valid, the system reserves the seat for that invited person.

What the Invited Person Needs to Do

After receiving the invitation email, the invited person needs to complete this flow:

  1. Open the invitation email from KEENLITY.
  2. Click the invitation link in the email.
  3. Register or sign in with a KEENLITY ID.
  4. Complete the account flow required by Armoury Intelligent.
  5. Enter the workspace.
  6. Review the organization invitation in the workspace.
  7. Accept the invitation.
  8. Officially join the organization.

Note that completing KEENLITY ID registration does not mean the person has joined the organization.

Registration only creates the account identity needed to use Armoury Intelligent. The invited person still needs to sign in, enter the workspace, and accept the organization invitation before becoming a member of the organization.

Why KEENLITY ID Is Required

KEENLITY ID is the required account foundation for using Armoury Intelligent.

KEENLITY uses KEENLITY ID to connect KEENLITY services so the same user can sign in to different services with a consistent identity. For Armoury Intelligent, this allows organization members, project permissions, activity records, and user identity to map correctly.

Therefore, even if the invited person is using Armoury Intelligent for the first time, they must complete KEENLITY ID registration before accepting the organization invitation and entering the system.

What Happens If the Invitation Is Rejected

If the invited person rejects the invitation, the system releases the reserved member quota back to the organization.

For example, if your plan allows up to five members, the organization currently has four active members, and one invitation has been sent, the organization quota is temporarily used up to five members. If the invited person rejects the invitation, the system releases that seat. The organization returns to four members, and you can invite someone else.

This design lets administrators clearly manage the member limit and prevents rejected invitations from occupying quota long term.

Practical Example

Assume you are the first Armoury Intelligent administrator in your company. You have already created the organization and now need to invite the first test engineer.

First, enter the correct organization from the workspace. Click the account name in the upper-right corner to open the profile page, then click the members page in the left sidebar. After entering member management, review current members, confirm the member quota, and click the invite member button.

Next, enter the test engineer's company email address and choose a role based on the work they will do. If they mainly execute tests, choose Tester. If they also need to manage project members and settings, choose Project Manager.

After you send the invitation, the system sends an invitation email from KEENLITY and temporarily reserves one member seat. The test engineer receives the email, clicks the invitation link, completes KEENLITY ID registration, signs in to Armoury Intelligent, and accepts the organization invitation in the workspace.

After the engineer officially joins the organization, you can assign them to a project so they can help create test groups, write test cases, execute tests, or report defects.

This is the starting point of collaboration in Armoury Intelligent: create the organization first, invite members next, enter projects after that, and then let the team maintain testing assets together.

Getting Started

Create the First Project

Create a clear first project so the team has a well-defined starting point for testing work.

Create the First Project

In Armoury, a project is the main working scope for day-to-day testing.

When a team starts managing test cases, planning test execution, tracking test results, or organizing defects, the first step is usually not to create a large number of cases. The first step is to create the right project.

When the project is clear, later test groups, sections, test cases, test executions, and defect tracking all have a clear place to belong. When the project is created too casually, teams can quickly end up with scattered cases, unclear member permissions, and data from different products mixed together.

Creating the first project is not just completing a form. It is creating the starting point for the team's testing work.

What a Project Is

A project is the main unit under an organization for managing testing work.

In most cases, projects should be separated by product, brand, system, or large product line. Each project has its own test content, members, permissions, and settings. Content does not automatically flow between projects.

Common ways to split projects include:

Split bySuitable scenario
ProductThe company has multiple independent products
BrandDifferent brands are maintained by different teams
SystemFrontend, backend, member center, or other systems need separate management
Large product lineA single product is large enough to require separate management by line
DepartmentDepartments want independent control over test content and permissions

For example, if a company maintains a public website, an admin system, and a member center, it can create three projects:

  • Public website
  • Admin system
  • Member center

Each project can then have its own test cases, test execution records, member permissions, and quality metrics.

What to Confirm Before Creating the First Project

Before creating a project, confirm the following points.

Confirm the Scope the Project Represents

The project name should directly reflect the product or system it manages.

Avoid names that are too vague, such as:

  • Test project
  • Demo project
  • New project
  • First project

These names may look acceptable at first, but as the number of projects in the organization grows, the team will have difficulty understanding what each project is actually for.

Use clear product or system names, such as:

  • Member center
  • Admin system
  • Mobile application
  • Public website
  • Order management system

The clearer the name, the less confusion team members will have when switching projects, creating cases, and executing tests.

Confirm Who Will Create and Manage the Project

Before creating a project, also confirm who is responsible for creating it and who will manage it afterward.

In Armoury, a project is not just a folder for storing test cases. It is also a working scope where members, permissions, settings, and test content can be managed independently.

Because of this, project creation usually involves two important roles:

RoleMain responsibility
Project creatorCreate the project, set initial information, and assign the project owner
Project ownerManage members, permissions, settings, and daily testing content inside the project

The project creator is usually an organization administrator or a user who has permission to create projects. This person's responsibility is to create the correct project scope and assign a suitable project owner after creation.

The project owner is the main manager for daily project operations. This person is usually the one most familiar with the product, system, or testing process, such as a test lead, product owner, or primary maintainer of the system.

The project owner can handle more detailed management inside the project, such as:

  1. Inviting or removing project members.
  2. Setting what members can do in this project.
  3. Managing basic project settings.
  4. Maintaining how test groups, sections, and test cases are organized.
  5. Helping the team establish the test execution workflow.
  6. Monitoring project quality metrics and testing status.
  7. Deciding whether the project should be archived or reorganized.

This division of responsibility prevents every task from being concentrated on the organization administrator. The organization administrator sets the overall direction, while the project owner handles daily management inside the project.

For example, a company has three products:

  • Member center
  • Admin system
  • Mobile application

The organization administrator can create these three projects first, then assign different project owners. The member center can be managed by the member system test lead, the admin system by the backend product owner, and the mobile application by the app testing owner.

This lets each project be managed by the person who understands the product best, instead of sending every setting change back to the same administrator.

Confirm Whether the Current Plan Can Still Create New Projects

The number of projects available in Armoury depends on the plan.

The key limit here is the number of projects that can be created. Different plans allow different project counts. When the current plan has reached its project limit, users can no longer create new projects.

Before creating a new project, confirm:

  1. How many projects the current plan allows.
  2. How many projects the organization has already created.
  3. Whether any unused projects can be archived.
  4. Whether this need truly requires a new project.

In practice, creating a new project for every testing activity is not recommended. If the work is only a different version, feature, or testing phase of the same product, it can usually be managed with test groups, sections, or test execution. A new project may not be necessary.

Steps to Create the First Project

Follow these steps to create the first project.

  1. Enter Armoury.
  2. Confirm the organization you are currently in.
  3. Open the project list or project entry point.
  4. Select the option to create a project.
  5. Enter the project name.
  6. Fill in the project description.
  7. Confirm the initial project settings.
  8. Create the project.
  9. After creation, open the project home page.
  10. Assign the project owner.
  11. Let the project owner complete members, permissions, and project settings.

After creation, this project becomes the main location for managing later testing data. You can start creating test groups, sections, and test cases. You can also invite members into the project and assign permissions.

Default Project Behavior

After a project is created, Armoury helps users return to commonly used projects more easily.

The top navigation contains a project dropdown. This dropdown shows your default project so you can quickly enter the working scope you use most often.

Default project behavior is as follows:

FunctionDescription
Display locationThe project dropdown in the top navigation
Displayed contentThe current user's default project
Switching behaviorAfter another project is selected, the system redirects to that project
Default updateThe selected project becomes the new default project

In other words, the default project is not only a fixed value changed from a settings page. When you choose a project from the top navigation, Armoury redirects to that project and treats it as your current default project.

The purpose of this design is to make daily work faster.

If you work on the same product every day, you do not need to search for the project again the next time you enter the system. You can return directly to the project you use most often from the top navigation, reducing switching and search time.

Project Settings

When creating a project, project settings affect how the project will be managed later.

It is best to organize the basic settings on the first day instead of waiting until many cases have already been created and then trying to adjust structure and permissions afterward.

Common project settings include:

SettingKey action
Project nameUse a clear, recognizable product or system name
Project descriptionExplain the project purpose, management scope, and applicable team
Project ownerAssign the person responsible for daily project management
Project membersSpecify which members can enter this project
Project permissionsControl whether members can manage cases, execute tests, or adjust settings
Quality metricsObserve testing status and quality changes inside the project
Archived statusArchive the project when it is no longer used to reduce noise

Project settings are connected to later functionality.

For example, whether a member can create test cases is affected by project permissions. Results from test execution are reflected in project quality metrics. When a project is no longer used, archiving can keep the project list clean.

Project Counts and Usage-Based Billing

The number of projects that can be created in Armoury depends on the plan.

Different plans allow different numbers of projects. The main restriction is the project count limit. When the number of projects in the organization reaches the current plan limit, no more projects can be created.

This limit lets teams of different sizes choose the plan that fits their actual needs.

If you encounter a project count limit while creating a project, check the following:

  1. Whether any unused projects can be archived.
  2. Whether a new project is truly needed.
  3. Whether existing test groups or sections inside an existing project can be used for classification.
  4. Whether an organization administrator should confirm that the current plan is sufficient.
  5. Whether the plan should be adjusted to support more projects.

In practice, projects should be used to separate clear products, systems, or large testing scopes. If the work is only one version test, one regression test, or one feature verification, a new project is usually unnecessary.

These scenarios can be managed inside an existing project:

ScenarioRecommended approach
New version of the same productManage it with test execution
New feature of the same productClassify it with sections or test groups
One regression testCreate a new test execution
One temporary verificationPlace it under the appropriate classification in an existing project
Different product or systemCreate a different project

This keeps the project count clean and prevents the team from losing track of data later.

Practical Example

Assume your team is adopting Armoury, and the first product to manage is the member center.

You can create the project like this:

FieldRecommended content
Project nameMember center
Project descriptionManage tests related to member registration, login, profiles, password resets, and member permissions
Project creatorOrganization administrator
Project ownerMember center test lead
Project membersTesters, product owner, development lead

After creation, continue with these settings:

  1. Assign the member center test lead as the project owner.
  2. Have the project owner invite relevant members into the project.
  3. Set different permissions based on member responsibilities.
  4. Create a test group, such as Member core features.
  5. Create sections, such as Login, Registration, Profile, and Password reset.
  6. Create test cases in each section.
  7. Create a test execution to plan this week's version regression test.
  8. Track defects and quality status based on test results.

When a user selects Member center from the top navigation, the system redirects to that project and sets it as the current default project. The next time the user returns to Armoury, they can enter their daily project scope more quickly.

In this example, the organization administrator is responsible for creating the project and assigning the project owner. The project owner is responsible for later member management, permission configuration, test content organization, and daily maintenance.

This management model makes responsibility clearer. The person who creates the project opens the correct working scope, while the project owner keeps that scope correctly used over time.

As long as the project scope, name, owner, and permissions are clear, later case management and test execution will be much more stable.

Getting Started

Create the First Test Set

Create the first test group, section, and test case so the team has a maintainable testing structure.

Create the First Test Set

In Armoury, the point of creating the first test set is not to finish writing every test case first. The point is to create a clear, extensible testing structure that the team can maintain together.

A complete set of testing content usually starts from a project, then moves down to a test group, uses Sections to classify test cases, and only then adds the actual test cases. For first-time Armoury users, understanding this order helps prevent test content from being placed in the wrong location and makes later test execution, maintenance, and searching smoother.

The basic structure is:

LevelPurpose
ProjectManages test content for a product, system, brand, or product line
Test groupManages a focused testing scope inside a project
SectionClassifies test cases inside a test group
Test caseDescribes the operation, condition, and expected result to verify

When creating the first test set, follow this order:

  1. Enter the correct project.
  2. Create the first test group.
  3. Update the test group name and description.
  4. Click the test group name to enter the group.
  5. Create the first Section inside the empty test group.
  6. Add the first test case under the Section.

Enter the Target Project

Before creating testing content, first confirm that you are in the correct project.

You can switch projects from the project dropdown in the top navigation. After you select a target project, the system redirects to that project and treats it as the current default project for your work.

This confirmation is important because Armoury's test groups, Sections, and test cases are all created under a project. Content does not automatically flow between projects. If you create testing data in the wrong project, other team members may not find it later, and the team may need to reorganize or move the data.

Before you begin, confirm:

  1. The current organization is correct.
  2. The selected project is correct.
  3. You have permission to create test groups in this project.
  4. You have permission to edit Sections and add test cases.

If you cannot see create, edit, or add buttons, your project permissions are usually insufficient. Contact the project manager and ask them to adjust your permissions.

Create the First Test Group

After entering the project, create a new test group from the test group list.

Armoury creates test groups directly: after you click create, the system automatically generates a new test group. This means you do not need to complete a full form before the group exists. You create the group first, then update its name and description.

Use these steps:

  1. Enter the target project.
  2. Find the test group list.
  3. Click create test group.
  4. The system automatically adds a test group.
  5. Find the newly created test group in the list.
  6. Update the test group name.
  7. Add the test group description.
  8. Save the changes.

This design is useful for quickly creating a testing scope. When the team is organizing a new feature, module, or version test, it can create the group first and then gradually complete the name, description, and test cases.

Update the Test Group Name

After the system generates the test group, update the group name right away.

A good test group name should let team members understand the testing scope at a glance. Avoid vague names such as "First test set," "New feature test," or "Test data." As the project gains more groups, vague names make it difficult for the team to understand what each group is for.

Use names like these:

AvoidRecommended
First test setMember login flow
New feature testShopping cart checkout flow
Version testJune payment feature regression
Temporary testAdmin permission settings verification

The test group name does not need to be long, but it should explain the testing scope. A practical pattern is to combine the feature name with the testing purpose, such as "Member login flow," "Order creation flow," or "Admin role permission verification."

Fill In the Test Group Description

The test group description adds context that the name cannot fully explain. It does not need to be long, but it should help the next maintainer understand the purpose and boundary of the group.

The description can include:

  1. Which features the group covers.
  2. Which features the group does not cover.
  3. When new cases should be added to this group.
  4. Whether the group maps to a specific version, module, or requirement.
  5. Any limits the team should pay attention to.

For example, if the test group is named "Member login flow," the description can be:

This test group manages member login test cases, including username and password login, failed login messages, retained login state, and login again after logout. It does not include member registration, forgot password, or third-party login flows.

This kind of description prevents cases from being placed in the wrong location and keeps the test group clear during long-term maintenance.

Enter the Test Group

After the test group is created and its basic settings are complete, click the test group name to enter it.

Use these steps:

  1. Return to the test group list.
  2. Find the test group you just created.
  3. Click the test group name.
  4. Enter the test group content page.
  5. Confirm that the current page shows the correct group.

This step matters because test cases are not created outside the test group list. You need to enter the target group first, then add cases according to the Section classification.

If the project has multiple test groups, always confirm the current group before adding data. This directly affects where the test case is classified later and also affects the selection scope when you create test executions.

Create the First Section

After entering a new empty test group, you need to create the first Section before adding test cases.

A Section is the classification structure inside a test group. It organizes test cases by type or scope. A test case must be placed under a Section, so an empty test group cannot receive test cases until at least one Section exists.

Use these steps:

  1. Enter the test group you just created.
  2. Look at the Section data area on the left.
  3. Click the settings button in the upper-right corner of the left Section area.
  4. Open the Section editing page.
  5. Add a root-level Section.
  6. Enter the Section name.
  7. Save the settings.
  8. Return to the test group content page.

A root-level Section is the top-level classification. It does not need to sit under another Section. For the first test set, start with one simple and clear root-level Section, such as "Basic login flow," "Main operation flow," or "Core verification items."

At the beginning, do not split Sections too finely. If the classification is too detailed, the team may not know where a test case belongs, and maintenance cost increases. Start with one main Section, then add more classifications later when the number of cases grows.

Add the First Test Case

After the first Section is complete, you can add test cases.

A test case is the most basic verification unit in Armoury. It describes one specific thing that must be confirmed. For example: "After entering a valid username and password, the user can log in successfully."

Use these steps:

  1. Enter the target test group.
  2. Confirm that the left side has an available Section.
  3. Select the Section where the case should be placed.
  4. Click add test case.
  5. Fill in the test case title.
  6. Set the priority.
  7. Fill in the steps.
  8. Fill in the expected result.
  9. Add notes or attachments if needed.
  10. Save the test case.

For the first test case, choose the most central and easiest flow to verify, such as login, search, data creation, or form submission. This helps the team quickly understand how data is created in Armoury and reduces friction for first-time use.

Test Case Content Example

Here is a simple test case example:

FieldContent
TitleUser can log in with a valid username and password
PriorityHigh
StepsOpen the login page, enter a valid username and correct password, and click the login button
Expected resultThe system logs in successfully and redirects to the user's home page
NotesThis case only verifies standard account login and does not include third-party login

The case does not need to be long, but it must be clear. Team members should understand what action to perform and what result counts as expected.

How Test Groups, Sections, and Test Cases Relate

After creating the test group, Section, and first test case, you have built the most basic testing management structure in Armoury.

Their relationship can be understood like this:

  1. The project determines which product or system the testing content belongs to.
  2. The test group determines which testing scope this set of cases belongs to.
  3. The Section determines where the case is classified inside the group.
  4. The test case describes the actual operation and expected result to verify.

This structure affects later test maintenance and test execution. When groups and Sections are planned clearly, the team can find cases faster and expand new testing content more reliably.

Practical Example

Assume your team is creating the first test set for an e-commerce system. You can first create a test group named:

Member login flow

The group description can be:

This test group manages member login cases, including successful login, failed login, incorrect password, nonexistent account, and login again after logout. It does not include member registration or forgot password flows.

Then click the test group name to enter the group. Because this is a completely new empty test group, you need to create a Section first.

In the left Section data area, click the settings button in the upper-right corner, open the Section editing page, and add a root-level Section:

Basic login flow

After that, return to the test group content page, select the "Basic login flow" Section, and add the first test case.

FieldContent
TitleUser can log in after entering a valid username and password
PriorityHigh
StepsGo to the login page, enter a valid username, enter the correct password, and click login
Expected resultThe system logs in successfully and displays the member home page
NotesPrepare one valid member account before testing

After these steps, you have created the first maintainable set of testing data. Later, you can continue adding cases in the same Section, such as "Show an error message when the password is incorrect," "Do not allow login when the account does not exist," and "Do not allow returning to the member page after logout."

When the number of cases grows, add more Sections as needed, such as "Failed login scenarios," "Login state retention," and "Logout flow." This keeps the test group clear and helps the team execute and maintain tests more efficiently.

Organization Administration

Organization Roles and Support Access

Review organization-wide roles, permission ownership, and temporary KEENLITY support access without confusing them with project permissions.

Review organization-level access

Organization roles apply across shared organization administration. Use this page to confirm which members receive each role, review the complete permission matrix, and keep owner responsibilities explicit. Project roles remain separate and should be managed from the relevant Project Settings page.

Organization roles and permission matrix
Review organization roles and their complete permission sets before assigning members.

Control support access

Support access is an explicit organization decision. Before enabling it, confirm who requested assistance, the intended support window, and the records that will remain available for audit. Disable access when the investigation is complete.

KEENLITY support access controls and records
Grant support access deliberately and use the records below it to verify past changes.

Practical operating sequence

  1. Review active members and pending invitations.
  2. Assign the narrowest organization role that supports the member's work.
  3. Keep at least one accountable owner and review privileged roles periodically.
  4. Enable support access only for a specific operational need, then revoke it when the work ends.
Organization Administration

Identity and Login Sessions

Understand SSO identity, profile data, and recent browser sessions so account access can be reviewed without changing organization permissions.

Separate identity from authorization

Armoury uses the signed-in KEENLITY identity for the account name and email, while organization and project roles decide what that identity may access. Changing a display name does not grant permissions, and changing a role does not create a separate login.

Review recent sessions

The Profile page shows account identity and recent browser sessions. Compare the device, time, and current-session indicator when investigating an unfamiliar login. End sessions through the supported sign-out flow so both Armoury and the identity provider complete logout.

SSO identity profile and recent sessions
Confirm the signed-in identity and review recent sessions before investigating access concerns.

Practical checks

  • Use one named account per person; do not share browser sessions.
  • Confirm the organization in the top navigation before performing administrative work.
  • Review organization roles separately when the identity is correct but access is unexpected.
Projects

Projects

Understand how projects connect test cases, test execution, defects, and project settings.

What Is a Project?

The Projects workspace combines product-line navigation, active and archived context, project metrics, and a selected-project summary. Use the list to choose the correct data boundary before opening its test work.

Project portfolio organized by product line
Use product lines, project status, and the selected summary to enter the correct testing boundary.

In Armoury, a project is the main unit under an organization for managing testing work. An organization can create multiple projects and separate them by product, service, brand, system module, or product line. Each project has its own test cases, test groups, test executions, defect records, and project settings, so a project usually represents a testing scope that can be managed independently.

For a team, a project is not just a folder. It is a workspace where quality status can be tracked over time. As test cases increase, test execution becomes more frequent, and defects begin to be reported and tracked, the project becomes an important entry point for judging product quality, test coverage, and development stability.

Where Projects Fit in Armoury

Armoury's data hierarchy can be understood as:

LevelDescription
OrganizationThe largest data scope for a company or team
ProjectThe testing management unit under an organization
Test groupA group under a project for classifying test cases
SectionA structural classification inside a test group
Test caseContent that describes test conditions, steps, and expected results
Test executionUsed to execute test cases and record results
DefectAn issue found during testing that needs to be tracked

Creating a project is therefore usually the first step in formally organizing testing content. Without a project, test groups, test cases, and test executions do not have a clear place to belong.

Quickly Enter Projects from the Top Bar

In Armoury's top bar, there is a project-related button or entry point. Users can use this entry point to quickly open the project list without navigating through organization settings or several other pages.

Recommended operation:

  1. After entering Armoury, confirm the current organization.
  2. Find the project entry point in the top bar.
  3. Click the project button to open the project list page.
  4. Select the project you want to enter from the list.
  5. After entering the project, start managing test groups, test cases, test executions, and defects.

This entry point is suitable for daily use. When the team needs to switch between projects every day, the top bar is the fastest navigation path.

Overall Information Provided by the Project List

The project list does more than show which projects exist. It is also an overview page that helps managers quickly understand the company's current testing status.

In the project list, you can usually see:

InformationPurpose
Total project countUnderstand how many projects currently exist under the organization
Active project countIdentify how many projects are still actively used
Cross-project unresolved defect countQuickly understand overall product or development quality risk
Test execution count for each projectUnderstand which projects have more recent testing activity
Test case count for each projectEvaluate accumulated testing assets
Test group count for each projectUnderstand whether testing content has initial classification
Unresolved defect count for each projectJudge the current quality pressure of a single project

The unresolved defect count is especially useful for managers. When the cross-project unresolved defect count increases quickly, it may mean recent development changes are heavier, discovered issues have not yet been fixed, or some projects are not resolving defects as quickly as testing is finding them.

How the Project List Connects to Testing Work

The statistics in the project list connect to actual testing work.

For example:

  1. An increase in test case count means the team is accumulating testing assets.
  2. An increase in test group count means testing content is starting to be classified and managed.
  3. An increase in test execution count means the team is actively executing tests.
  4. An increase in unresolved defect count means issues still need developers or related owners to handle them.

These data points help the team judge whether a project is operating normally. If a project has many test cases but almost no test execution, the cases may have been created but not actually used. If a project has many test executions but very few test cases, the testing content may not have been fully organized. If a project's unresolved defect count stays high for a long time, the team should check whether defects have owners, fix timelines, or priorities.

Default Environment and Current Major Version in Project Settings

In project settings, you can set the "default environment" and "current major version." Currently, these two fields are mainly notes for project information and do not substantially affect system workflow.

In other words, after you fill in these fields, the system currently does not automatically change test case, test execution, or defect behavior based on the environment or version.

Recommended usage:

FieldRecommended content
Default environmentFor example, test environment, staging environment, or production environment
Current major versionFor example, 1.0.0, 2026.06, or second-quarter version

Although these fields are currently used as notes, the team should still fill them in consistently. This helps members quickly understand the main testing version and environment background for the project during collaboration.

Row Number Display in Project Settings

Project settings can also control whether row numbers are displayed. When a user enables row number display, the test case list shows numbering, which helps the team discuss, locate, and inspect data.

This setting is especially useful in these situations:

  1. During meetings, the team can refer directly to a specific row in the test case list.
  2. When there are many test cases, users can more quickly understand their current position.
  3. During document review or content cleanup, numbering can support communication.
  4. When team members report issues, they can more clearly describe which row needs review.

Note that row number display mainly helps list reading and communication. It is not the permanent identifier of a test case. To track a specific test case precisely, use the test case's own identifier or detailed content.

Practical Example

Assume a company maintains a public website, an admin management system, and a mobile application. The team can create three projects in Armoury:

ProjectManaged content
Public website projectRegistration, login, form submission, content display
Admin management system projectPermissions, reports, data maintenance, management flows
Mobile application projectInstallation, login, push notifications, core usage flows

After the projects are created, testers can create test groups and test cases inside each project. Managers can use the project list to view the test execution count, test case count, and unresolved defect count across the three projects.

If the admin management system has significantly more unresolved defects than the other projects, managers can first check whether the admin system recently had a major revision, whether testing is concentrated in that project, or whether the development team needs to prioritize defect handling. At that point, the project list is not just an entry point. It is a management tool that helps the team judge quality status.

In short, a project is the core unit in Armoury that connects test cases, test execution, defects, and project settings. Creating and managing projects correctly helps the team understand each product's current testing progress, quality risks, and next handling direction more clearly.

Projects

Product Lines

Use product lines to organize large project lists by product, service, brand, or management scope.

Product Lines

As the number of projects in an organization grows, finding the target project by project name alone becomes less efficient. This is especially true for owners and managers, who usually have higher permissions and can access many projects or even every project in the organization. In that situation, Product Lines help users create clear classifications for projects. The Projects list becomes more than a stack of names, and users can navigate by product, service, brand, or management scope.

The purpose of Product Lines is not to change the project's data structure, and it is not to make data flow between projects. Product Lines help classify projects inside an organization, and they are a navigation tool that helps users quickly locate the project they need among many projects.

Do not use Product Lines as security boundaries. Project membership and roles decide access; Product Lines help people find and scan Projects.

What is a Product Line?

A Product Line is a classification layer for projects. When a company maintains several products, platforms, or services at the same time, related projects can be assigned to the same Product Line. Users can then first identify the product scope and enter the actual project afterward.

For example, an organization may have these projects:

Project nameSuitable Product Line
Member Center WebMember System
Member Center MobileMember System
Order FlowTransaction Services
Invoice ModuleTransaction Services
Admin Management PlatformOperations Console
Report CenterOperations Console

Without Product Lines, managers must search directly through every project. When there are only three to five projects, this is not a major problem. When the organization grows to ten, twenty, or more projects, users are more likely to open the wrong project, repeatedly confirm names, or spend too much time switching.

After Product Lines are assigned, users can first choose Member System, Transaction Services, or Operations Console, then enter the target project under that Product Line.

Who should use Product Lines?

Product Lines are most useful for roles that can access many projects.

Owners

Owners can usually manage the whole organization and view most or all projects. As the organization's projects increase, owners need to quickly understand which projects are maintained under each product area.

Product Lines help owners organize projects from the company-wide perspective instead of searching the full project list every time.

Managers

Managers often maintain projects, members, permissions, and settings. Because a manager may work across several teams or products, Product Lines make it faster to switch to the correct project.

For example, if a manager needs to review projects related to Transaction Services today, they can first locate the Product Line and then enter order, invoice, or payment-related projects.

Cross-product collaborators

Some test leads, quality owners, or project owners participate in testing activity for several products at once. These users may not manage the whole organization, but they still switch projects frequently.

Product Lines help these users organize projects by work scope and reduce confusion while moving between projects.

Relationship between Product Lines and Projects

Product Lines only classify projects. Projects are still the main unit for managing testing content in Armoury.

In Armoury, these records are still scoped primarily by Project:

  1. Test Groups are created under a Project.
  2. Test Cases belong to a specified Project.
  3. Test Runs are created by Project.
  4. Defects are managed by Project.
  5. Project members and permissions are configured by Project.
  6. The project Dashboard only counts data inside that Project.

Therefore, Product Lines do not merge Test Cases from different Projects, and they do not automatically share Test Runs across Projects. Their role is closer to a clear navigation category that helps users find the correct Project faster.

This is especially important when writing test data or viewing metrics. After users enter a Project, the Dashboard, Test Groups, Test Cases, Test Runs, and Defects they see are still that Project's own data.

When to use Product Lines

If the organization has only a few projects, users can enter the target project directly from the Projects list. A planned Product Line structure may not be necessary yet.

When these situations appear, start using Product Lines:

  1. The number of projects in the organization is increasing.
  2. Several projects belong to the same product or service.
  3. Owners or managers need to switch between different projects frequently.
  4. Project names are similar and easy to misclick or confuse.
  5. The company wants to organize projects by product, brand, platform, or business unit.
  6. Managers need to quickly understand which projects belong to a product area.
  7. New members need an easier way to understand how projects are distributed.

The earlier Product Lines are planned, the easier it is to keep structure clear as more projects are added. If the organization waits until the project count is already very high, managers will need more time to reclassify projects and confirm naming.

Locate Projects through Product Lines

The main workflow is to narrow the scope first, then enter the project.

Step 1: Open the Projects list

Open the Projects list from the project entry point in the top bar. The Projects list is the main place to view accessible projects.

For general members, the list may show only projects they are authorized to access. For owners or managers, it usually shows more projects, so Product Line classification is especially useful for those roles.

Step 2: Review Product Line classification

In the Projects list, use Product Line information to confirm the scope each project belongs to.

Users can first decide which Product Line their work belongs to. For example, work on member login and profile data starts from Member System. Work on orders or invoices starts from Transaction Services.

Step 3: Enter the target Project

After confirming the Product Line, choose the actual Project to enter.

After entering the Project, later work returns to the Project itself, such as reviewing the Dashboard, managing Test Groups, maintaining Test Cases, creating Test Runs, or reviewing Defects.

Step 4: Use with Default Project

If one Project is the user's most common working scope, they can make it their usual daily Project after finding it.

Product Lines help users quickly locate a Project among many projects. Default Project helps users return to the Project they use most often. Used together, they improve both organization-wide navigation for managers and daily operation efficiency for each user.

Product Line naming guidance

Product Line names should be clear, stable, and easy to understand. Good Product Line names let new members understand the project scope without asking for much background.

Common naming patterns include:

Naming patternExamples
By productMember System, Payment Service, Report Platform
By platformWeb Platform, Mobile App, Admin System
By brandBrand One, Brand Two, Brand Three
By business unitEcommerce Department, Enterprise Services, Internal Systems
By service scopeLogin and Registration, Order Flow, Notification Center

Avoid vague names such as:

  1. Other
  2. New Project
  3. Test
  4. First Group
  5. Temporary Classification

These names may look convenient in the short term, but as the project count grows, users cannot quickly understand what the classification means. The value of Product Lines is making projects easier to find, so names should directly reflect the management scope.

Connections with other features

Product Lines are a classification feature, but they affect how efficiently users enter other features.

Projects list

The most direct connection is the Projects list. When the number of projects increases, Product Lines help users quickly find the target project in the list.

Project Dashboard

After users enter a Project through a Product Line, they can view that Project's Dashboard. The Dashboard shows testing progress, defect status, Test Runs assigned to me, and other project-level metrics inside that Project.

Product Lines do not aggregate Dashboard data across projects, but they help users enter the correct project Dashboard faster.

Project members and permissions

After owners or managers use Product Lines to find the target Project, they can enter the Project members and permissions page to manage that Project's members and access.

Product Lines do not directly decide member permissions. Whether a member can see a Project still depends on organization roles and permission settings inside the Project.

Archived Projects

When some projects under a Product Line are no longer used, managers can decide whether they should be archived. After archive, the Project cannot be accessed directly and must be restored before it can be used again.

Product Lines help managers more quickly see which product areas are still active and which product areas may contain projects that have reached the end of maintenance.

Practical scenario

Suppose a company maintains several systems and has created these projects in Armoury:

  1. Member Center Web
  2. Member Center Mobile
  3. Login Verification Service
  4. Order Flow
  5. Invoice Module
  6. Payment Service
  7. Admin Management Platform
  8. Report Center
  9. Notification Service
  10. Customer Support Tool

If every project is placed directly in one flat list, managers need to search through the full list every time they work. When project names are similar, such as Payment Service and Invoice Module both being transaction-related, users may need to confirm repeatedly.

A better approach is to organize projects into these Product Lines:

Product LineProjects
Member SystemMember Center Web, Member Center Mobile, Login Verification Service
Transaction ServicesOrder Flow, Invoice Module, Payment Service
Operations ConsoleAdmin Management Platform, Report Center
Support ServicesNotification Service, Customer Support Tool

When a manager needs to review payment-related testing status, they can first find Transaction Services and then enter the Payment Service Project. When a test lead needs to review admin defects, they can first find Operations Console and then choose Admin Management Platform or Report Center.

This classification does not change where testing data belongs, but it clearly reduces the time needed to find projects and lowers the chance of opening the wrong project, reading the wrong data, or switching repeatedly.

Operating guidance

The value of Product Lines comes from clear, consistent, and continuously maintained classification. Organizations should confirm which Product Line a Project belongs to when creating a new Project.

In practice, follow these principles:

  1. A Project should belong to its primary Product Line.
  2. Product Line names should be understandable to new members.
  3. Do not create too many Product Lines for a small number of temporary projects.
  4. When the product architecture changes, review Product Line classification at the same time.
  5. Owners or managers should periodically confirm whether Projects are correctly classified.
  6. Product Lines should improve navigation efficiency, not replace Project management.

Product Lines are not a replacement for Projects. They help users find and manage Projects more efficiently. After the number of projects in an organization increases, good Product Line planning makes Armoury easier to understand and helps owners and managers more quickly grasp testing work across different product areas.

Projects

Project Dashboard

Use the project dashboard to review Test Run progress, defects, data quality, and member workload inside one project.

Project Dashboard

Use the populated dashboard to read release quality as a connected view: execution progress, defects, unexecuted assignments, data-quality alerts, workload, and trends all describe different parts of the same project risk.

Project dashboard showing release quality and workload
Review execution, defects, quality alerts, workload, and trends together before making a release decision.

The Dashboard is an important information summary entry point inside a project. It helps users quickly understand the current project's testing progress, defect status, data quality, and member workload.

One point matters especially: the Dashboard does not aggregate data across projects. It only shows data for the current project, and it summarizes the status of different Test Runs inside that same project. When a user opens the Dashboard for a project, they see that project's test execution, defects, member work, and trend information, not a whole-organization overview across every project.

This design prevents data from different products, teams, or testing scopes from being mixed together. Project owners can judge more accurately whether one specific project is moving forward in a stable way.

When to use the Dashboard

The Dashboard is useful in these situations:

  1. At the start of the day, to check which Test Runs are assigned to you.
  2. When a project owner is tracking testing progress and wants to confirm that several Test Runs inside the same project are gradually being completed.
  3. Before release, when the team needs to review risks by checking defect volume, not-run items, and data quality.
  4. Before team meetings, to understand the current project state and reduce time spent searching for data during the meeting.

The Dashboard is not meant to replace other feature pages. Its purpose is to show the important signals first, so users can decide which feature page needs deeper follow-up.

View Test Runs assigned to me

The Dashboard shows Test Runs currently assigned to the user. This is the area testers use most often, because it lets them quickly see their current execution tasks.

Steps

  1. Enter the target project.
  2. Open the project Dashboard.
  3. Review the My Test Runs or assigned Test Runs area.
  4. Choose the Test Run that needs to be executed.
  5. After entering the Test Run, update case statuses according to the actual test results.
  6. After finishing execution, return to the Dashboard and confirm how the overall progress changed.

Through this flow, testers can begin from their own tasks and still return to check whether the project has a large amount of not-run work remaining.

Project-level metrics

The Dashboard provides several project-level metrics. All of these metrics come from the current project and are not merged with other projects.

Defects

Defect metrics show the status of defects created in the current project. Project owners can use defect counts to quickly judge whether the current problem volume is too high and whether repair or retesting needs to be prioritized.

If defect counts keep increasing, testing is still finding new problems. In that situation, the team should check defect severity, fix progress, and whether the defects affect the release decision.

Assigned to me

Assigned to me helps users understand their own work items in the current project. For testers, this is the starting point for daily work. For project owners, it also helps confirm whether tasks have been clearly assigned.

Not run

Not-run data represents items in the current project that still have no test result. If the not-run count is high, testing is usually not complete, or Test Run execution planning has not been fully carried out.

Common causes include:

  1. The testing scope is too large.
  2. Test cases have not been assigned yet.
  3. The test environment is not ready.
  4. Member workload is unevenly distributed.
  5. Some Test Runs have not started yet.

Data quality

Data quality is calculated from the quality metrics in project settings. Armoury enables all quality calculations by default, so the project can check whether test data is complete from the beginning.

The purpose of data quality is to remind the team whether test cases or related data are clear enough. Low data quality may mean case descriptions are incomplete, steps are insufficient, expected results are unclear, or required fields have not been filled in.

When data quality is insufficient, testers may need to repeatedly confirm content while executing cases, and different people may interpret the case differently. Data quality is therefore not only a report number. It directly affects testing efficiency and the trustworthiness of test results.

Member workload

Member workload helps the team observe how tasks are distributed inside the current project.

If one member has too many assigned Test Runs or test items, testing progress may be delayed. If some members have almost no work items, task assignment may not be correct yet. Project owners can use this information to adjust assignments and keep testing progress more stable.

View defect tickets

The Dashboard also lists defect tickets in the current project. This area lets the team see issues that need attention before opening the full defect management page.

Steps

  1. Review defect tickets on the Dashboard.
  2. Prioritize high-severity or recently created defects.
  3. Decide whether a defect needs immediate repair.
  4. Open the defect detail page when the full content needs to be reviewed.
  5. After the fix is complete, arrange the related Test Run or test case for retesting.

The defect ticket list is useful for quick inspection. If the team needs complete defect classification, tracking, or management, they should continue into the defect feature page.

Test progress trend

The right side of the Dashboard provides a test progress trend chart for observing Test Run progress inside the current project.

The point of this chart is not only to read a single day's number. It is to see whether progress is gradually converging. Under normal conditions, as testing continues, not-run items should gradually decrease and completed items should gradually increase.

If test progress does not change for a long time, testing tasks may not have started, members may not be executing their assignments, the test environment may not be ready, or the Test Run scope may be too large. Project owners can use the trend to decide whether tasks should be reassigned, the testing scope should be reduced, or the release schedule should be adjusted.

Defect trend

The defect trend chart helps the team observe changes in defects at different severity levels inside the current project.

If low-severity defects increase, there may be many detail issues, such as UI, copy, or operation experience problems. If high-severity defects increase quickly, core features, main flows, or system stability may have higher risk.

Project owners can use the defect trend to judge:

  1. Whether defects are increasing quickly.
  2. Whether high-severity defects are under control.
  3. Whether the fix speed is keeping up with newly created defects.
  4. Whether the project is ready for pre-release confirmation.
  5. Whether the team should pause broader testing and first focus on existing problems.

Relationship with other features

Related featureRelationship with the Dashboard
Test RunThe Dashboard shows Test Runs assigned to you inside the current project.
DefectsThe Dashboard shows defect metrics, defect lists, and defect trends.
Project SettingsData quality is calculated according to the quality metrics in project settings.
Members and PermissionsMember workload helps project owners observe task distribution.
Test CasesData quality reflects whether test case content is complete.

Practical scenario

Suppose the team is preparing a new release. After entering the project, a tester first opens the Dashboard, checks the Test Runs assigned to them, and starts execution. After testing is complete, the tester updates the results, and the Dashboard's test progress reflects the current state.

Before the daily meeting, the project owner reviews the Dashboard and notices that the not-run count is still high, and the defect trend shows that high-severity defects have increased noticeably in recent days. The project owner can first check member workload to see whether someone is carrying too much work, then open defect tickets to decide which issues need priority fixes.

If data quality is also low, some test cases may have incomplete descriptions. The team should complete the necessary content before asking members to continue execution. Otherwise, even if the number of executed tests increases, the results may still be unreliable.

The value of the Dashboard is that it lets the team judge Test Runs, defects, data quality, and member workload in one view inside the same project. It is not a cross-project report. It is a management entry point that helps one project move forward steadily.

Projects

Quality Metrics

Use project-level quality metrics to find test cases that need missing information fixed before execution.

Quality Metrics

Quality Metrics are Armoury's project-level case checking mechanism. They help project managers, test leads, and owners quickly find test cases that need missing information filled in or may affect test execution quality.

They are not used to judge tester ability, and they do not replace human review. Instead, they turn common gaps in case data into a trackable list. As the number of test cases in a project grows, checking every case manually can easily miss cases without owners, steps, expected results, Sections, or tags. The value of Quality Metrics is that these problems can be seen in one place and then corrected on the test cases themselves.

The quality of test cases directly affects later test execution quality. When test case information is insufficient, test engineers must ask around and fill in missing context before they can test correctly. If case content is unclear, test results may become less trustworthy and can even lead the team to the wrong decision.

Where Quality Metrics are managed

Quality Metrics are located in Project Settings.

They are usually managed by these roles.

Organization owners

Organization owners can manage most projects and settings. They are suitable for defining company-level case quality rules.

Organization admins

Organization admins can help maintain project settings. They are suitable for helping teams build consistent checking standards.

Project managers

Project managers can adjust Quality Metrics for a single project. They are suitable for deciding which checks should be enabled according to that project's testing process.
Quality Metrics are project-level settings and are not counted across projects. Each project can decide which checks to enable according to its own management approach.

What happens after enabling Quality Metrics

After Quality Metrics are enabled in Project Settings, Armoury creates related data quality statistics on that project's Dashboard.

The basic workflow is:

  1. Enter the target project.
  2. Open Project Settings.
  3. Find the Quality Metrics settings.
  4. Select the quality checks that should be enabled.
  5. Return to the project Dashboard.
  6. Review data quality statistics on the Dashboard.
  7. Click the data quality block.
  8. Open the detailed case list.
  9. Find test cases that need correction.
  10. Open the case content and fill in or adjust the data.

The point of this workflow is that the Dashboard reminds, the detailed list locates, and the Test Case page fixes.

Built-in Quality Metrics

Armoury currently provides these built-in Quality Metrics:

Quality MetricCheck purpose
Cases without ownersFind active test cases without an assigned owner.
Cases without test stepsFind test cases where both structured steps and detailed steps are empty.
Cases without expected resultsFind test cases without an expected result.
Cases without a SectionFind test cases that have not been placed in a Section.
Cases without active tagsFind test cases without any active project tags.
Archived cases still in active Test RunsFind archived source cases that still exist in non-archived Test Runs.

Cases without owners

This metric finds active test cases without an assigned owner.

The owner usually represents who maintains the case. When a case has no owner, it is hard for the team to decide who should handle unclear content, outdated steps, or incorrect expected results later.

Recommended workflow:

  1. Open the data quality list.
  2. Filter for cases without owners.
  3. Assign the matching owner according to feature module or product scope.
  4. Ask the owner to confirm whether the case content needs updates.
  5. Periodically check whether new cases are still missing owners.

If the project already has clear module ownership, case owners should match that ownership as much as possible. This prevents the team from being unable to find the right maintainer during later maintenance, version updates, or requirement changes.

Cases without test steps

This metric finds test cases where both structured steps and detailed steps are empty.

Test steps are the most important execution guide for test engineers. If a case has only a title and no steps, the tester may only be able to test according to personal interpretation. This can make different testers produce different results and increase communication cost.

Recommended workflow:

  1. Open the data quality list.
  2. Find cases without test steps.
  3. Confirm whether the case should still be kept.
  4. If it should be kept, add executable test steps.
  5. If it is no longer needed, consider archiving it.

If many cases have no steps, those items are usually still closer to a requirement list or testing idea than formal executable test cases.

Cases without expected results

This metric finds test cases without an expected result.

The expected result defines what counts as passing and what counts as failing. Without an expected result, testers may complete the operation but still be unable to judge accurately whether the result is correct.

Recommended workflow:

  1. Open the data quality list.
  2. Find cases without expected results.
  3. Return to requirements, specifications, or the product screen to confirm the correct behavior.
  4. Add a clear expected result that can be judged.
  5. Avoid vague descriptions such as "normal," "successful," or "shown correctly."

A good expected result should allow different testers to make the same judgment under the same conditions.

Cases without a Section

This metric finds test cases that have not been placed in a Section.

Sections are an important classification tool inside a Test Group. They are usually used to organize modules, pages, flows, or feature areas. If cases are not placed in Sections, later search, maintenance, and Test Run planning become harder.

Recommended workflow:

  1. Open the data quality list.
  2. Find cases without a Section.
  3. Decide which feature or flow the case belongs to.
  4. Move the case into the correct Section.
  5. If no suitable Section exists, adjust the Section structure first, then move the case.

A case without a Section is not necessarily wrong, but it has not yet been placed in a clear classification location. In large projects, that noticeably increases maintenance cost.

Cases without active tags

This metric finds test cases without any active project tags.

Tags help teams organize cases from different angles, such as feature type, platform, risk level, testing scope, or maintenance status. When cases have no tags, filtering and classification become inconvenient in a large case library.

Recommended workflow:

  1. Confirm which active tags exist in the project.
  2. Open the data quality list.
  3. Find cases without active tags.
  4. Add tags according to the project tag rules.
  5. If existing tags do not fit, adjust tag planning first.

Tags do not need to be complex from the beginning. In practice, start with a small number of common tags, such as platform, module, and risk level, then expand them according to team needs.

Archived cases still in active Test Runs

This metric finds archived source cases that still exist in non-archived Test Runs.

When a source test case has been archived but still exists inside an active Test Run, it can create management confusion. Testers may execute cases that should no longer be used, or they may make incorrect judgments when reporting results.

Recommended workflow:

  1. Open the data quality list.
  2. Find archived cases that still exist in active Test Runs.
  3. Confirm whether the case still needs to be executed.
  4. If it is not needed, adjust the related Test Run.
  5. If it is still needed, confirm whether a new valid case should be created.

This metric is especially useful after version updates, feature retirement, or flow refactoring. It prevents old cases from continuing to affect new testing activity.

Practical scenario

Suppose a project is about to enter release regression testing. The project manager opens the Dashboard and sees that data quality reports several cases missing steps and expected results.

The team should not create the Test Run immediately, because test engineers will likely need to repeatedly ask product managers or developers for clarification during execution. The better approach is to click data quality, open the detailed case list, and review the problem cases one by one.

The team can handle the issues like this:

  1. Assign cases without owners to the matching module owners.
  2. Ask owners to add executable steps to cases without test steps.
  3. Confirm requirements or product behavior for cases without expected results.
  4. Move cases without Sections into the correct feature Sections.
  5. Add existing project tags to cases without tags.
  6. For archived cases that still exist in active Test Runs, confirm whether to remove or reschedule them.

After the fixes are complete, return to the Dashboard and confirm whether data quality improved. The resulting Test Run will be easier for testers to understand, and the team can reduce incorrect execution and repeated communication.

The core value of Quality Metrics is not making numbers look good. It is making test cases easier to understand, execute, and maintain. When case quality is stable, later test execution, defect reporting, and release decisions become more reliable.

Projects

Dashboard Data Rules

Read project Dashboard counts, lists, trends, quality checks, and member workload according to the data each widget actually uses.

Dashboard Data Rules

The Dashboard summarizes only the current Project. It does not combine projects. Its cards, grids, and charts can also change scope when a Test Run is selected, so read the current selection before comparing numbers.

Test Run scope

The Test Run grid contains all active Test Runs that are not completed in the current Project. It is not limited to runs assigned to the signed-in user.

Select a row to scope the Dashboard to that Test Run. The defect, assignment, not-run, activity, progress, and workload data then use that run where applicable. Clear the selection to return to all eligible runs.

The My column is personal even though the row list is not. It shows the number of not-run cases assigned to you and the total number of cases assigned to you in that run.

Summary cards and lists

AreaWhat is counted
DefectsDefects that are currently open. With one run selected, only defects linked to that run are included. With no run selected, open defects without a Test Run are also included.
Assigned to MeRun-case items assigned to you whose current status is Not Run. It is not a count of all your assignments.
Not RunRun-case items whose current status is Not Run. One source Test Case added to two runs is two run-case items.
Data QualityThe sum of all enabled quality-rule matches. A case matching several rules contributes once to each rule.

The Defect count uses all matching open defects, while the visible defect grid shows at most eight. Recent Activity also shows at most eight entries, assembled from up to four recent Test Runs and up to four displayed defects. A short grid therefore does not mean the total count is equally small.

The defect grid includes issue ID, title, Test Run, status, severity, days since update, and aging. Aging starts as normal, becomes watch after three days, warning after seven days, and critical after fourteen days. High- or critical-risk defects reach warning after three days and critical after seven days; risk is high when either severity or priority is high or critical.

Test progress trend

The progress chart tracks the current state of run-case items using these statuses: Not Run, Passed, Failed, Blocked, Skipped, and Deprecated.

Each run-case enters the series as Not Run on its creation date. Later Test Results change its state from their result date onward. The chart therefore describes the selected run or the currently eligible run set over time; it is not a chart of source Test Case status.

The chart is rebuilt only from run-cases that still exist in the Project's currently active, non-completed Test Runs. Removing a run-case, completing a run, or archiving a run removes that item from the entire replay, including earlier dates. Treat the chart as an operational view of the current run scope, not an immutable execution audit.

Defect trend

The defect trend groups defects by priority and builds a cumulative series from their open dates. Its input is the set of defects that are open now. When a defect is closed, it no longer contributes to earlier points in this chart either.

Use this chart to inspect the age and priority mix of the current open backlog. Do not treat it as a permanent historical record of every defect that was opened and later closed.

Exact data-quality checks

All six checks are enabled when Project Settings are first created. A project manager can turn individual checks off.

CheckCurrent rule
Cases without ownersActive Test Cases whose Owner is empty.
Cases without test stepsActive Test Cases whose persisted steps and text_step values are both empty. A Step Template may have been materialized into steps when the case was last saved, but later template changes are not recalculated for this query. A Text Template linked to Step Details does not fill the local text_step value.
Cases without expected resultsActive Test Cases whose persisted local expected_result value is empty. A linked Text Template does not fill that local value for this query.
Cases without a SectionActive Test Cases whose Section is empty.
Cases without active tagsActive Test Cases with no active Project Tag. Archived tags do not satisfy the check.
Archived cases still in active Test RunsArchived source Test Cases that remain in a Test Run whose status is In Progress. Other non-completed run statuses are not included by this rule.

The Data Quality card is the sum of enabled rule counts, not a count of unique Test Cases. Select an enabled metric to load its full case list. Loading that list requires permission to view Test Cases; a disabled metric cannot be opened.

Member workload

Member Workload appears only to users with the project permission to view member workload. It includes active organization users who also have active membership in the current Project.

For each member, the workload total is:

Not Run + Failed + Blocked + Open Defects

Passed, Skipped, and Deprecated assignments are excluded from that workload total. The separate total-assigned value still includes every assigned run-case status. The workload grid follows the selected Test Run when one is selected.

Open Defects are attributed only through the defect's primary Assignee field. Additional people recorded as other defect assignees do not increase their workload count.

Practical reading order

  1. Check whether a Test Run row is selected.
  2. Compare the summary-card total with the corresponding limited grid.
  3. Use Assigned to Me for unstarted personal work, not all personal work.
  4. Interpret the progress chart as run-case state history.
  5. Interpret the defect chart as a reconstruction of the currently open backlog.
  6. Open individual quality metrics when the summed Data Quality number needs investigation.
Projects

Archive a Project

Archive a project that has ended so it leaves daily work and releases active project quota.

Archive a Project

When a project is confirmed to no longer be used, it can be archived. Archiving a project is Armoury's lifecycle action for a project that has ended. It is not a temporary hiding tool and not a long-term preservation workflow. It moves a completed, deactivated, retired, or no-longer-operable project out of daily work.

In Armoury, product users archive projects instead of manually deleting them. After a project is archived, it can still be found in the system, but users cannot directly enter and operate it as active work. If the project still needs to be used again, a manager can unarchive it and return it to active state.

Archive should be used for projects that are confirmed as no longer needed. Do not archive a project only because it has no testing work this week or this month. Also do not treat archive as a long-term preservation guarantee. If your organization has retention or cleanup policies, confirm what must be exported or backed up before archiving.

What archiving means

Archiving a project means the project has entered an ending process. It is for projects the team should no longer use, so the Projects list stays clean and members do not accidentally enter old work and continue adding Test Cases, creating Test Runs, or changing data that should no longer move.
After a project is archived, it has these properties.

It can still be found

Archived projects do not disappear immediately. Managers can still find archived records through the relevant management or archive workflow. This gives the team a chance to unarchive the project if the archive was premature or more work is truly needed.

It cannot be directly operated

After archive, users cannot directly enter the project for normal work. Test Groups, Test Cases, Test Runs, Defects, and Project Settings are no longer active editing surfaces. If users need to inspect or operate the project again, it should be unarchived first.

It releases active project quota

After a project is archived, the active project quota it used is released. The organization can use that released capacity to create a new project. This matters when a plan limits how many active projects the organization can have.

It is not a deletion workflow

Armoury does not provide ordinary users with a manual project delete action. Archive is the supported lifecycle action from the product UI and API. However, archive is also not a promise that project data should be kept forever. Before archiving, confirm whether project data still needs export, backup, audit review, or handoff according to your team's policy.

When archiving is appropriate

Archive a project when it has clearly ended and the team accepts that it should leave active operations.

SituationArchive?Explanation
Product has been shut downYesThe product is no longer operated and no new Test Runs are needed.
Old system version has been retiredYesA new version replaced the old one and the old project is no longer maintained.
One-time event project has endedYesThe event is complete and no new test content will be added.
Custom delivery project has closedYesDelivery is complete and the project is no longer used internally.
Project temporarily has no testing workNoIt may resume later and should not be removed from active state.
Team only wants a cleaner listNoArchive is not classification. Use Product Lines first.

Use a simple rule: if the project may still be maintained, retested, extended with more cases, or frequently reviewed as a complete workspace, do not archive it. Archive should be reserved for projects that are confirmed to be finished and no longer used.

When not to archive

Archiving can release quota, but it should not be used as a temporary pause or as a replacement for data preservation.

Product development is only paused

A paused development schedule does not mean the product lifecycle has ended. If development may resume later, the Test Cases and Test Runs still have value. Keep the project active.

The project still needs frequent historical lookup

If the team, managers, customers, or audit process still need to review test records frequently, do not rush the archive. Archived records may remain findable, but normal project operation is blocked. If data has long-term preservation value, export or back it up according to your policy before archiving.

The list only feels messy

Archive is not a project classification tool. If the problem is that there are many projects and users cannot find the right one, use Product Lines first. Product Lines help manage projects that are still in use. Archive is for projects that have ended and should no longer be used.

Testing is only inactive for a short period

No test schedule does not mean the project is unused. If the team may create Test Runs or maintain cases later, do not archive it.

What to check before archiving

Because archived projects leave active work and may be subject to team retention or cleanup policy, project owners should complete basic checks before archiving.

Check itemRecommended action
Is the project truly no longer used?Confirm the product, version, event, or delivery project has ended.
Are there unfinished Test Runs?If results still need updates, do not archive yet.
Are there unresolved Defects?Confirm they are closed or moved into another process.
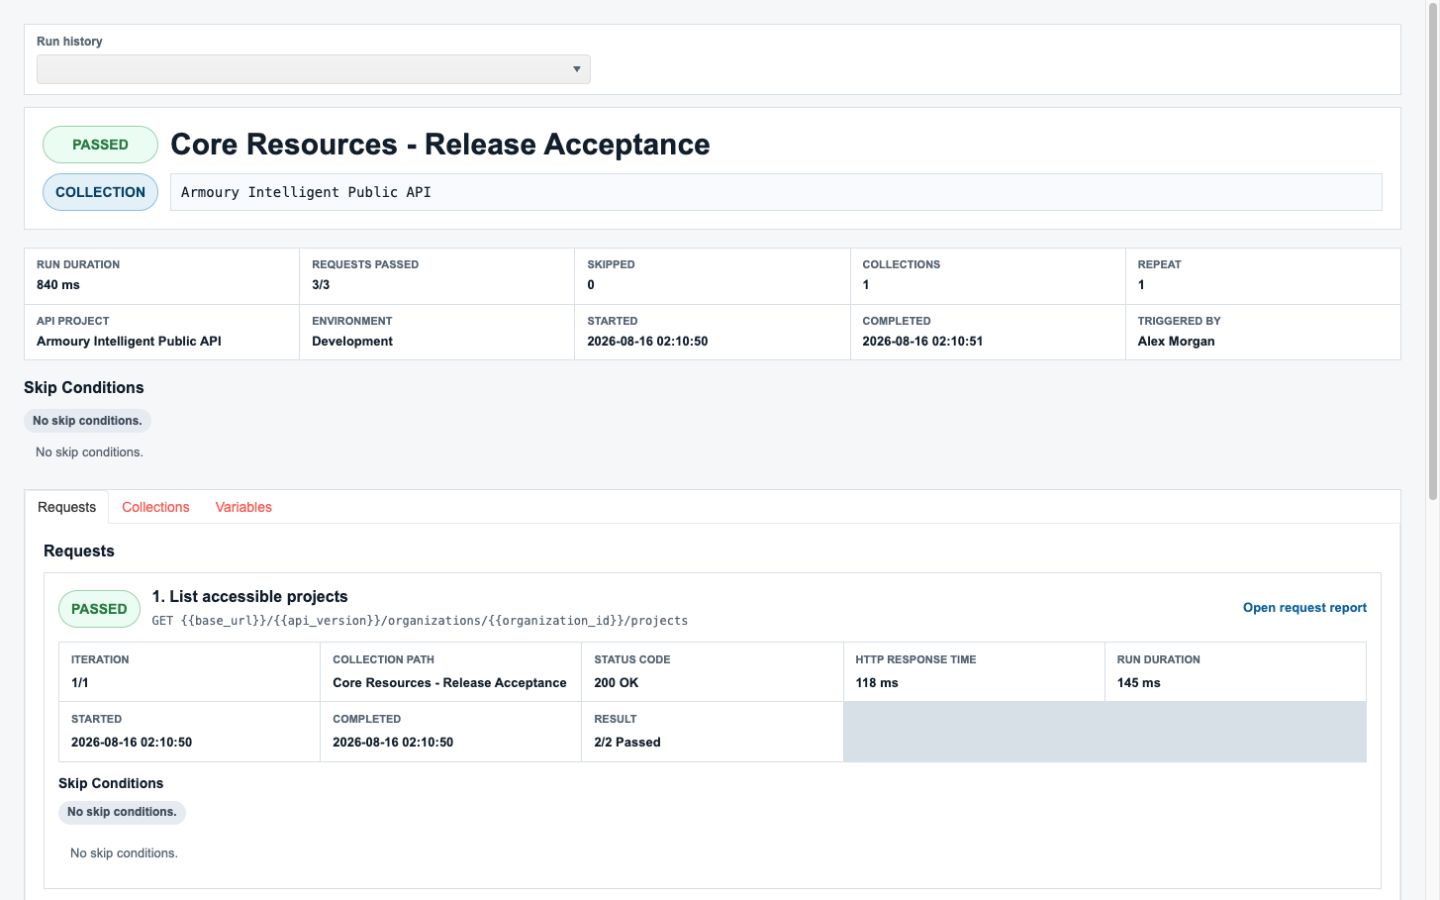
Does test data need to be kept?Export or back up required records before archiving.
Do members still need frequent lookup?If yes, archive may be too early.
Is this only a temporary pause?If the project may restart, keep it active.

The archive decision is not only about whether the project is being used today. The key question is whether the project will be needed in the future. If the answer is yes, do not use archive yet.

How to archive a Project

The archive action is available from the project summary in the Projects list. Start from the Projects list, then open the summary for the project you want to archive.

Step 1: Open the Projects list

Click the project entry point in Armoury's top bar and open the Projects list.

Before archiving, confirm the project name, project status, and whether any team is still using it. This reduces the chance of archiving an active project by mistake.

Step 2: Open the project summary

In the Projects list, click anywhere in the project table row except the project name.

This opens the project summary. Clicking the project name usually opens the project itself. If your goal is to review the summary and archive the project, click another area in the row, such as a project metric column or empty row space.

Step 3: Archive the project

In the project summary, find the archive project option and run the archive action.

After archive completes, the project leaves normal active operation. Users cannot directly enter it, modify Test Cases, create Test Runs, update Defects, or adjust Project Settings until it is unarchived.

How to find and restore after archive

Archived projects can still be found, but that does not mean they can be used directly. If a manager discovers that the project must be reviewed or operated again, they should unarchive it first.

After unarchive, the project returns to active state. Users can then enter it again and work with Test Groups, Test Cases, Test Runs, Defects, and Project Settings.

Unarchive should be treated as an exception, not a daily workflow. Archive assumes the project is no longer used. If a project often needs to be unarchived, it probably should not have been archived.

Relationship with plan quota

Armoury plans may limit the number of active projects an organization can create. When the organization approaches the limit, managers can archive projects that are no longer used to release active project quota.

This is suitable for project replacement. For example, if an old product is shut down and a new product needs a testing project, the team can archive the old project and use the released quota for the new project.

Quota release should not be the only reason to archive. If a project still has long-term value or may resume later, do not archive it just to create capacity. First confirm data risk, preservation needs, and the replacement path.

Practical scenario

Suppose a company has an Old Member Center project for the old member system's Test Cases and Test Runs. Later, the new member center is officially launched. The old member center is no longer maintained, no longer receives new features, no longer fixes defects, and will not have new Test Runs.

The project owner first confirms that Test Runs are complete, unresolved Defects are closed or moved, and required data has been preserved. After confirming the project will no longer be used, they open the project summary from the Projects list and archive the project.

After archive, the Old Member Center releases its active project quota. The team can use that quota for the New Member Center or another product project. If the manager later discovers that the old project needs short-term review, they can unarchive it before entering and operating it.

By contrast, if the Old Member Center simply has no testing tasks for the next month or two but may return for maintenance work, it should not be archived. Keep it active or use Product Lines to classify it. Archive is for projects that have truly ended.

Projects

Project Members and Permissions

Manage who can access a project and what each member can do inside it.

Project Members and Permissions

Project Members and Permissions is the settings page for managing who can access a Project and what members can do after they enter it.

In Armoury, joining an organization does not mean a member can automatically see every Project. Receiving an organization role does not change that boundary: organization roles control organization-level actions only. Unless the member is the Organization Owner or an enabled KEENLITY support user, they need an active membership in each regular Project they use.

This design lets the organization manage accounts centrally while each Project keeps its own access boundary. For example, the same company may have separate Projects for the public website, admin console, and mobile app. Different teams only need to see the Projects they are responsible for. They should not automatically receive every Project's data just because they joined the organization.

When to Configure Project Members

Use Project Members and Permissions when any of these situations occurs:

  1. A new member has joined the organization but cannot see any Projects.
  2. A tester needs to start writing or executing test cases for a Project.
  3. Product, development, or test leads need to review testing data inside a Project.
  4. A member should only view data and should not edit test cases or test results.
  5. A Project needs more specific roles, such as external viewer, defect reporter, or test case maintainer.
  6. A member who used to participate in the Project has left the team and should lose Project access.

The point of Project Members and Permissions is not only to add people to a Project. It is to give each person just enough capability to complete their work.

Open Project Members and Permissions

Use this workflow:

  1. Enter Armoury.
  2. Enter the target Project from the top bar or the Project list.
  3. Find the Project Settings or management entry inside the Project.
  4. Open Project Members and Permissions.
  5. Review the list of members currently added to this Project.

This page is usually managed by Project owners or members with the required Project governance permissions. An organization Admin does not automatically receive access to every Project and must also be a Project member. Ordinary testers or viewers usually do not need to manage Project members.

Add a Project Member

To let a member access a Project, add that person to the Project member list.

Use this workflow:

  1. Enter the target Project.
  2. Open Project Members and Permissions.
  3. Click Add Member.
  4. Select the organization member to add to this Project.
  5. Choose either a shared Project role or a complete set of custom permissions for that member.
  6. Confirm and submit the setting.
  7. Return to the member list and confirm the member appears in the Project member list.

After this is complete, the member can see the Project in their own Project list and operate according to the permissions they were granted.

If the member still cannot see the Project, confirm:

  1. Whether the member has joined the organization.
  2. Whether the member has been added to the Project.
  3. Whether the member uses the intended shared role or custom permission set.
  4. Whether the Project is still active.

Choose One Permission Source

Every ordinary Project member who is not an owner uses exactly one permission source. Armoury does not merge a Project role with personal exceptions. Project owners use the separate full-access layer described below.

Shared Project Role

When adding a Project member, you can apply a default role directly. Default roles cover most common situations, such as managing a Project, maintaining test cases, executing tests, and viewing data.

Each Project has its own roles. A shared role works like a group: every member assigned to it has the same permission set. Adding or removing a permission from the role affects all of those members immediately. A role created in one Project is not shared with another Project.

If the default roles do not meet the actual need, a Project owner or member with role-management permission can create a Project-specific role. For example, an external collaborator may only need to view test results and should not be able to add, archive, or edit test cases. In that case, create a more restricted shared role.

Custom Permissions

Use custom permissions when one person needs a complete permission set that should no longer follow a shared role. Every checked permission is allowed, and every unchecked permission is denied. There is no additional role permission underneath the custom set.

After a member switches to custom permissions, later changes to their former role do not affect them. When switching the member back to a shared role, Armoury requires explicit confirmation that the role will replace the custom set. Confirming the change deletes the stored custom permissions; future changes to the selected role then apply normally.

Common permission directions include:

Use caseRecommended permission direction
Project ownerIndependent full Project access; no role or custom set applies during ownership
Test case maintainerCan create, edit, and organize test cases
Test executorCan enter Test Runs and update test results
Development or product memberCan view test cases, test results, and Defects
External viewerCan only view required content and should not edit data

The principle is: do not grant too much access, but do not leave members unable to complete their work because permissions are too narrow.

Difference Between Project Roles and Organization Roles

Organization roles and Project roles are different concepts in Armoury.

An organization role is the member's identity across the whole organization. It decides what they can do at organization level, such as managing organization members, creating Projects, or changing organization settings. It does not grant permissions inside a regular Project.

A Project role applies only to one Project. It decides what that member can do inside that Project, such as managing test cases, Test Groups, Test Runs, Defects, or Project Settings.

Even if a Project role and an organization role have the same name, they are separate permission sets. For example, a member may be an Admin in the organization but only have Viewer access in one Project. Another member may have an ordinary organization role but be an owner of a specific Project.

There is no organization-role fallback for regular Project permissions. An ordinary non-owner Project membership must explicitly use either one Project-local role or a complete custom allow set. Organization Admin and other organization roles require Project membership like ordinary members. The Organization Owner and enabled KEENLITY support users are deliberate global system exceptions and have full access to regular and API Projects without ordinary Project membership. This bypass does not make them Project owners.

Multiple Project Owners

A Project can have more than one owner and must always keep at least one active owner. If no owner is selected when a regular or API Project is created, the creator becomes its owner.

Ownership is an independent full-access permission layer, not a shared role. While a member is an owner, their role or custom permission source does not apply and they do not need a separate role. Owners can perform all governance and business operations inside their regular or API Project.

Direct owner changes protect the Project without requiring the administrator to preselect a successor in every case. If an authorized active organization member who is not acting as a KEENLITY support user removes the only other owner, the actor automatically becomes an owner. If the only owner tries to remove their own ownership, Armoury retains that ownership. A KEENLITY support user cannot become the automatic successor, so another active owner must be assigned first.

Suspending a member, removing them from the organization, or having them leave is an organization-level offboarding flow rather than a direct owner change. Those operations may require another active owner to be assigned first; do not rely on automatic takeover during offboarding.

Relationship With Other Features

Project Members and Permissions directly affects several features.

Project List

Members only see accessible Projects after they are authorized. If a member reports that their Project list is empty, the first place to check is usually Project member settings.

Test Case Management

Whether a member can add, edit, archive, or organize test cases is controlled by Project permissions. Test case maintainers need enough edit access, or they cannot complete case design and maintenance work.

Test Execution

Whether a member can update test results, assign testing items, or view progress also depends on permissions inside the Project. If a tester can only view data but cannot update results, return to Project Members and Permissions and adjust the role.

Defect Management

Whether a member can view or create Defects should also follow the Project permission design. Development and product members usually need to view Defects and test results, but they may not need to edit test cases.

Project Settings

Project Settings should usually be reserved for Project owners or members with the corresponding Project permission. An organization Admin is not sufficient by itself. If ordinary members do not need to maintain Project structure, do not grant settings permission. This avoids accidental changes that affect the whole Project.

Management Recommendations

In practice, start with shared default roles and avoid creating too many special roles or custom member sets at the beginning. Use custom permissions only when the member should intentionally stop following a shared role.

Recommended practices:

  1. Assign one or more owners; before organization-level offboarding, confirm that each affected Project still has another active owner.
  2. Give testers only the permissions needed to complete their work.
  3. Start development and product members with view access, then adjust when needed.
  4. Use view-oriented permissions for external members whenever possible.
  5. Review the Project member list regularly and remove people who are no longer participating.
  6. When a member cannot see a Project, first check whether they have been added to the Project, not only whether they have joined the organization.
  7. Keep shared role names clear so future Project owners understand their purpose.
  8. Before switching custom permissions back to a role, review the permission difference and confirm that deleting the custom set is intended.

The goal of permission management is not to restrict the team. It is to let each person complete their work safely and clearly.

Practical Scenario

Suppose a company is creating a Member Center Project. The organization admin has already invited the product manager, testers, and developers into the organization, but after signing in to Armoury, they still cannot see the Member Center Project.

One of the Project owners needs to enter the Member Center Project, open Project Members and Permissions, and add the relevant members to the Project.

They can use a setup like this:

Member typeRecommended permission source
Product managerShared review role with test case, result, and Defect view permissions
TesterShared tester role for case maintenance and result updates
DeveloperShared read-only role for results and Defects
Test leadProject owner with independent full Project access
External collaboratorRestricted shared role, or a complete custom set for a true individual exception

After configuration, each member can see the Member Center Project in their own Project list and operate within their work scope.

This arrangement lets the product manager understand testing progress, testers own cases and execution, developers review Defects and test results, and external members avoid unnecessary edit access. If Project staffing changes later, admins only need to return to Project Members and Permissions and adjust access. They do not need to reorganize the entire organization's member structure.

Projects

Project Archive Management

Manage project records that have left daily workflows and restore them only when they are needed again.

Project Archive Management

Archive Management separates inactive Groups, Sections, Test Cases, Tags, Templates, and Test Runs from daily lists while retaining recovery context. Select an item to inspect its ownership and dependencies before restoring it.

Archive management with recoverable project records
Inspect archived records by type and verify the selected item before restoring it to active work.

Project Archive Management is Armoury's way to manage records that have left the daily operating scope. During Project maintenance, not every record should stay active forever. When a product is no longer maintained, the testing scope changes, test cases become obsolete, or Project tags are no longer used, archive lets those records leave the main workflow.

Archive is not only a cleanup action. It affects data access, quota usage, and whether the record can be made active again later. Before archiving, managers should confirm that the record is truly no longer needed in daily work.

Records That Can Be Archived

In Armoury, Projects can be archived. Common Project maintenance records can also be archived:

Archived itemSuitable situation
ProjectThe product is no longer maintained, a customer engagement has ended, or the Project should no longer be operated
Test GroupA testing scope is no longer maintained, but the historical structure should remain understandable
Test CaseA feature has been retired, the case is obsolete, or the case should no longer appear among active cases
Project TagThe classification rule has changed and members should no longer apply the old tag
Project TemplateShared reusable case content should no longer be selected for new cases, while existing references still need to resolve

The purpose of archive is to move data out of active state. Archived data should no longer be treated as part of daily test management, case maintenance, or tag classification.

State After Archive

After a record is archived, it leaves its normal active workflow. Project-scoped Archive Management helps managers review archived Test Groups, Test Cases, Project Tags, and Project Templates. Archived Projects are managed through the Project list, Project summary, or the relevant Project archive flow.

Archived data is no longer used like active data:

  1. Archived records cannot continue to be used in the original active workflow.
  2. To use the record again, restore or unarchive it first.
  3. When restored, the record returns to its original context when that context is still available.
  4. Archive should not be treated as permanent storage.
  5. If an organization has retention, export, backup, or cleanup requirements, confirm them before archiving.

This means archive is not a temporary storage area. It is closer to the exit stage of a record's lifecycle.

How to Archive

Archive usually starts from the page that manages the record.

Step 1: Confirm the Archive Level

Before archiving, decide which level should leave active work.

Use these principles:

  1. Archive a Project when the entire product or customer engagement is no longer used.
  2. Archive a Test Group when a group of testing scope is no longer maintained.
  3. Archive individual Test Cases when only a small number of cases are obsolete or no longer applicable.
  4. Archive Project Tags when classification rules have changed.
  5. Archive Project Templates when shared reusable content should no longer be selected for new test cases.

Do not archive an entire Test Group just because a few Test Cases are obsolete. Do not archive a Project only because it temporarily has no testing work. The higher the archive level is, the larger the impact is.

Step 2: Archive From the Original Feature Page

Different records are archived from different places:

  1. Projects can be archived from the Project list or Project summary.
  2. Test Groups can be archived from Test Group management.
  3. Test Cases can be archived from the Test Case management workflow.
  4. Project Tags can be archived from Project tag management.
  5. Project Templates can be archived from Project template management.

Before archiving, confirm whether the record is still being used by recent work. This is especially important for Test Cases and Test Groups. If they are still related to active testing work, archiving too early may make follow-up status harder to trace.

Step 3: Review Data in Archive Management

After records are archived, managers can review project-scoped archived records in Archive Management. The purpose of Archive Management is to centralize archived Test Groups, Test Cases, Project Tags, and Project Templates for the current Project. Archived Projects are handled from the Project-level archive workflow.

Managers can periodically check:

  1. Which Project records have been archived.
  2. Which Test Groups have been archived.
  3. Which Test Cases have been archived.
  4. Which Project Tags have been archived.
  5. Which Project Templates have been archived.
  6. Whether any archived data needs export, handoff, or other policy handling.

Archive Management helps prevent obsolete records from staying mixed with active data for too long, which lowers maintenance cost.

Step 4: Restore When Needed

When archived data needs to be used again, restore or unarchive it from the relevant archive workflow.

After restore, records return to their original context when the parent structure and quota allow it:

  1. An unarchived Project returns to the Project list.
  2. A restored Test Group returns to its original Project.
  3. A restored Test Case returns to its original location when the parent structure is available.
  4. A restored Project Tag returns to Project tag management.

This design reduces the cost of reorganizing records after restore and helps keep the original structure intact.

Archive and Quota Usage

Archive can release active usage for quota-tracked records. This is useful when an organization is close to its plan limit. For example, if the active Project count is full, archiving a Project that is no longer used can release capacity for a new Project.

However, archive has an important limitation:

Archived data may release active usage, but archived data is not available for normal active work.

Restoring data can also require quota again. If you archive a Project to release quota, then create new Projects and use all available quota, you may not be able to unarchive the original Project immediately.

Do not use archive as a short-term way to borrow quota. Archive should be used for records that are truly no longer used or are ready to leave daily management.

Practical Scenario

Suppose a company has an old product Project called Storefront Version 2. The product is no longer maintained and no new testing work is planned. A manager can archive the Project so it leaves daily operations and releases active Project usage.

After archive, the team cannot directly enter the Project and keep working in it. If the team later needs to inspect or reactivate it, a manager must first unarchive it through the relevant Project archive workflow.

If the company creates new Projects after archive and uses all plan quota, Storefront Version 2 may not be able to return to active state immediately. The manager must release enough quota before it can be unarchived.

The most important principle of Project Archive Management is:

Archive is not temporary storage. It is the management flow before data exits daily use.

Test Library

Test Groups

Use Test Groups as the first structure layer for organizing reusable test cases inside a project.

Test Groups

The Test Groups page is the first layer of the reusable case library. Use names and descriptions that make each scope recognizable before opening its Sections and Test Cases.

Populated Test Groups workspace
Choose the Test Group that owns the reusable case scope before editing its structure.

Test Groups are the main organizing unit in Test Cases. They are used to classify test content inside the same Project by product module, feature scope, testing purpose, or release phase. When a Project is new, the number of cases may be small enough for users to find content directly from a list. But after cases grow to dozens, hundreds, or more, maintaining, finding, executing, and assigning work becomes difficult without a clear Test Group and Section structure.

In Armoury, a Test Group can be understood as the top-level container for a set of test cases. Sections are created under a Test Group, and Test Cases are created inside Sections. A Test Group is therefore not the place where cases are placed directly. It is the first classification layer used to plan the test library structure.

What Test Groups Are For

Test Groups help teams organize test content so cases are not only created, but can also be maintained and reused over time.

Common uses include:

  1. Classifying by product module
    • Examples include member management, login, payment, products, and admin management.
    • This works well for Projects whose product functions are clearly separated.
  2. Classifying by platform
    • Examples include web app, mobile app, and admin portal.
    • This works well when testing content differs significantly between platforms.
  3. Classifying by testing purpose
    • Examples include regression testing, release acceptance, and core flows.
    • This works well for teams that need to execute a stable testing scope regularly.
  4. Supporting later Test Run creation
    • The clearer the Test Group structure is, the easier it is to choose case scope when creating a Test Run.
    • Test leads can also quickly understand how many cases exist in a module and whether the area is being maintained.

Relationship Between Test Groups, Sections, and Test Cases

The basic test case structure can be understood as:

LevelDescription
ProjectManages one product, system, or business scope
Test GroupClassifies test content by module, purpose, or scope
SectionCreates more detailed case categories inside a Test Group
Test CaseRecords actual test steps, expected results, and notes

After adding a Test Group, the system does not automatically create a default Section. Therefore, in a new Test Group, users must manually create the first Section before they can start adding Test Cases.

This order matters. Many users create a Test Group and assume they can add cases directly, but Test Cases must be placed inside Sections. After creating a group, plan and create Sections immediately to avoid empty groups and confusing classification later.

Create a Test Group

Project owners, test leads, or members with permission to manage test cases usually create Test Groups.

Use this workflow:

  1. Enter the target Project
    • Enter the Project from the top Project menu or the Project list.
    • Before creating the group, confirm that the current Project is correct so the Test Group is not created in the wrong Project.
  2. Open Test Cases
    • Click Test Cases in the Project menu.
    • This page shows the Test Groups already created inside the current Project.
  3. Add a Test Group
    • Click the action button for adding a Test Group.
    • After creation, the system provides a default name first.
    • At this point, the group has been created successfully, but its name and description still need to be adjusted.
  4. Edit the group name
    • Rename the group immediately after creation.
    • The name should clearly describe the testing scope of the group.
    • Examples include Member Login and Registration, Checkout and Payment, and Admin Permission Management.
  5. Add a group description
    • The description can explain which features are included in the group.
    • It can also explain which areas are excluded, so members do not place cases in the wrong group.
    • For example: This group manages front-end member login and registration flows only. It does not include admin account management.
  6. Create the first Section
    • A new Test Group does not include a default Section.
    • Enter the Test Group and create the first Section first.
    • After the Section is created, users can start adding Test Cases.

Things to Watch When Creating Test Groups

A Test Group is the upper-level classification for test case structure, so before creating one, consider whether it really needs to be its own group. Too few groups can mix unrelated cases together. Too many groups can increase navigation and maintenance cost.

Use these principles:

  1. Do not keep the default name for long-term management
    • The system provides a default name to support fast creation.
    • Rename it immediately after creation to avoid multiple hard-to-identify groups later.
  2. Do not create a group and leave it empty
    • After adding a group, create the first Section next.
    • A Test Group without Sections cannot be used to create Test Cases.
  3. Do not use vague names
    • Avoid names such as Test One, Other, or New Feature.
    • The name should let members understand the purpose without opening the group.
  4. Plan Sections before creating many cases
    • Cases can be reorganized later, but doing so adds cost.
    • Design the Test Group and Section structure before adding or importing many cases.

Edit a Test Group

When product modules change, feature names are updated, or the original classification no longer fits, edit the Test Group.

Common edit scenarios include:

  1. Edit the name
    • When a feature name changes, the Test Group name should be updated too.
    • For example, if Member Center becomes Account Center, update the group name accordingly.
  2. Edit the description
    • When the group scope expands or narrows, the description should explain the latest rules.
    • A clearer description helps new members decide where cases belong.
  3. Organize group order
    • When the number of Test Groups increases, adjust the display order.
    • Put core features, recently maintained areas, or frequently used groups near the front.
  4. Check Section and case counts
    • The Test Group list shows how many Sections and Test Cases each group has.
    • Managers can use these counts to quickly identify whether a group has content or needs more cleanup.

Search and Order Test Groups

As a Project grows, the number of Test Groups may increase from a few to dozens. Search and ordering directly affect daily operating efficiency.

Search is useful for quickly locating a specific group. For example, entering keywords such as login, payment, or admin can help users find related test content quickly.

Ordering is useful for defining the team’s shared browsing sequence, such as:

  1. Put core flows first
    • Examples include login, registration, payment, and orders.
  2. Put recently maintained features first
    • Examples include modules being developed or accepted in the current release.
  3. Put low-frequency or old features later
    • This keeps less relevant areas from slowing down daily navigation.

The Test Group list shows each group’s Section and case counts. If a group has many cases but very few Sections, the classification may be too concentrated. If a group has no Sections or no cases, confirm whether it is still needed.

Archive a Test Group

When a Test Group is no longer used, archive it. Archiving is suitable when a feature is retired, a product module is removed, or test content is no longer maintained.

Use this workflow:

  1. Open Test Cases
    • Click Test Cases inside the Project.
    • Find the Test Group that should be archived.
  2. Confirm the group content
    • Check whether the group still has Sections or Test Cases that need maintenance.
    • Confirm whether recent Test Runs still use these cases as sources.
  3. Archive the group
    • Choose archive from the Test Group action menu.
    • After confirmation, the group enters archived state.
  4. Manage after archive
    • Archiving is not a daily classification method. It is for content that is no longer used.
    • If the group is only temporarily out of scope, do not archive it immediately.
    • Do not treat archived data as the team’s long-term preservation workflow. Complete any required backup, export, or transition work before archiving.

Practical Scenario

Suppose an e-commerce Project is newly introduced into Armoury. The test lead can create the following Test Groups in Test Cases:

Test GroupPurpose
Members and LoginManage registration, login, forgot password, and member profile
Product BrowsingManage product lists, product details, search, and filtering
Shopping CartManage adding to cart, quantity changes, and removing products
Checkout and PaymentManage shipping information, payment methods, and order creation
Admin ManagementManage product maintenance, order management, and permission settings

Using Checkout and Payment as an example, after the group is created, the system first generates a default name. The test lead should immediately rename it to Checkout and Payment and add a description, such as: This group manages test cases from entering checkout from the cart through payment completion and order creation.

Because the system does not automatically create a Section, the lead must create the first Section first, such as Shipping Information. After the Section is created, the team can start adding Test Cases such as Complete a home-delivery order as a signed-in member, Pay successfully by credit card, and Show an error message when payment fails.

As cases increase, the team can create more Sections such as Payment Methods, Coupons, and Order Creation. Even after the group accumulates many cases, members can still use the clear Test Group and Section structure to quickly find the test content they need to maintain or execute.

Test Library

Sections

Use Sections inside a Test Group to organize, navigate, and maintain test cases.

What Is a Section?

A Section is an important structure inside a Test Group for organizing test cases. When the number of test cases grows, relying on a single list quickly leads to problems: cases become hard to find, classification becomes unclear, and maintenance cost rises.

Armoury provides a multi-level tree structure so teams can organize test cases by feature module, user flow, testing purpose, platform difference, or product scope.

For testers, Sections are the entry point for quickly finding test cases. For managers, Sections are an important tool for keeping the test library structure clear.

Inside a Test Group, test cases belong under specific Sections. After users enter a Test Group, they can use the Section list on the left to switch between Sections and review the test cases inside each Section.

New Test Groups do not automatically include a default Section. After creating a Test Group, users must create the first Section before they can create and organize test cases.

Section Usage Principles

Armoury supports a multi-level tree structure, so Sections can be created as root nodes, child nodes, and sibling nodes. This lets teams build flexible classification that fits different products and testing scenarios.

However, deeper and larger Section structures are not automatically better. Too much subdivision makes testers spend more time finding cases and makes later maintenance harder.

Based on KEENLITY's practical experience, one Test Group should generally not exceed 50 Sections. If a Test Group already has more than 50 Sections, it usually means the group is carrying too much scope. In that situation, consider creating another Test Group instead of continuing to put everything into the same group.

In daily use, users can click a Section node on the left to jump directly to that Section. This is useful when browsing test cases, confirming classification, or switching quickly between functional areas. In other words, Sections are not only the classification structure for test cases. They are also the navigation entry that helps testers locate cases quickly inside a Test Group.

SituationRecommended handling
Few Sections and concentrated casesUse a single Test Group
Sections are increasing but still understandableAdjust Section names and hierarchy
More than 50 SectionsConsider splitting into another Test Group
Different product scopes are mixed togetherCreate a new Test Group to manage them separately
One feature has multiple subflowsUse child nodes for organization

Open Section Management

Section management happens inside a Test Group. Enter the target Project first, then open Test Cases and choose the Test Group to manage.

Use this workflow:

  1. Enter the Project.
  2. Click Test Cases in the menu.
  3. Enter the target Test Group.
  4. Find the Sections area on the left side of the screen.
  5. Click the settings icon at the upper right of the Sections area.
  6. Open Section Management.

Section Management is the main place for maintaining the Section structure. When you need to add, edit, move, or archive Sections, start from this page.

Add a Root Node

A root node is the first layer of the Section tree. When a Test Group does not have any Sections yet, teams usually create a root node first as the starting point for later classification.

Use this workflow:

  1. Open Section Management.
  2. Choose Add Root Node.
  3. Enter the Section name.
  4. Add a Section description.
  5. Save the setting.

Root nodes are suitable for major functional areas, such as Members, Login, Cart, Checkout, Reports, and Notification Center.

When creating a root node, keep the name clear, short, and specific. Do not use vague names such as Other, General Features, or Test Use. These names may seem convenient early on, but later they make it hard for the team to decide where test cases should belong.

Add a Child Node

A child node is the next layer under an existing Section. Use child nodes when a root node still needs clear separation by subfeature or flow.

Use this workflow:

  1. Select the target node in Section Management.
  2. Choose Add Child Node.
  3. Enter the child node name.
  4. Add a description.
  5. Save the setting.

For example, under Members, you can create child nodes such as Registration, Login, Forgot Password, and Profile. This keeps test cases from all being piled directly under Members and lets the team organize them by actual function.

Child nodes are useful when the feature scope is clear and the number of cases is increasing. If a Section only has a small number of cases, do not rush to split it into child nodes. Otherwise, the structure may become too fragmented.

Add a Sibling Node

A sibling node is a Section at the same hierarchy level as the current node. Use Add Sibling Node when you need another parallel classification.

Use this workflow:

  1. Select a node in Section Management.
  2. Choose Add Sibling Node.
  3. Enter the node name.
  4. Add a description.
  5. Save the setting.

For example, if the current node is Login and you need to add Registration and Forgot Password, those nodes usually belong at the same level. Sibling nodes keep the classification logic consistent and make browsing easier for later users.

Edit Section Information

After clicking a Section node, the editor on the right shows that Section's editable information.

You can manage:

  1. Section name.
  2. Section description.
  3. Section location.
  4. Moving the Section under another node.

The Section name should let users understand its purpose immediately. The Section description can explain the scope, such as which cases are included, which cases are excluded, or what the team should watch for during maintenance.

Descriptions are especially important in larger teams. Different members may understand a functional scope differently. Without a clear description, teams can easily create duplicate cases, place cases in the wrong location, or leave maintenance responsibility unclear.

Move a Section

When the Test Group classification needs adjustment, use the Section editor to move a Section under another node.

Common situations include:

  1. There are too many root nodes and they need a clearer parent classification.
  2. A small feature has grown into a full module and needs a different hierarchy.
  3. The team has redefined how testing should be classified.
  4. Product functions have been reorganized and the old classification no longer fits.

Before moving a Section, check whether it already contains many test cases. After the Section location changes, users will also see a different classification in the left sidebar. If the team is currently testing, notify related members first so testers do not lose track of where cases moved.

Archive a Section

When a Section is no longer used, archive it. Archive is suitable when a feature is retired, classification has been reorganized, or the Section no longer needs to appear to users.

When archiving a Section, pay special attention to whether it contains test cases.

If the Section has no test cases, it can be archived directly.

If the Section has direct test cases, Armoury requires a default destination Section. After archive, the test cases directly under the archived Section are moved to the selected default Section. Child Sections are handled by the Section archive workflow so the useful substructure can remain manageable.

This design prevents test cases from losing their location because a Section was archived. Archiving a Section does not delete test cases. It removes a classification that is no longer used while keeping cases in a manageable location.

Before archiving, confirm:

  1. Whether the Section is truly no longer used.
  2. Whether the test cases under it need to be kept.
  3. Whether the default Section is a suitable new destination.
  4. Whether cases should be organized before archiving the Section.
  5. Whether members maintaining the Test Group should be notified.

Review Test Cases in a Section

Under the Section editor, Armoury shows a small set of test cases from that Section for quick reference. This area shows only five test cases. It is not meant to replace the full list. Its purpose is to help managers quickly understand what kind of content is roughly placed under the Section.

If you need to see all test cases in the Section, use the quick jump action.

Use this workflow:

  1. Select the target Section in Section Management.
  2. Review the case reference area under the Section editor.
  3. Click the arrow button beside Cases in this Section.
  4. The system jumps back to that Section inside the Test Group.
  5. The page shows all test cases under that Section.

This is useful when organizing a large number of test cases. Managers can adjust structure in Section Management, then quickly return to the case list to confirm whether content is in the correct location.

Practical Scenario

Suppose an e-commerce Project has a Test Group called Frontend Functional Testing. At first, the team creates a few simple Sections: Members, Products, Cart, and Checkout.

As product functions grow, Members starts to accumulate many test cases, including Registration, Login, Forgot Password, Third-Party Login, and Profile Editing. If all cases stay directly under Members, testers must search through many cases every time, and maintenance efficiency drops.

A better approach is to open Section Management, keep Members as the root node, and add these child nodes:

  1. Registration.
  2. Login.
  3. Forgot Password.
  4. Third-Party Login.
  5. Profile.

Then move the cases originally under Members into the corresponding child nodes. If Third-Party Login is later retired, archive that Section. If it still has test cases, first choose a default destination, such as moving them under Login, so the cases do not lose their manageable location.

When Frontend Functional Testing grows to more and more Sections, especially more than 50, the team should not keep stacking everything into the same Test Group. Consider splitting it into new Test Groups such as Member Functional Testing, Product Functional Testing, and Checkout Flow Testing. This keeps each Test Group's scope clearer and makes later Test Run planning and case maintenance more stable.

The point of Sections is not to make classification complicated. The point is to help the team find cases faster, maintain cases more easily, and keep a clear structure when the product changes.

Test Library

Test Cases

Create, find, edit, sort, copy, move, and archive Test Cases within the structure and permission boundaries Armoury actually enforces.

Test Cases

The Test Case workspace keeps the Section tree, filters, case list, and selected case details together. Select a representative case and verify its priority, owner, tags, steps, and expected outcome before using it in a Test Run.

Test Case library with Sections and selected case details
Review structure, filters, and complete selected-case content before adding a case to execution scope.

Test Cases are reusable test definitions inside one Project. Every case belongs to a Test Group and normally appears directly under a Section. A case can be reused in Test Runs without changing the source case itself.

The Test Cases page requires access to the Project. Creating, editing, copying, archiving, importing, exporting, and adding cases to a Test Run are separate permission-controlled actions. A button may therefore be unavailable even when the page itself can be opened.

Create a case

The page requires at least one Section before its normal New Case workflow can be used.

  1. Open a Test Group.
  2. Find the target Section.
  3. Select New Case in that Section's toolbar.
  4. Armoury immediately creates a case in that Section with Medium priority, no tags, no owner, and empty test content.
  5. The generated title is New Case <order>. Select the title or Edit Case to open the full editor.
  6. Replace the generated title, complete the needed fields, and save.

The creation click is already a write operation. If you leave without editing, the generated case remains in the Section. Archive it if it should not remain in the library.

Find and filter cases

Use the Section tree to choose which parts of the Test Group are visible. Selecting a parent selects its descendants. Selecting an individual child does not automatically select its parent or siblings.

The case list provides these filters:

FilterBehavior
SectionShows cases from the checked Sections.
PriorityLimits cases to the selected priority.
TagsMatches selected active Project Tags using the chosen OR or AND mode.
KeywordSearches title, description, reference, preconditions, notes, Step Details, and Overall Expected Result.

Normal lists exclude archived cases and show only active tags. Clear filters before concluding that a shared case link is invalid; a valid case hidden by the current filters cannot be opened in place.

Read and edit case content

Select a row to open the compact detail panel. Select the case title or Edit Case to change the source definition.

FieldUse and constraint
TitleRequired when the full editor is saved.
Test GroupFixed after creation. An existing case cannot be moved to another Test Group.
SectionMay be changed only to a Section in the same Test Group.
PriorityLow, Medium, High, or Critical.
OwnerAn active member of the organization, or unassigned.
TagsActive tags from the same Project.
DescriptionPurpose and scope of the case.
ReferenceRequirements, tickets, specifications, or other source context.
PreconditionsState that must exist before execution.
NotesInternal supporting detail.
Step DetailsFree-form procedural content.
Test StepsOrdered Action and Expected Result rows.
Overall Expected ResultEnd condition for the whole case.

For structured steps, an empty Action and Expected Result row is discarded. If an Expected Result is entered, its Action is required. Add, remove, and reorder rows in the editor. Text and step templates can also be linked where the Project Templates feature is available.

Attachments appear only after a case already exists. Case Versions, attachment handling, and template behavior are covered in their dedicated articles.

Sort cases

Case sorting works within one Section. Keyword, priority, and tag filters must be clear before sorting begins.

  1. Select Sort on the Section.
  2. Drag a case into the required position, or select several checkboxes and drag any selected case to move them together.
  3. Select Finish Sorting to persist the order.

Selected cases keep their current displayed order inside the moved group, regardless of the order in which their checkboxes were selected. Dragging an unselected case moves only that case. The saved order must contain every active direct case in that Section exactly once. Cases in child Sections are sorted separately.

Batch management

Turn on Case Management Mode to select cases across the currently visible Sections. Available actions depend on permission.

ActionActual boundary
Add Case to RunThe SplitButton primary action when at least one visible case is selected. It adds selected cases to the chosen Run. Cases already in that Run are marked as added and cannot be selected again for it.
Add Section to RunThe SplitButton primary action when no visible cases are selected, and its menu action otherwise. It adds every active direct case from the Sections checked in the sidebar. Keyword, priority, and tag filters do not limit this action.
CopyCopies to a selected Project, Test Group, and Section. The target Section is required.
MoveMoves cases to another Section in the same Test Group only. This uses the Test Case update permission.
PriorityReplaces priority on every selected case.
OwnerReplaces or clears Owner on every selected case.
ArchiveSoft-archives every selected case and removes it from normal lists.

The Select All checkbox beside the SplitButton controls all selectable cases in every currently visible Section Grid. It excludes cases already in the selected Run and mirrors manual selection with checked, indeterminate, and unchecked states.

Copy behavior

Within the same Project, a copy keeps active tags and Project Template links. Across Projects, all tags and template bindings are removed. Local text fields are copied, but resolved Text Template content is not carried into those fields. Linked Step Template content is expanded into ordinary manual steps so the target case does not depend on a template from another Project.

A copied case receives its own identity and initial version.

Move behavior

Moving does not change the Test Group and does not create a cross-project transfer. Choose a destination Section that is not already the Section of a selected case. The operation creates a new version when case versioning is enabled.

Archive and restore

Archive is a soft lifecycle change. The case leaves normal lists and no longer consumes the active-case allowance, but its history remains. Archive Management in Project Settings is the place to inspect and restore archived cases.

Restoring changes the case to Active while keeping its original Test Group and Section references. The restore does not require those parent records to be active, so it can succeed while the case remains absent from normal navigation because its Test Group or Section is archived. The active-case quota is the explicit restore limit. Restore the parent structure first when the case should return to normal use. Archiving a source case does not remove run-case copies already present in Test Runs.

Permission and plan checks

The main case actions use separate project permissions, including view, create, update, duplicate, archive, import, export, and reorder. Moving a case is an update action; there is no separate move permission. Drag sorting uses the reorder permission. Adding cases to a run also requires the relevant Test Run management permission.

Organization plan settings can independently limit active cases, version history, attachments, imports, exports, and Project Templates. When an action is visible but the plan does not include it or its quota is full, Armoury stops the write and shows the applicable limit.

Test Library

Case Management Mode

Select many Test Cases and handle batch actions such as adding them to Test Runs, copying, moving, setting priority, and assigning owners.

Case Management Mode

Case Management Mode is the batch operation feature Armoury provides on the Test Cases page for working with large numbers of cases. After the number of test cases grows, editing every record one by one takes too much time and makes omissions more likely. With Case Management Mode, users can select multiple Test Cases at once and add them to a Test Run, copy them, move them, set priority, assign owners, and perform other batch actions.

This feature is especially useful for test leads, project managers, and senior testers who need to organize test scope quickly, build test execution content, or adjust many test cases during library maintenance.

Enter Case Management Mode

On the upper right of the Test Cases page, find the Case Management button.

After clicking it, the page switches into Case Management Mode. The test case list shows checkboxes, and users can select one case, multiple cases, or cases across different Sections.

Case Management Mode supports these actions:

FeaturePurpose
Add Case to RunAdd the selected cases to a specified Test Run
Add Section to RunAdd the active direct cases from the Sections checked in the sidebar to a specified Test Run
Copy casesCopy cases to a specified Project, Test Group, and Section
Move casesMove cases to a specified Section in the same Project
Set priorityBatch update case importance
Set ownerBatch assign case maintainers

Add Cases or Sections to a Run

Adding Test Cases to a Test Run is one of the most important actions in Case Management Mode. In Armoury, Test Run content is not built by freely adding cases inside the Test Run. Instead, users select cases from the Test Cases page and add them to a run. This means the Test Cases page is the main entry point for building the testing scope of a Test Run.

Use this workflow:

  1. Open the Test Cases page.
  2. Click Case Management to enter Case Management Mode.
  3. Click Select Test Run.
  4. In the dialog, choose the Test Run that should receive the cases.
  5. After selecting it, the page shows a Select All checkbox and an add-to-Run SplitButton.
  6. Select the Test Cases to add.
  7. When cases are selected, the primary SplitButton action becomes Add Case to Run. Select it.
  8. The system adds the selected cases to the specified Test Run.

Select All controls every selectable case in every currently visible Section Grid. Cases already in the selected Test Run are excluded. The checkbox is checked when all available cases are selected, indeterminate when only some are selected, and unchecked when none are selected.

To add cases by Section without checking individual case rows, check the required Sections in the left sidebar. With no cases selected, Add Section to Run is the primary SplitButton action. When cases are selected, open the SplitButton menu and select Add Section to Run. Keyword, priority, and tag filters do not limit this action. Selecting every Section includes all active cases assigned to a Section in the current Test Group.

This action is useful for full regression testing, pre-release testing, or quickly building a focused multi-Section scope. Empty Sections and Sections whose cases are already in the Test Run do not create empty Section snapshots.

Add Filtered Cases

In real work, a Test Run does not always need every Test Case. For example, the team may only test high-priority cases, cases with a specific feature tag, or cases related to a particular requirement.

In that situation, first use the filters at the top of the Test Cases page to narrow the case scope, then enter Case Management Mode and select the needed cases.

A common workflow is:

  1. Filter cases by priority, tag, or the search box.
  2. Enter Case Management Mode.
  3. Select the filtered cases that need to be executed.
  4. Choose the target Test Run.
  5. Select Add Case to Run.

After a case is added to the Test Run, its checkbox changes to an Added state. This helps users clearly see that the Test Case already exists in the currently selected Test Run, avoids duplicate additions, and makes it easier to check whether the test scope is complete.

Test Run Version Snapshot Concept

When a Test Case is added to a Test Run, Armoury stores a snapshot of that case content at that moment. This is a very important concept because a Test Run must reflect the test content that was actually executed at the time, not content that may be changed later.

For example:

  1. A Test Case is currently version v3.
  2. A user adds this case to a Test Run.
  3. The Test Run stores the v3 content.
  4. Later, the Test Case is changed to v4.
  5. The case already added to the Test Run remains v3 and does not automatically become v4.

This design keeps test records traceable. When the team reviews a past test result later, they can know which version of the Test Case was actually executed at that time. Later case edits will not distort the historical record.

Copy Cases

In Case Management Mode, users can copy Test Cases in batches.

Use this workflow:

  1. Enter Case Management Mode.
  2. Select the Test Cases to copy.
  3. Click Copy cases.
  4. In the dialog, choose the target Project.
  5. Choose the target Test Group.
  6. Choose the target Section.
  7. After confirming, the system copies the selected cases under the specified Section.

Copying cases can work across Projects. As long as the user has enough permission in the target Project, cases can be copied into another Project.

The destination of a copy operation is a Section. All selected cases are copied to the same specified Section. If different cases need to be copied into different Sections, perform the operation in separate batches.

This feature is commonly used in these situations:

  1. Different Projects have similar features and can reuse existing Test Cases.
  2. A new product inherits old product flows and needs a quick initial test library.
  3. Shared test flows are copied into different Projects and then adjusted for product differences.

Move Cases

Moving cases relocates existing Test Cases to another Section so the test library structure can be cleaned up.

Use this workflow:

  1. Enter Case Management Mode.
  2. Select the Test Cases to move.
  3. Click Move cases.
  4. Choose the target Section.
  5. After confirming, the system moves the cases to the specified Section.

Moving cases does not work across Projects. Cases can only be moved to another Section inside the same Project.

If users need a similar effect across Projects, use Copy cases to copy the cases into the target Project first, then return to the original Project and archive the original cases that are no longer needed.

In practice, moving cases is useful for test library cleanup, such as:

  1. Moving uncategorized cases into the correct functional Section.
  2. Gathering old feature cases into a maintenance Section.
  3. Adjusting the Test Case structure so the Test Group is easier to read.

Set Priority

When organizations create Test Cases, they often create the case content quickly first, then let the test lead or owner decide priority later. Case Management Mode can set priority in batches and avoids opening every case edit page one by one.

Use this workflow:

  1. Enter Case Management Mode.
  2. Select the Test Cases to adjust.
  3. Click Priority.
  4. In the dialog, choose the new priority.
  5. After confirming, the system updates the selected cases in batch.

Armoury's built-in priorities help teams plan testing order. Critical and high-priority cases are usually included in important Test Runs and executed first when testing capacity is limited.

Set Owner

Test Cases can have owners to show who is responsible for maintaining them. After the number of cases grows, setting owners in batch helps make maintenance responsibility clearer.

Use this workflow:

  1. Enter Case Management Mode.
  2. Select the Test Cases to assign.
  3. Click Owner.
  4. In the dialog, choose the member to assign.
  5. After confirming, the system updates the owners of the selected Test Cases in batch.

Setting owners is useful in these situations:

  1. Assigning Test Cases from different modules to different testers.
  2. Giving newly created but not yet organized cases to a specific member for maintenance.
  3. Confirming during test library review that each batch of cases has a clear owner.

Practical Scenario

Suppose a product is about to enter release testing, and the test lead needs to create a new Test Run that includes only the most important testing scope for this version.

A recommended workflow is:

  1. On the Test Cases page, first filter cases by the tags related to this version.
  2. Then filter by critical and high priority.
  3. Click Case Management to enter management mode.
  4. Select the Test Run for this version.
  5. Select and confirm the cases that need to be executed.
  6. Select Add Case to Run.
  7. Check that the cases show the Added state.
  8. If some cases are not categorized correctly, use Move cases to organize them into the right Section.
  9. If cases need different maintainers, set owners in batch.
  10. If other Projects also need the same cases, use Copy cases to copy them to the specified Project and Section.

With this workflow, the test lead can quickly build the test scope, organize cases, and assign responsibility. Case Management Mode is not just a batch tool. It is an important operational entry point that connects Test Cases, Test Runs, and team ownership.

Test Library

Test Case Versions

Review Test Case snapshots, compare older content with the latest version, and restore a historical version without deleting later history.

Test Case Versions

Version history records content snapshots for a Test Case when versioning is included in the organization's plan. The visible history depth is also plan-controlled; a zero limit means no versions are available to view.

When versions are created

Saving an update, moving a case, changing priority or owner in a batch, archiving a case, and restoring a historical version create version records when versioning is enabled.

A case created with the normal New Case button does not receive an initial version at the moment its generated placeholder is created. Its first later update creates the first snapshot. Cases created by import or copy do receive an initial version.

Attachments are separate stored files. Uploading or deleting an attachment does not create a Test Case version, and attachment files are not restored by restoring case content.

What the version panel shows

The stored snapshot contains the case fields and template references needed for history and restoration. The visible version panel shows title, Test Group, Section, priority, Owner, tags, the local description, reference, preconditions, notes, local Step Details, structured step rows, and the local Overall Expected Result.

For fields linked to Text Templates, the panel shows the saved local text rather than the merged template-and-local result. Status, case type, sort order, and template-link metadata are not shown in this panel. Structured steps can reflect rows resolved when the snapshot was created, but that does not make the referenced template itself part of the case version.

Review history

  1. Open a Test Case.
  2. Select its version indicator or version action.
  3. Choose a version from the list, which identifies the version number, change time, and editor.
  4. Review the read-only fields and steps.
  5. Use the warning markers to see where an older version differs from the latest available version.

A case share link can include a version selection. The link still depends on access to the Project, Test Group, case, and visible version history. A version that is no longer retained by the plan cannot be opened from an old link.

Restore a version

Restoring is not a rollback that erases history.

  1. Select an older version.
  2. Review the fields shown in the panel. Remember that restoration can also apply snapshot values that the panel does not display, including status, case type, sort order, and template-link identifiers.
  3. Select Restore and confirm.
  4. Armoury applies that snapshot to the current case.
  5. Armoury creates a new latest version for the restored state.

The content that existed immediately before restoration remains in version history. You can therefore inspect or restore it again later while it remains within the visible retention limit.

Restoration restores template binding identifiers; it does not roll a Project Template back. After the case is updated, linked content resolves from the template's current state. An older version's resolved Step Template rows or Text Template text are therefore not guaranteed to become the current case content. Restore the template separately when its own history must also be rolled back.

Restore boundaries

Viewing versions requires permission to view Test Cases. Restoring requires permission to update them and an enabled versioning feature.

A historical snapshot can refer to a Section, Owner, tag, or template whose current state has changed. Validation can prevent restoration when required Project relationships are no longer valid. A template that still exists is resolved in its current state, while a missing weak reference remains missing. Review the error, repair the referenced Project data where appropriate, and retry; do not assume every old snapshot is automatically valid in the current Project state.

Test Library

Test Case Attachments

Attach evidence and supporting files to an existing Test Case, then preview, download, or permanently remove those files.

Test Case Attachments

Organization File Management provides a project-oriented inventory of Test Case files in addition to the attachment panel on each case. Use it to locate evidence, confirm storage usage, and follow the file back to its owning Test Case.

Organization file management for Test Case evidence
Locate stored evidence by project and Test Case while monitoring organization attachment usage.

Attachments keep specifications, screenshots, sample data, and other supporting files with a Test Case. They belong to the source case, not to an individual Test Run result.

Availability and permissions

Uploading requires the attachment feature to be enabled for the organization and sufficient organization storage quota to remain. Viewing, previewing, and downloading existing attachments require permission to view Test Cases. Uploading and deleting require permission to update Test Cases.

Feature enablement and available storage restrict uploads, not access to existing files. If the feature is later disabled or storage is full, permitted users can still list, preview, download, and delete attachments that already exist.

The Test Case must already exist before the attachment editor appears. Archived Test Cases cannot receive new attachments.

Upload files

  1. Open an existing Test Case for editing.
  2. Find Attachments below the case content.
  3. Choose one or several files.
  4. Wait for the upload result and confirm the files appear in the gallery.

The case editor enforces a fixed 5 MB maximum per file and the extensions listed below. The organization also has a combined attachment-storage allowance. A batch selection is processed file by file; if a later file fails validation or quota checks, review the gallery to see which earlier files were already accepted.

The default allowed extensions are:

jpg, jpeg, png, webp, gif, pdf, txt, md, csv, json, xml, doc, docx, xls, xlsx, ppt, pptx, and zip.

Backend deployment settings can make the accepted size or extension policy stricter. Making the backend more permissive does not widen the case editor's fixed browser-side limits. Empty files are rejected.

Preview and download

The gallery displays the original filename and size. JPEG, PNG, and WebP files can receive generated thumbnails; other files use their file representation.

  • Preview opens a temporary signed link for inline viewing when the browser supports the file type.
  • Download opens a temporary signed link with download disposition.

The generated link is temporary. Return to the case and request it again if an old link has expired.

Delete an attachment

Select the delete icon on an attachment and confirm. Deletion removes both the original stored object and any generated thumbnail, updates organization storage usage, and does not delete the Test Case.

Deletion is not part of Test Case version restore. A deleted file is not recreated when an older case version is restored. Keep source files elsewhere when organizational retention requirements demand a separate record.

Test Library

Export Test Cases

Export one active Test Group to an XLSX workbook while understanding which Sections, cases, tags, owners, steps, and template content are included.

Export Test Cases

Export creates one XLSX workbook for the active Test Group currently open on the Test Cases page. It does not export every Test Group in the Project and does not use the current keyword, priority, tag, or Section selection as an export filter.

The Export action requires the Test Case export permission. It is shown only when export is included in the organization's plan, and the generated row count must fit the plan's export limit.

Export steps

  1. Open the Project and the active Test Group to export.
  2. Select Export above the Section filters.
  3. Wait for the workbook to be generated.
  4. Save the downloaded <test-group>-test-cases.xlsx file.
  5. Check the source Section identifiers and representative case rows before using the file as a handoff or future import source.

Included records

The workbook includes:

  • Every active Section in the current Test Group.
  • Every non-archived Test Case directly assigned to an active Section.
  • Every non-archived sectionless Test Case in the Test Group.
  • A Section-only row for an active Section with no non-archived direct cases.

Archived Test Cases are excluded. Cases attached to archived Sections are also excluded even if the case itself is active. Sectionless cases are written after Section rows and their direct cases.

Only active Project Tags linked to an included case are written. Archived tags are omitted even when their case relationship still exists.

The plan row limit counts exported cases plus Section-only rows for empty active Sections.

Workbook fields

The first row contains these 17 fields:

GroupFields
Section identitysource_section_id, source_parent_section_id, section_name, section_description
Case contenttitle, description, reference, preconditions, notes, step_details, steps_json, expected_result
Classificationpriority, status, case_type, owner_email, tags

Section-only rows populate the first four fields and leave case fields blank. Tags use CSV-compatible encoding inside one cell so names containing punctuation can remain distinct.

The workbook does not include attachments, Test Case version history, reusable template bindings, Test Runs or Test Results, or the original Test Case ID. source_section_id identifies a Section; it is not a case identifier.

Templates and steps in the file

Export writes resolved case content, not reusable Project Template bindings. Text template content is combined with the case's local text. Step templates are expanded into ordinary ordered step objects in steps_json.

If structured steps are empty but resolved Step Details contains text, export creates one steps_json action step containing that text. This keeps procedural content usable by a later import.

Because bindings are resolved, importing the workbook later creates independent case content. It does not recreate links to the original Project Templates.

Round-trip boundary

The import process treats the workbook as a new import plan. It creates new Sections in the selected target Test Group rather than merging rows into existing Sections with matching names. Owners are matched again, tags are reused or created again, and active-case and active-section quotas are checked again.

Use export as a structured handoff of the supported fields, not as a complete backup or an in-place update file for existing Test Cases.

Test Library

Project Templates

Maintain reusable text and step content, link it to Test Cases, inspect related cases and versions, and archive templates without breaking existing links.

Project Templates

The Templates workspace keeps reusable content, ordered steps, version history, and related Test Cases together. Select a populated template to understand its current impact before editing or restoring a version.

Project Templates with steps, versions, and related cases
Inspect reusable steps, version history, and related cases before changing shared template content.

Project Templates are reusable content within one Project. They are useful for preconditions, standard references, shared instructions, common expected results, and repeated step sequences that should remain linked to a maintained source.

Creating a template requires the feature to be enabled and active-template allowance to remain. Returning an archived template to Active has the same feature and quota requirements. The allowance is organization scoped, so active templates in different Projects consume the same limit.

Those requirements do not universally block operations on templates that already exist. Direct viewing, updating, archiving, version review, and Related Cases remain governed by their permissions and are not all rejected merely because creation is unavailable or the active quota is full.

Template types

TypeContentWhere it can be linked
TextOne text bodyDescription, Reference, Preconditions, Step Details, or Overall Expected Result
StepsOrdered Action and Expected Result rowsAmong the structured Test Steps of a case

Template name is required. A Project cannot contain two templates with the same name and type, although a Text template and a Steps template may share a name. Type is fixed after creation.

Create and maintain a template

  1. Open Project Templates in the current Project.
  2. Select Text Template or Step Template.
  3. Enter a name and optional description.
  4. For Text, enter the reusable content. For Steps, add and order Action and Expected Result rows.
  5. Select Save Template.

An entirely blank step row is ignored. A row with an Expected Result must also have an Action. Use the row controls to add below, delete, move up, or move down.

Viewing the page and versions, creating, updating, and archiving use separate Project permissions. Archive permission is independent from update permission. Some page controls can remain visible even when the current user lacks their write permission; the operation is rejected when attempted. Do not use button visibility as proof that an action is authorized.

Template versions

A version is created when a template is created, updated, archived, or restored. Open Versions to review name, type, status, description, and text or steps, together with change time, editor, and change summary.

Template history uses the same plan-controlled visible history limit as Test Case versions. Restoring an older template version replaces the current fields and creates a new latest template version. Existing history remains available while it is within that limit.

Archive and restore

Archiving removes the template from active lists and prevents selecting it for new case links. Existing Test Cases keep their references and continue resolving content from the archived template.

Restore archived templates from Archive Management. Restoring consumes active-template allowance again and can be blocked when the feature is unavailable or the organization quota is full. These limits do not by themselves prevent permitted users from viewing or archiving existing templates.

If a referenced template is no longer present, the case editor displays a missing-template message. Switch or unlink the missing reference before relying on the affected content.

Test Execution

Plan and Track Test Runs

Create project Test Runs, define their scope, review progress, and understand the snapshot-based execution lifecycle.

What a Test Run represents

The Test Runs page presents release scope, ownership, schedule, status, and result distribution across active runs. Use its summary and recent-run context to choose the correct execution rather than creating a duplicate run.

Test Run portfolio and execution summary
Compare active runs, ownership, progress, and result counts before opening or creating execution work.

A Test Run is a project-scoped execution workspace. It combines a named testing objective with Run Case snapshots, ownership, scheduling information, current results, result history, defects, and report snapshots.

The source Test Cases remain in the test library. When a Test Case is added to a Test Run, Armoury creates a Run Case that preserves the content selected for that execution. This separation lets the library continue to evolve without silently changing what the team planned to execute.

Use a separate Test Run when the team needs a distinct execution record, for example for a release candidate, environment, customer delivery, regression cycle, or focused verification scope.

Create a Test Run

Open Test Runs for the current project and select Create Test Run.

The current interface immediately creates an empty, in-progress Test Run named New Run. It does not open a setup form first. Open the new row and use the edit button on the detail page to supply the intended properties.

Set the following information as needed:

FieldPurpose
NameIdentifies the execution cycle. A clear release or objective name is easier to find later.
VersionLabels the product or build being tested. Result history also records the Run version in effect when each result is saved.
EnvironmentRecords where the work is being executed, such as Staging.
AssigneeIdentifies the person responsible for coordinating the Test Run. This is separate from each Run Case owner.
Due DateSupports due-date filters and overdue review.
DescriptionRecords scope, goals, constraints, or handoff context.

The edit panel also controls visible Run Case grid columns and the priorities included in execution.

Define priorities to execute

Every Test Run includes one or more of these priority levels:

  • Critical
  • High
  • Medium
  • Low

All four are included by default. At least one must remain selected.

Clearing a priority changes the active execution scope. Run Cases with that priority are excluded from the execution list, priority filters, Test Run statistics, and future report snapshots. The Run Cases are not deleted. Selecting the priority again returns them to the active scope.

Review this setting before execution and before generating a report. A report only includes the priority scope that is active when the report is generated.

Add the execution scope

Run Cases are normally added from the Test Cases page, not from the Test Run detail page.

The basic flow is:

  1. Open the Test Group that contains the source cases.
  2. Enter Case Management mode.
  3. Select Select Test Run and choose the target run.
  4. Select the cases to include.
  5. Select Add Case to Run from the SplitButton primary action.

The Select All checkbox selects all currently visible cases that are not already in the chosen Run and reflects partial manual selection with an indeterminate state. To add a Section-based scope without checking individual rows, check the required Sections in the left sidebar and select Add Section to Run, which is the SplitButton primary action when no cases are selected and a menu action otherwise. Search, priority, and tag filters do not limit this action. Selecting every Section adds all active cases assigned to a Section in the current Test Group. Cases already present in the selected Test Run are identified and skipped instead of being added twice.

See Manage Run Cases for snapshot, Section, ownership, move, sort, and removal behavior.

Understand the Test Run list

The list provides a project-level view of active execution work. Its summary cards show:

  • Runs in Progress
  • Expired / Unset
  • Pending Cases
  • Blocked Cases
  • Awaiting Retest

The grid shows the Run name, version, progress, environment, status, linked defect count, assignee, and due date. Select a Run name to open its execution workspace. Select a defect count to open Defect Tracking already filtered to that Test Run.

Expand a grid row to review result counts by execution version. This summary groups each Run Case by the version recorded on its latest result. If a Run Case was executed under more than one Run version, only its latest result contributes to this list summary.

Find the right Test Run

Use the main filters to narrow the list by:

  • Project
  • Version
  • Environment
  • Status
  • Assignee
  • Module
  • Due-date range

The quick filters provide shortcuts for all runs, runs assigned to you, in-progress runs, expired or unset due dates, overdue runs, runs awaiting retest, and runs containing blocked cases.

Expired / Unset includes both past due dates and missing due dates. Overdue only includes unfinished runs whose due date has passed.

Recently opened Test Runs appear in the sidebar. The recent list is based on access, not creation time, and contains up to five active runs across projects in the organization.

Read the lifecycle correctly

A newly created Test Run starts In Progress. Saving results does not automatically mark it Completed. Even when no Run Case remains Not Run, Armoury only shows a reminder to review failed, blocked, and retest items.

Formal completion is report-driven:

  1. Review the current execution data.
  2. Generate a Test Run report snapshot.
  3. Open that report.
  4. Select Close with This Report.
  5. Confirm the irreversible action.

The Test Run becomes Completed, and that report becomes its locked closing report. A completed Test Run cannot be reopened through the normal workflow, and the closing report cannot be replaced or deleted.

Completed is a closure marker, not a read-only lock for the execution workspace. With the relevant permissions, users can still edit ordinary Test Run fields, manage Run Cases, and save later results. Those changes do not automatically update the closing report's stored metrics and result rows, although removing Run Cases can also remove their rows from existing reports. See Test Run Reports before closing a run.

Duplicate a Test Run

Open the Run edit panel and select Duplicate Run when a new cycle should reuse the current structure.

The duplicate keeps the current Test Run properties, Section snapshot, Run Case content, owners, ordering, and priority scope. It becomes a new in-progress Test Run with every Run Case reset to Not Run.

The following records are not copied:

  • Execution results and result history
  • Defect references and linked defects
  • Test Run reports
  • Test Run history records

Use duplication for a fresh cycle, not as a way to preserve an executed copy. Generate a report when a saved execution review is needed, and read the report preservation limits before treating it as a permanent record.

Access and plan limits

Project permissions control who can view, create, edit, execute, manage Run Case snapshots, synchronize content to source cases, generate reports, and close a Test Run. Controls may be visible while an operation is still rejected for a user who lacks the required permission.

The organization's plan can also limit the number of active Test Runs and whether Test Case version history is available. If a limit is reached, follow the plan message shown by Armoury or ask an organization administrator to review the subscription.

Test Execution

Manage Run Cases

Add Test Cases to a Test Run, preserve execution snapshots, and organize owners, Sections, order, and case content.

Source cases and Run Cases

A Test Case is the reusable source record in the test library. A Run Case is the execution copy inside one Test Run.

This distinction is intentional. A Run Case must preserve what the team intended to execute even if the source Test Case is edited later. It can also have an execution owner, position, latest result, and result history that belong only to its Test Run.

Each source Test Case can appear at most once in the same Test Run. Adding it again is treated as a duplicate and does not create another Run Case.

Add selected Test Cases

Add cases from the Test Cases page:

  1. Open the relevant project and Test Group.
  2. Select Case Management.
  3. Select Select Test Run.
  4. Choose an existing Test Run.
  5. Wait until Armoury finishes checking which cases already belong to that run.
  6. Select one or more available cases, including cases across different Sections.
  7. Select Add Case to Run from the SplitButton primary action.
  8. Review the requested, added, and duplicate counts in the notification.

Once a target Test Run is selected, cases already in that run are marked as added and no longer show management checkboxes. This prevents accidental duplicate selection.

The Select All checkbox beside the SplitButton selects every available case across all currently visible Section Grids. It becomes checked when all are selected, indeterminate when only some are selected, and unchecked when none are selected.

Only active Test Cases can be added. An archived source case cannot be newly added to a Test Run.

Add Sections to a Run

After selecting a Test Run in Case Management mode, check one or more Sections in the left sidebar and select Add Section to Run. It is the SplitButton primary action when no cases are selected and a menu action when cases are selected.

This action adds every active Test Case directly assigned to the checked Sections. Keyword, priority, and tag filters do not change the batch scope. Existing Run Cases are skipped.

Selecting every Section is equivalent to adding all active cases that belong to a Section in the current Test Group. Source cases without a Section are not included. Use selected cases when the Test Run should cover a filtered or individually targeted subset.

An empty selected Section does not create an empty Section snapshot in the Test Run. The same applies when every case in a selected Section is already present. A Section snapshot is created only when at least one new case requires it.

What the snapshot contains

When Armoury creates a Run Case, it captures the execution content, including:

  • Title, description, reference, and type
  • Test Group and Section context
  • Preconditions and notes
  • Detailed step text
  • Structured test steps and their expected results
  • Overall expected result
  • Priority and status context
  • Project tags associated with the source case at snapshot time; archived tags are not filtered out
  • Source case and source version references

If the source case has an active owner who is still an organization member, that owner becomes the initial Run Case owner.

When Test Case versioning is available, a normal case uses its latest stored version snapshot. A case whose content is resolved from project templates captures the currently resolved content instead. The Run Case then stays independent until a user explicitly synchronizes an edit back to the source.

Attachments are not copied into the Run Case snapshot. The detail view loads the current attachments from the source Test Case, so later attachment additions or removals on the source can appear in an existing Test Run.

How Sections are copied

Armoury copies the source case's Section and any missing ancestor Sections into the Test Run snapshot. This recreates the relevant hierarchy without requiring the entire source Test Group tree to be copied first.

The copied Sections belong to the Test Run. Later changes to source Sections do not automatically reorganize the Test Run, and changes made inside the Test Run do not reorganize the test library.

Cases without a source Section appear as ungrouped Run Cases.

Review and filter Run Cases

The Test Run detail page groups Run Cases by the copied Section hierarchy. Use these filters while reviewing or executing:

  • Case ID or title search
  • Section
  • Tags
  • Priority
  • Test result

The priority filter only offers priorities currently included in the Test Run's execution scope. Select the metric counts above the workspace to quickly filter by result or priority, and select the overall count to clear those filters.

Open a Run Case to review its owner, executor, tags, attachments, preconditions, description, notes, step details, expected result, structured steps, source identifiers, and execution version.

Use Case Management inside a Test Run

Select Case Management on the Test Run detail page. Checkboxes appear so that you can select multiple Run Cases across Sections.

The management toolbar supports:

ActionBehavior
OwnerAssigns the selected Run Cases to an active organization member. This batch action cannot clear an existing assignment.
Move CasesMoves selected Run Cases to another Section in this Test Run. Their relative visual order is retained at the destination.
Sort CasesEnables Section-by-Section drag ordering. Finish sorting to persist the new order.
Execution ResultWrites the same result values to every selected Run Case and creates a separate history entry for each one.
Remove CasesRemoves selected Run Cases from this Test Run only.
Remove SectionRemoves a Section snapshot and its directly contained Run Cases.

Select Finish Management when the bulk operation is complete.

Move and sort cases

Moving cases requires a target Section that already exists in the Test Run snapshot. The source Test Case's Section is not changed.

Sorting is performed within one Section at a time. Enter sorting mode, select Sort for a Section, drag the complete list into the intended order, and finish sorting. Search and filters are cleared or disabled during sorting so that a hidden case cannot be omitted from the saved order.

Remove cases and Sections carefully

Removing a Run Case deletes it from the current execution scope, statistics, and future Test Run reports. Its result history inside this Test Run is removed with it. The source Test Case, source versions, and other Test Runs are not affected.

Removal also cascades to that Run Case's rows in every existing report, including a locked closing report. The report's stored headline metrics are not recalculated, so its case lists can then disagree with its saved totals. Completed status does not prevent this removal.

Removing a Section has additional effects:

  • Run Cases directly inside that Section are removed.
  • Direct child Sections are reattached to the removed Section's parent.
  • If the removed Section was a root Section, its children become root Sections.
  • Source Test Cases and source Sections are not changed.

Review the confirmation counts before continuing. Move any cases that must be preserved before removing their Section.

Edit only the Run Case snapshot

Open a Run Case and select the edit icon. You can edit its title, description, reference, preconditions, notes, detailed step text, structured steps, overall expected result, and priority.

Select Save to change only the current Run Case. Armoury marks the Run Case as not synchronized with its source so that the difference remains visible. The source Test Case and its versions are unchanged.

Use this when execution needs a temporary clarification or variation that should not become library content.

Save and synchronize to the source

Select Save and Sync when the Run Case correction should also update the source Test Case.

After confirmation:

  1. Armoury updates the source Test Case.
  2. If Test Case versioning is available, Armoury creates a new source version.
  3. The current Run Case receives the synchronized content.
  4. The Run Case is marked synchronized.

Existing source versions remain unchanged. If versioning is not included in the current plan, the source is updated without a new version snapshot.

Run Cases that use project template bindings cannot be synchronized back from the execution workspace. Update the source Test Case or the project template library instead, then decide how the execution snapshot should be handled.

Share a precise Run Case view

Select the share icon on a Run Case to copy a link containing both its Test Run Section and Run Case identity. Opening the link selects the matching case and opens the large detail view.

The recipient still needs access to the organization, project, Test Run, and Run Case. If the case was removed or the link no longer matches the Test Run snapshot, Armoury shows that it cannot open the shared case.

Test Execution

Execute Test Runs

Record Run Case results, preserve every submission, review execution metrics, and convert failed results into defects.

Open the execution workspace

In a populated release regression run, select a Run Case on the left and review its snapshot, steps, result history, and current execution form on the right. The summary metrics and filters should guide focus without replacing case-level evidence.

Release regression Test Run execution workspace
Execute one selected Run Case with its snapshot and history visible, then save an evidence-based result.

Select a Test Run name from the Test Runs list. The detail page is divided into a Run Case list and a case workspace.

Use the list to find a case, then switch among:

  • Case Details for the execution instructions and source context
  • Test Results for every saved result submission
  • Execution Result for recording the next result

A large detail view is also available when the case content and result history need more space.

Limit the visible execution scope

Search by case ID or title, or filter by Section, tags, priority, and test result. The metrics above the workspace also act as filters.

The Test Run's Priorities to Execute setting is applied before these filters. A Run Case whose priority is excluded does not appear in the execution list or contribute to the displayed execution statistics. Edit the Test Run and include that priority if it should be executed in this cycle.

The Filtered / Total metric helps distinguish the current filtered result from the whole active priority scope.

Understand the result statuses

StatusIntended use
Not RunThe case has not yet received an execution decision, or its latest summary was reset.
PassThe observed result meets the expected result.
FailedThe observed result does not meet the expected result.
BlockedExecution cannot be completed because a dependency, environment, data, or other prerequisite prevents it.
RetestThe case is set aside for another execution after a change or follow-up. Internally, this is the skipped result state, but the interface labels it Retest.
DeprecatedThe case should no longer be treated as part of the meaningful execution result.

Use the status according to the team's agreed testing policy. Armoury preserves the selected value but does not infer the reason for Failed, Blocked, Retest, or Deprecated.

Record a result

Select a Run Case and open Execution Result. Complete the fields that are relevant:

FieldPurpose
Test StatusSets the new latest result status.
Actual ResultRecords what was observed during execution.
Failure Category / NotesRecords failure classification, blocker context, retest reason, or other execution notes.
Defect Link / ReferenceStores a ticket link, defect key, or another reference.

Select Save to remain on the current case. Select Save and Next to save and advance to the next Not Run case under the current filters.

If the filters contain no next Not Run case, Armoury keeps the saved result and asks you to adjust or clear the filters. The completion reminder checks the whole Test Run, not the current filters or active priority scope: it appears only when no Run Case anywhere in the Run remains Not Run. The reminder asks you to review Failed, Blocked, and Retest items, but does not complete or close the Test Run.

Every save creates history

Each result save creates a new history entry. The entry records:

  • Status
  • Actual result
  • Notes
  • Defect reference
  • Test Run version at execution time
  • Executor
  • Execution time

The Run Case also stores the newest values as its latest summary. Saving another result replaces that summary but does not overwrite older history.

Resetting a case to Not Run clears its latest executor and execution time. The earlier result history remains available for traceability.

Use Test Run versions deliberately

The Test Run Version is captured on each result submission. If the Run version changes and a case is retested, its newer result carries the new version while older history retains the previous one.

The Test Runs list and report version summaries group a Run Case by the version on its latest applicable result. They do not count every historical submission as a separate case in those summaries.

Record a meaningful version before execution when version-level comparison matters.

Record batch results

Use Case Management when the same decision applies to multiple Run Cases:

  1. Enter Case Management mode.
  2. Select the Run Cases, including across Sections if needed.
  3. Select Execution Result in the management toolbar.
  4. Enter the shared status, actual result, notes, and defect reference.
  5. Review the confirmation and save.

Armoury creates one result history entry for each selected Run Case. Existing histories remain. Because every selected case receives identical text, batch execution is best for a genuinely shared outcome such as a common environment block, not for unrelated failures.

Convert a failed result to a defect

Each item in Test Results has a defect conversion control. It is enabled only for a Failed result.

When you convert a Failed result, Armoury creates a local defect that includes execution context such as the Test Run, Run Case, Section, executor, execution time, the free-text Step Details, overall expected result, actual result, notes, and existing references. Structured step rows are not copied into this defect description. The Run Case priority becomes both the initial defect severity and priority. The new BUG-... key is appended to the result's defect reference.

Converting the same active result again returns the existing defect instead of creating a duplicate. If a defect must be associated with several Run Cases, manage those links from Defect Tracking after creation.

See Defect Management for assignment, external ticket linking, copying, and archiving.

Read execution-page progress

The execution page calculates its metrics only from priorities currently included in the Test Run.

Its progress formula is:

Run Cases whose latest status is not Not Run / all Run Cases in the active priority scope

This means Pass, Failed, Blocked, Retest, and Deprecated all count toward execution-page progress. The pass rate is Pass divided by all Run Cases in the active priority scope.

This is not the same as report completion. A generated report treats Not Run, Blocked, and Retest together as untested, and excludes all three from its executed count. Do not compare the two percentages without accounting for these different definitions.

Review result history before reporting

Before generating a formal report:

  1. Clear filters and review the full active priority scope.
  2. Check Failed results for useful actual results and defect references.
  3. Check Blocked results for the blocker and owner.
  4. Check Retest results for the follow-up condition.
  5. Confirm that Deprecated is intentional.
  6. Review the version attached to recent results.
  7. Add Test Run history notes for decisions, risks, environment changes, or handoffs.

Generate a new report after these records are complete. Changing a result later does not update the stored result row or metrics in an existing report. However, removing a Run Case can cascade-delete its rows from old reports, and some report sections use current data; review Test Run Reports for those limits.

Marking the Test Run Completed does not make result entry read-only. A user with execution permission can save later results, but the locked closing report is not replaced or automatically refreshed. Treat any post-closure execution as a deliberate exception because the live Run and its closing report can diverge.

Access considerations

Executing tests requires the Test Run execute permission. Editing Test Run structure, changing a Run Case snapshot, synchronizing to a source Test Case, and converting a result to a defect use separate permissions.

The share link does not grant access. Recipients can open the precise Run Case only when they already have the required project and Test Run access.

Test Execution

Generate and Close Test Run Reports

Create Test Run execution snapshots, interpret report metrics, understand preservation limits, and close a run with an official report.

What a Test Run report preserves

The report view combines immutable headline metrics with result distribution, priority analysis, defects, coverage, and case snapshots. Use it as release evidence and trace unusual totals back to the preserved report sections.

Closed Test Run report with release evidence
Read result distribution, priority, defect, coverage, and snapshot evidence from the same preserved report.

A Test Run report has a point-in-time execution snapshot. It stores the included Run Cases, their latest results, execution version information, included priority scope, Section result metrics, and defect references at the moment of generation.

Ordinary later edits to Run Case content or results do not rewrite those stored case rows or saved metrics. Generate another report when the team needs a newer execution snapshot.

The complete page is not immutable. The Test Run name, description, version, and environment are read from the current Run when the page opens. Defect Statistics uses currently active linked defects and current local and Jira fields. History Records uses the current visibility of records created no later than the report. These displays can therefore change after report generation. Run Case deletion is another exception described below.

Each Test Run can keep up to 10 reports. The report panel shows the current count and remaining capacity.

Generate a report

  1. Open the Test Run.
  2. Select Test Reports.
  3. Select Generate Test Report.
  4. Wait for the new report to open in a separate tab.
  5. Return to the report panel when you need to refresh, open, or delete a report.

Reports are named sequentially from the Test Run name, for example Release Verification Report #1.

Generation uses the Test Run's current Priorities to Execute setting. Run Cases whose priority is excluded are not added to the report snapshot and do not affect any report metric or defect statistic. The report page lists the included priorities so reviewers can verify its scope.

Snapshot content

For each included Run Case, the report preserves information such as:

  • Run Case and source identifiers
  • Title, Test Group, and Section
  • Priority and result status
  • Reference, notes, and step detail
  • Actual result and execution notes
  • Defect reference
  • Executor and execution time
  • Execution version
  • Tags

The full snapshot and its focused case lists link back to the corresponding Run Case while that Run Case is still available.

Know the preservation limits

The report combines saved execution data with current data:

BehaviorWhat to expect
Saved execution dataIncluded priorities, saved metrics and matrices, and each remaining report-case row keep the values captured at generation. Later content or result edits do not update them.
Current Test Run fieldsName, description, version, and environment are read from the current Test Run when the report opens.
Current related dataDefect Statistics and History Records are rebuilt using the current defect state and history visibility rules.
Cascading removalDeleting a Run Case, directly or by removing its Section, also deletes that case's rows from every existing report, including the closing report.

After cascading removal, stored headline metrics are not recalculated. A report's saved totals can therefore differ from the cases still shown in its lists. The Completed state does not block Run Case removal. If a permanent visual record is required, review and print or save the report externally before changing or removing its source Run Cases.

Interpret the core metrics

Report calculations differ from the live execution-page progress.

For report purposes:

  • Untested = Not Run + Blocked + Retest
  • Executed = Total - Untested
  • Completion = Executed / Total
  • Not Run Rate = Untested / Total
  • Overall Pass Rate = Pass / Total
  • Executed Pass Rate = Pass / Executed
  • Unpassed Cases = Failed
  • Critical Unpassed = Critical-priority Failed
  • Defect References = included Run Cases whose latest result has a non-empty defect reference

Blocked and Retest remain visible in status distribution and case lists, but they do not count as executed in report completion. Deprecated does count as executed for this formula because it is not in the report's untested set.

The live Test Run detail page uses a different progress rule: every status other than Not Run counts toward progress there. This is why a Run can show high live progress while the report completion remains lower when Blocked or Retest cases exist.

Review the report sections

The report page provides:

SectionWhat it shows
Result DistributionDonut chart of the snapshot's result statuses.
Priority Result MatrixStatus counts for each included priority.
Version Result StatisticsLatest applicable Run Case results grouped by execution version.
Defect StatisticsCurrently active linked defects and their current external ticket snapshot, limited to defects created no later than the report.
History RecordsRecords created no later than the report that are currently visible.
Section CoverageHierarchical result distribution for the copied Test Run Sections.
Unpassed CasesFailed Run Cases.
Not Run CasesNot Run, Blocked, and Retest Run Cases.
Obsolete CasesDeprecated Run Cases.
Full SnapshotEvery Run Case included in this report ID.

Select a case or defect link to inspect the current corresponding record in a new tab. Saved execution values remain historical while their report-case row exists; current Run fields, current defect data, and history visibility follow the exceptions above.

Defects and defect references are different

The Defect References metric counts non-empty reference text on Run Case results. It can include a local BUG-... key, an external link, or another value entered by a tester.

The Defect Statistics section is built when the page opens from active Armoury defects linked to included Run Cases and created no later than the report. It displays the defect's current local and Jira snapshot fields, so an old report can show a newer synchronized ticket status. An archived defect leaves this section.

Therefore, the frozen reference count and current linked defect count do not have to match. A free-text reference may not identify a local defect, one local defect may link several Run Cases, and an archived defect's key may remain in a Run Case snapshot without appearing in current Defect Statistics.

Add and control Test Run history

Open History Records on the Test Run to add important events, decisions, risks, environment status, or handoff notes. Records cannot be deleted. They can be hidden and shown again.

A report includes only records that:

  • Existed at or before that report's generation time
  • Were visible when the report page data was prepared

Hidden records remain in the Test Run history but do not appear on report pages. Showing a record again makes it visible on any report whose generation time is at or after that record's creation time, including an earlier report page opened again. History visibility is live; the record's creation-time cutoff prevents later notes from appearing in an older report.

Print or save a report

Select Print / Save PDF to open the browser's print workflow. The report switches to an A4 landscape layout, removes navigation and action controls, and lets detail tables continue across pages.

In the browser print dialog, disable Headers and footers to remove the browser-generated date and URL. Enable Background graphics to preserve report cards and status colors. Review the preview before saving or distributing the result.

Delete a review report

Users with the report delete permission can delete a report that is not the closing report. Deleting it also deletes that report ID's Run Case snapshots, and the report page can no longer be opened.

Use deletion to free one of the 10 report slots only when the snapshot is no longer required. A report chosen to close the Test Run is locked and cannot be deleted.

Close a Test Run with a report

Closing is a formal, irreversible action:

  1. Generate a report after the final execution review.
  2. Open the exact report that should become the official basis.
  3. Verify its included priorities, metrics, problem cases, defects, and history.
  4. Select Close with This Report.
  5. Confirm the warning.

Armoury then:

  • Marks the Test Run Completed
  • Records the closing user and time
  • Marks this report as the unique closing report
  • Locks the report against deletion
  • Adds a system history record for the closure

A completed Test Run cannot be reopened through the normal workflow, and another report cannot replace the closing report. Completed does not lock ordinary Test Run fields, Run Case management, or later result saves. These later changes do not automatically update the closing report's stored execution rows or metrics, but Run Case deletion still cascades into it and its current-data sections can change. Choose and protect the closing basis according to the team's process.
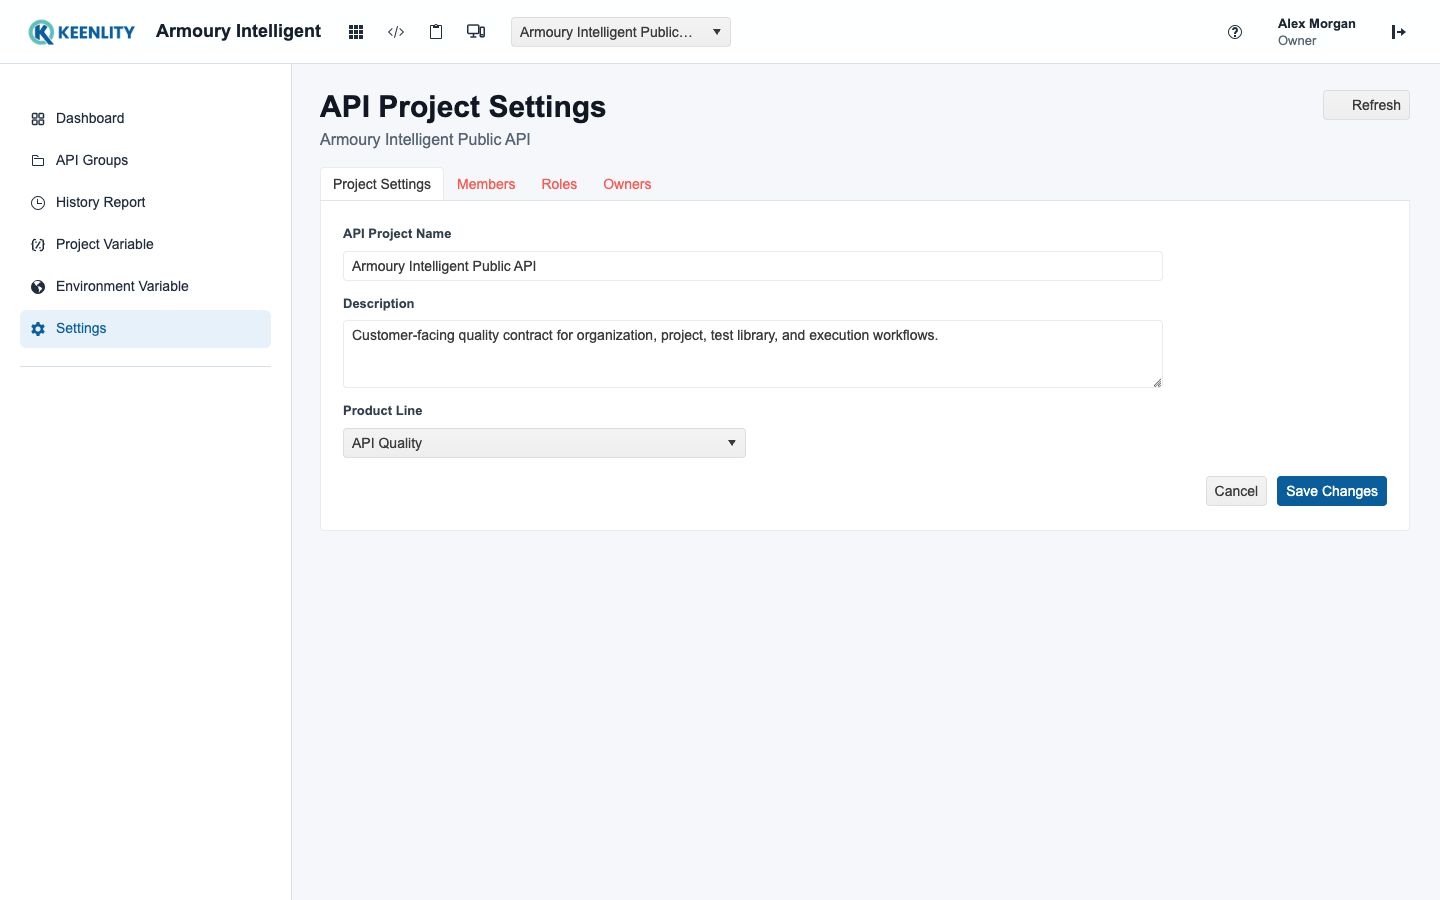
Permissions

Viewing reports, generating reports, deleting reports, and closing Test Runs are separate project permissions. A person may be able to execute Run Cases without being able to generate or close a report.

Ask a project manager to review role permissions if a required report control is not available or an operation is rejected.

Mind Maps

Plan Test Structure with Mind Maps

Build, arrange, save, and duplicate project mind maps before turning selected branches into test structure.

What a Mind Map Is For

The Mind Maps list keeps visual planning artifacts separate from the formal Test Case library. Review ownership and recent updates before opening, duplicating, or converting a map.

Project Mind Maps list
Choose the current planning map by name and update context before editing or conversion.

A Mind Map is a Project-scoped planning workspace. Use it to explore feature scope, requirement context, dependencies, and a possible Test Group and Section hierarchy before maintaining detailed Test Cases.

A node is not a Test Case. It has a short label, colors, a canvas position, and relationships to other nodes. It does not contain Test Case steps, expected results, priority, owner, or tags. Converting a branch also does not create Test Cases; it creates Test Group and Section structure that can hold Test Cases later.

Because every Mind Map belongs to one Project, confirm the current Project before creating or editing a map. Switching the Project from the top Project selector reloads the Mind Maps list for the selected Project.

Use the Mind Maps List

Open Mind Maps from the Project navigation. The list shows each active map's name and description, node and relationship counts, last update time, and last editor.

Use the list as follows:

  1. Select New Mind Map to create a map.
  2. Select a map name to open its editor in a new browser tab.
  3. Use Grid search to match a map name or description.
  4. Select one row, then choose Duplicate Mind Map when the same graph is a useful starting point for another plan.

A newly created map receives the next available default name, such as New Mind Map or New Mind Map 2, and starts with one Central topic node. Rename it before the purpose becomes difficult to recognize.

Duplication copies the description, nodes, relationships, colors, positions, and saved viewport. The copy receives a name such as Feature Map Copy. Conversion history is deliberately removed from every copied node because the new map has not created or verified those Test Group and Section relationships. The source map and the test structure created from it are not changed.

Work in the Full-Screen Editor

The editor opens as a dedicated full-screen workspace without the normal top and Project navigation. Back to List is the editor's controlled way back to the Mind Maps list.

Edit the map name and description in the header. A non-empty name is required before the map can be saved. The status beside the name indicates whether the editor is Synced, Unsaved, Saving, or Autosaving.

The canvas supports these node operations:

ActionResult
Add NodeCreates an unconnected node near the selected node, or near the first node when nothing is selected
Add Child NodeCreates a node and a parent-to-child relationship from the selected node; when nothing is selected, it uses the first node, or creates an unconnected node if the map is empty
Add SiblingCreates a node at the same level and gives it the same parent when one exists; when nothing is selected, it behaves like Add Node
Drag a nodeMoves the node on the canvas and marks the map as unsaved
Double-click a nodeOpens inline text editing
Select a nodeOpens Node Settings for its text, colors, hierarchy actions, and conversion history
IndentMakes the selected node a child of its previous sibling
OutdentMoves the selected node one level toward the root
Delete NodeRemoves the selected node and every relationship connected to it from this map

Deleting a converted node removes only the node and its conversion history from the map. It does not remove any Test Group or Section that was created earlier.

Use the color presets to apply a coordinated background, text, and border combination. The individual color controls let you adjust the background and text colors. Node text can also be edited in the Node Settings panel.

Create and Label Relationships

Drag from the connector on the right side of one node to the connector on the left side of another node to create a directed relationship. Select a relationship line to add a short label in Relationship Settings, such as depends on, impacts, or relates to.

Relationship labels explain the diagram but do not affect conversion. Direction does affect conversion: a conversion starts at the selected node and follows outgoing relationships to its descendants. For predictable results, draw a tree-like branch from parent to child and avoid ambiguous cycles or shared descendants.

Relationship changes affect the map hierarchy but do not change the content of either endpoint node. Review relationship direction before using Convert Group or Convert Section.

Arrange and Navigate the Canvas

Auto Layout arranges roots and descendants from left to right, using the current vertical order to place siblings. Center fits the current graph into view. The canvas controls and MiniMap support zooming, panning, and returning to the relevant part of a large graph.

The saved viewport is part of the map. A successful manual or automatic save records the current pan and zoom together with the graph. Panning or zooming by itself does not change the status to Unsaved, trigger autosave, or trigger a leave warning. Select Save to preserve a viewport-only adjustment.

Save and Leave Safely

Select Save or press Ctrl/Cmd + S for an immediate save. After the editor has loaded, it also checks once per minute and automatically saves when there are unsaved changes and no other save is in progress.

Autosave is periodic, not immediate. Do not close the tab as soon as the status changes to Unsaved. Wait for Synced, save manually, or use the controlled leave flow.

When Back to List is selected with unsaved changes, choose one of these actions:

ChoiceResult
CancelStay in the editor
Leave Without SavingReturn to the list and discard the current unsaved changes
Save and LeaveSave first and return to the list only after the save succeeds

Closing or reloading the browser tab while changes are unsaved triggers the browser's leave warning. The browser warning cannot save the map for you.

Use Keyboard Shortcuts

The graph shortcuts below apply when focus is not inside a text field, except that Ctrl/Cmd + S also works while editing text. Inline node editing has its own Enter and Escape behavior.

ShortcutAction
EnterAdd a sibling node
TabIndent the selected node under its previous sibling
Shift + TabOutdent the selected node
Ctrl/Cmd + ZUndo a graph change
Ctrl/Cmd + Shift + ZRedo a graph change
Ctrl/Cmd + YRedo a graph change
Ctrl/Cmd + SSave manually
Enter while editing a nodeFinish inline editing
Shift + Enter while editing a nodeInsert a new line
Escape while editing a nodeFinish inline editing without reverting the entered text

Undo and Redo retain up to 80 in-browser snapshots for recorded structural changes, node dragging, and recorded style changes. Typing in the map name, description, node text, or relationship label does not add each text edit to this history, so Undo is not a reliable way to restore that text. Saving does not turn the retained history into permanent map versions, and reopening the editor starts a new editing session.

Understand Limits, Permissions, and Plan Availability

A map can save at most 500 nodes and 800 relationships. Every saved node needs a unique identifier, and every relationship must connect nodes that still exist. A blank node label is stored as Untitled Node when the map is saved. If another validation or save error appears, correct the graph before relying on autosave or leaving the editor.

Mind Map access is controlled by separate Project permissions for viewing, creating, editing, converting, and synchronizing converted data. In the default Project roles, Project Managers and Contributors can normally create and edit maps, while Testers and Viewers normally have view-only Mind Map access. Customized Project roles or member-specific permissions can change this behavior.
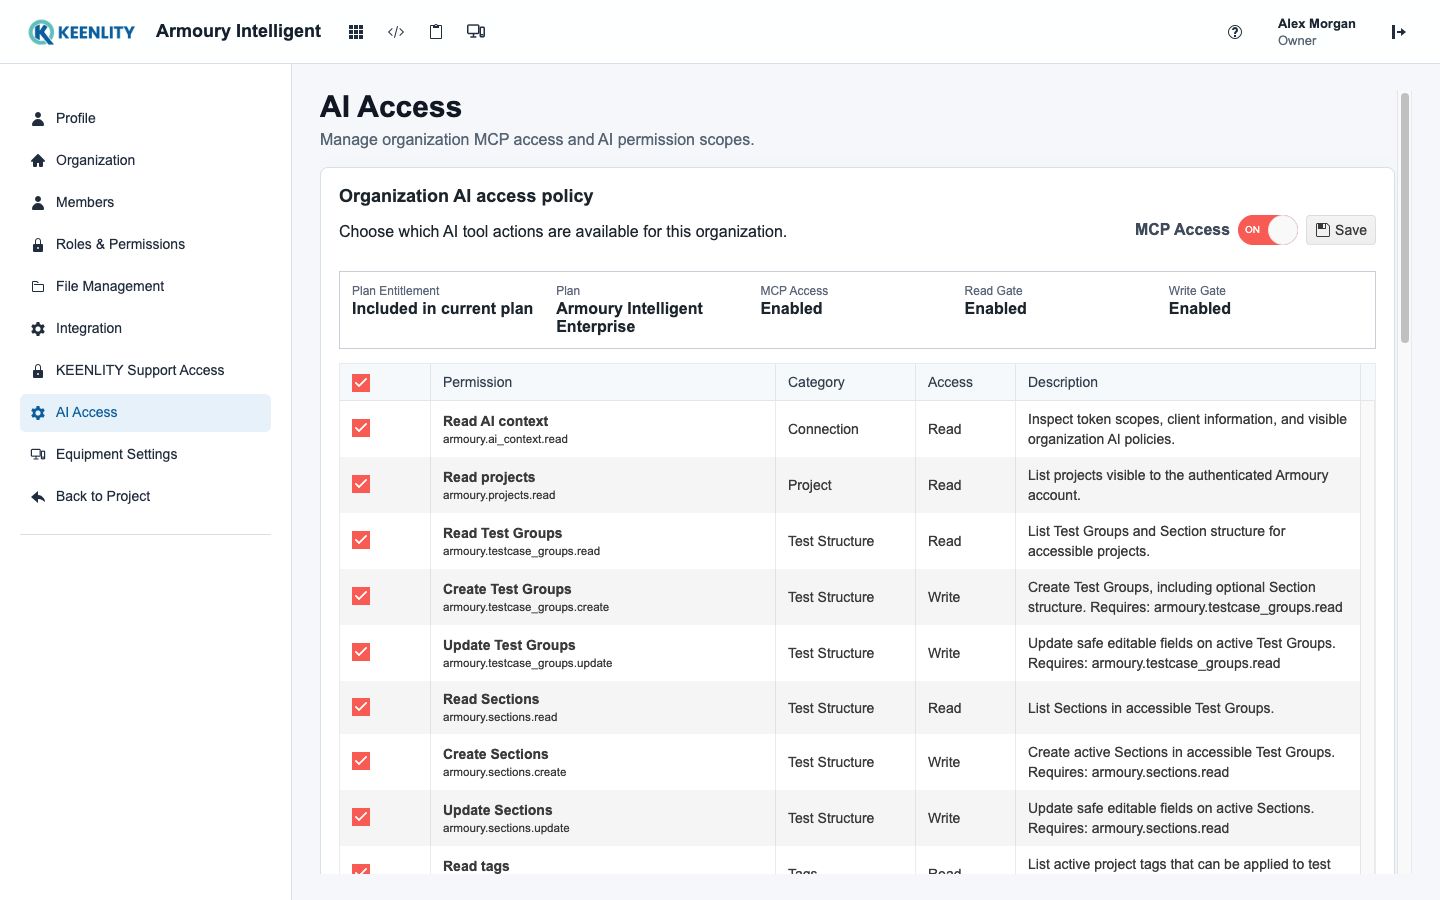
The navigation entry or an action button can still be visible when the signed-in member cannot complete that operation. Treat a permission error as an access decision, not as lost map data, and ask a Project administrator to review the relevant Project permission.

The organization's plan separately controls whether new Mind Maps can be created or duplicated and how many active maps the organization can hold. Existing maps may remain visible to members with access even when the plan does not allow another map. When creation or duplication reports a plan limit, reuse an appropriate existing map or ask an organization administrator to review plan capacity.

Conversion also consumes the available Test Group and Section capacity. Review the related guide Convert Mind Maps into Test Structure before using a diagram as the source of maintained test structure.

Practical Example

A team is planning a checkout feature. It creates a Mind Map named Checkout Scope with a root node for Checkout, child nodes for Cart, Address, Payment, and Confirmation, and deeper nodes for card payment and payment failure. Relationship labels capture dependencies that are useful during review.

The team saves the map and shares the structure in a planning session. After agreeing on the parent-to-child direction, it converts the Checkout branch into one Test Group with nested Sections. No Test Cases are created by that conversion. The team opens the resulting Sections from conversion history and then writes the reusable Test Cases, steps, and expected results in the Test Cases workspace.

Mind Maps

Convert Mind Maps into Test Structure

Turn one selected Mind Map branch into a new Test Group or nested Sections without creating Test Cases.

Know Exactly What Conversion Creates

The editor gives the selected branch, hierarchy, and spatial arrangement enough context to decide what should become a Test Group or nested Sections. Save the map before conversion so the generated structure matches the visible planning state.

Mind Map editor with structured test scope
Arrange and save the intended branch before converting it into formal Test Group or Section structure.

Mind Map conversion turns one selected branch into reusable test-library structure. It has two modes:

ModeWhat Armoury creates
Convert GroupOne new Test Group plus one Section for the selected node and one nested Section for each descendant
Convert SectionNew Sections inside one existing active Test Group, starting with a root Section for the selected node

Conversion does not create a Test Case. It does not create steps, expected results, priorities, owners, tags, or Test Case versions. After conversion, open the created Section and add or import Test Cases separately.

The selected node always becomes a Section. In Convert Group mode, the Test Group name comes from the name entered in the confirmation dialog; it does not come from the selected node automatically. A name longer than the Test Group name field allows is truncated during conversion.

Prepare the Branch

Before converting, check the selected branch:

  1. Give every included node a concise Section name.
  2. Direct relationships from parent nodes to child nodes.
  3. Remove unrelated outgoing relationships from the selected branch.
  4. Arrange siblings from top to bottom in the order they should appear as Sections.
  5. Save the map successfully.

Conversion follows every node reachable through outgoing relationships from the selected node. Ancestors, unrelated roots, and siblings outside that subtree are not included. Relationship labels do not change the hierarchy.

For a graph with multiple paths to the same node, the node is created as one Section under the first parent reached during conversion. For an understandable result, resolve shared descendants and cycles before confirming.

If the map has unsaved changes when conversion starts, the editor tries to save first and stops if that save does not succeed. Saving and conversion are two separate requests without a cross-tab revision lock. Avoid editing the same map in another tab while conversion is in progress.
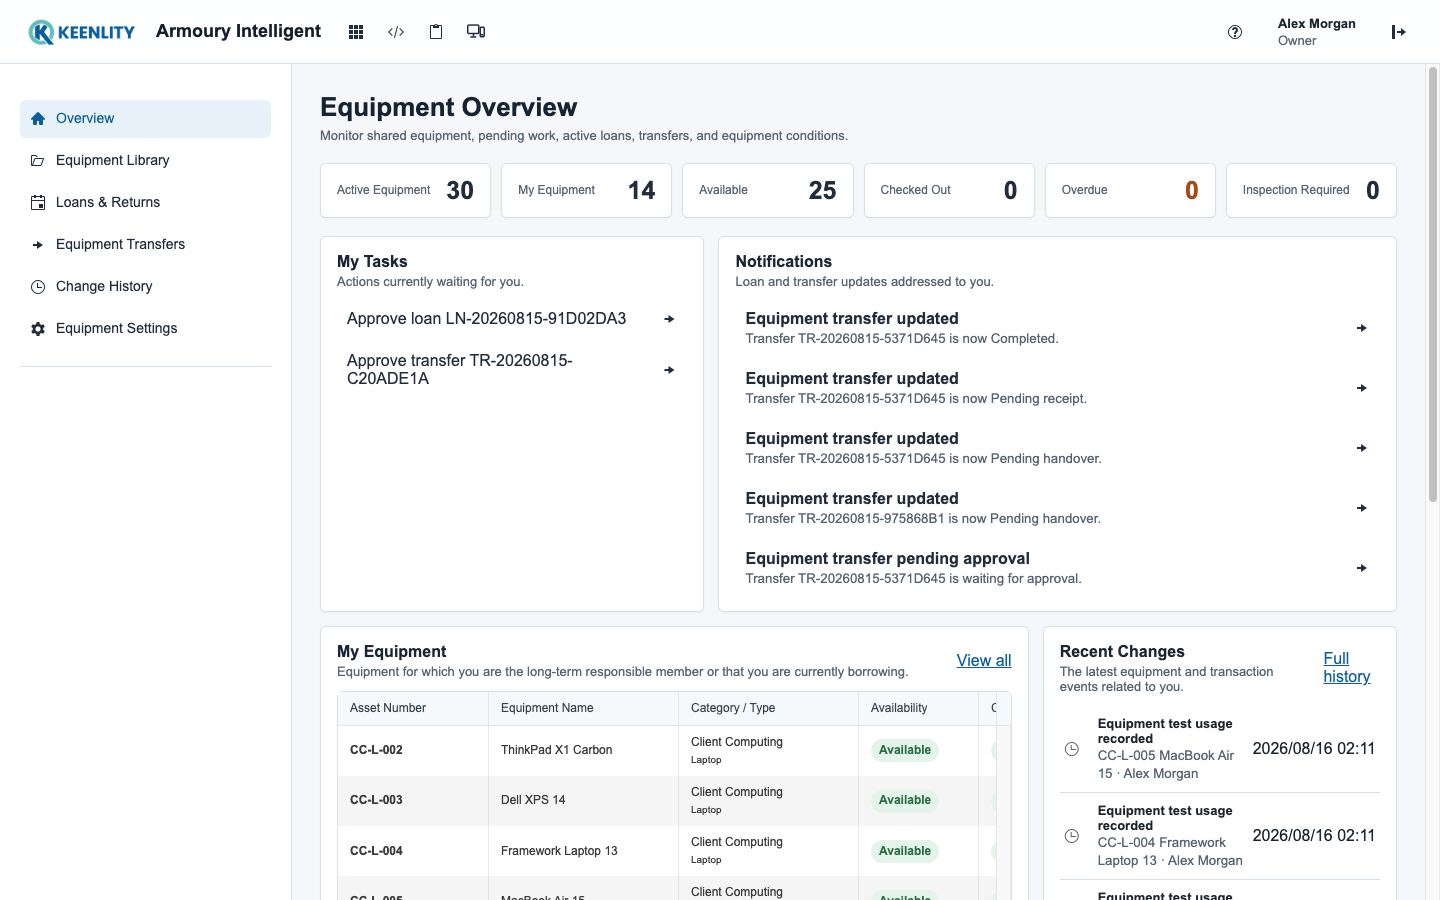
Convert a Branch into a New Test Group

Use Convert Group when the selected branch should become an independent top-level test area.

  1. Select the root node of the branch.
  2. In the Conversion panel, select Convert Group.
  3. Enter the new Test Group name.
  4. Select Confirm Conversion.
  5. Wait for the conversion buttons to become available again, then verify the new entry in Conversion history. Synced describes the map's save state; it does not indicate that conversion has finished.

Armoury creates the Test Group with an empty description. It creates the selected node as the root Section, then creates each reachable child as a nested Section. New Sections also start with empty descriptions.

The root Section becomes the Test Group's default Section. If the requested Test Group name already exists in the Project, Armoury uses the next available name, such as New Group 2, rather than replacing the existing group.

Selecting a non-root map node is supported. Only that node and its descendants are converted; its map parent and other branches remain outside the new Test Group.

Convert a Branch into an Existing Test Group

Use Convert Section when the branch belongs inside an active Test Group that already exists.

  1. Select the branch's root node.
  2. Select Convert Section.
  3. Choose an active Test Group from the list.
  4. Select Confirm Conversion.

The selected node becomes a new root-level Section directly under the chosen Test Group. Its descendants become nested Sections beneath it. The dialog does not select an existing parent Section, so conversion cannot insert the branch beneath a specific existing Section.

If the chosen Test Group does not yet have a default Section, the newly created root Section becomes its default. An existing default Section is left unchanged. Convert Section does not create another Test Group.

If no Test Group is available in the selector, create an appropriate Test Group first. The member must also be able to view Test Groups in order to load the selector.

Understand Section Order and Names

Each node label becomes its Section name. A label longer than the Section name field allows is truncated during conversion; the Mind Map node label is not changed. Armoury orders children by their current vertical canvas position, then horizontal position. Arrange siblings before conversion when their order matters.

The conversion copies structure and names at that moment. It does not create a live two-way connection:

  • Renaming a map node later does not rename the Section.
  • Renaming a Section later does not rename the map node.
  • Moving or deleting a map node later does not move or delete the created Section.
  • Editing or removing a relationship later does not reorganize the created Sections.

Make later structural changes in the Test Cases workspace, or convert a deliberately revised branch as a new structure after confirming that duplication is intended.

Read Conversion Markers and History

After a successful conversion, each converted node receives a conversion record unless it already retains the maximum of 50. A marker on the node indicates that conversion history exists and reflects only the most recent retained record. Selecting the node lists all retained records with their Test Group, Section, conversion time, and Section link. A healthy record uses a status dot without status text; missing or archived records also show a written warning.

The link opens the Section context; it does not imply that the Section contains any Test Cases. A stored link for a missing or archived mapping can be stale or lead to a not-found page. Use the normal Test Cases workspace to review the target and create detailed cases.

The conversion record is traceability metadata stored with the Mind Map. It is not ownership of the created Test Group or Section, and it does not prevent those records from being renamed or managed in their normal workspace.

Repeat Conversion Deliberately

Conversion is additive. Running Convert Group or Convert Section again on the same node does not update, merge, or replace the earlier output. It creates another Test Group or another set of Sections and, while an affected node is below its record limit, appends another conversion record to that node.

Use repeated conversion only when a second independent structure is intentional. To revise the first output, edit its Test Group and Sections directly.

A node retains at most 50 conversion records. When it already has 50, another conversion can still create new test structure, but the new conversion metadata is discarded for that node and the existing 50 records are not evicted. Avoid using repeated conversion as a version-history mechanism.

Duplicating a Mind Map clears all conversion records from the copy. Test Groups and Sections created from the source map remain unchanged. Deleting a converted node likewise does not remove previously created test structure.

Synchronize Converted Data

Conversion records are snapshots until synchronized. When a converted Test Group or Section is renamed or becomes unavailable, select a node that has conversion history and use Sync Converted Data.

The editor saves pending map changes first. It then checks every conversion record across the entire Mind Map, not only the selected node, and pulls these values into the history metadata:

  • Current Test Group name.
  • Current Section name.
  • Active or archived state.
  • Missing state when the referenced Section or Test Group no longer exists.
  • The latest synchronization time in stored metadata. This time is not displayed in the editor.

Synchronization does not rename node text, recreate a missing Section, reactivate an archived record, move any Section, or push map edits into the test structure. It only refreshes the conversion history shown in the map. The node marker still summarizes only the most recent retained record, so review the full history panel for warnings on older mappings.

Understand Permissions and Plan Capacity

Conversion and synchronization use their own Project permissions. In the default Project roles, Project Managers and Contributors can normally perform both actions; Testers and Viewers normally have view-only Mind Map access. Customized roles and member-specific permissions can differ.
Convert Section also requires access to view the available Test Groups. A conversion button can remain visible even when the signed-in member lacks one of the required permissions. If an access error appears, ask a Project administrator to review Mind Map conversion, synchronization, and Test Group viewing permissions.
Creating the result consumes the organization's available active Test Group and Section capacity. Convert Group needs capacity for one Test Group and every Section in the selected subtree. Convert Section needs capacity for every Section in that subtree. If validation, permission, or plan capacity blocks the operation, Armoury does not intentionally create only part of the requested hierarchy.

Practical Example

A Payment node has Card Payment, Bank Transfer, and Failure Handling children. Failure Handling has Retry and Declined Card descendants.

The team selects Payment and uses Convert Group with the name Checkout Payment. Armoury creates the Checkout Payment Test Group, a root Payment Section, three child Sections, and two deeper Sections under Failure Handling. It creates no Test Cases.

Later, a lead renames Failure Handling to Payment Errors in the Test Cases workspace. The map node still says Failure Handling until someone edits it manually. After Sync Converted Data, conversion history shows Payment Errors as the current Section name while the node label remains unchanged. The team then opens the Section link and writes the relevant reusable Test Cases.

Defect Tracking

Manage Project Defects

Report local defects, associate execution evidence, assign owners, filter the defect workspace, copy records, and preserve archived history.

How defects work in Armoury

The Defect workspace combines status and assignment filters, a populated grid, linked Run Cases, and the selected defect record. Start from the selected item's local evidence before deciding whether Jira synchronization or another status change is appropriate.

Defect tracking workspace with selected defect evidence
Filter the defect portfolio, then inspect the selected record and linked execution evidence before triage.

Defect Tracking stores project-scoped problem records. A defect can be reported directly, created from a failed Run Case result, or created from an existing Jira ticket.

Armoury separates local QA classification from external ticket data:

  • QA Severity describes the impact assessed by the testing team.
  • QA Priority describes the handling priority assessed by the testing team.
  • Ticket Status and Ticket Priority come from the linked external ticket when one exists.

QA Severity and QA Priority both use Critical, High, Medium, and Low, but they are independent fields. Updating one does not update the other.

There is no separate local workflow status such as Open or Closed. An active defect with no external ticket is treated as open. For a linked defect, the external ticket's status category determines whether it is currently considered open.

Defects do not require a Test Run

A defect can be created without a Test Run. This supports problems found during exploratory testing, review, setup, or other project work that has no Run Case.

When execution evidence exists, linking the defect to a Test Run and one or more Run Cases provides stronger traceability. These relationships remain optional rather than becoming fake required data.

Use the No Linked Test Run filter to find active defects without a Test Run association.

Create a local defect

Open Defect Tracking, open the create split button, and select Create Defect.

Complete the relevant fields:

FieldBehavior
TitleRequired local summary.
Test RunOptional execution context.
Run CaseOptional case from the selected Test Run.
QA SeverityLocal impact classification; defaults to Medium.
QA PriorityLocal handling classification; defaults to Medium.
AssigneesZero or more active organization members.
DescriptionLocal details, reproduction information, or supporting context.

Armoury assigns the next project-specific key in the BUG-001 style and records the current user as the reporter.

Create from a failed result

Open a Run Case's Test Results and select the conversion control on a Failed history item.

The new defect receives the Test Run, source Run Case, source result, case context, expected and actual results, execution notes, executor, and execution time. Its initial QA Severity and QA Priority both match the Run Case priority. The new defect key is appended to the result's defect reference.

Only Failed results can be converted. Converting the same active result again returns its existing defect instead of creating a duplicate.

Review the defect workspace

The page provides filters for:

  • Test Run, including No Linked Test Run
  • Ticket Status
  • QA Severity
  • QA Priority
  • Assignee
  • Keyword search across defect and ticket information

Ticket status summary blocks show counts for the active defects currently loaded. Select a status block to apply that Ticket Status filter.

The grid includes the external Ticket ID, defect title, Ticket Status, Ticket Priority, Ticket Reporter, QA Severity, Test Run, QA Priority, assignees, synchronization time, and external ticket timestamps. Select a ticket link to open the external system. Select the Armoury defect title to open the defect editor.

Edit an unlinked defect

When no external Ticket is linked, the defect editor allows the local title and description to be changed together with QA Severity, QA Priority, Test Run, assignees, and linked Run Cases.

When a Ticket is linked, its title and description become the externally managed display values and are read-only in the defect editor. Local QA Severity, QA Priority, execution links, and assignees remain Armoury-managed fields.

This boundary prevents a local edit from appearing to update Jira when synchronization is designed to pull linked ticket content into Armoury.

Share a defect

Select the share control in the detail view or editor to copy a precise defect link. Opening the link selects the matching active defect and opens its editor.

The link does not grant project access. If the record is not active, belongs to a different project, or no longer exists, Armoury shows that the shared defect cannot be opened.

Copy a defect

Select Copy Defect, then choose the current project or another active project in the same organization.

The new defect receives a new project-specific key and copies:

  • Title and description
  • QA Severity and QA Priority
  • Assignees who are still active in the organization

It does not copy:

  • Test Run or Run Case relationships
  • Source Test Case or result relationship
  • Test Group or Section context
  • External Ticket link or synchronization state

The user performing the copy becomes the reporter. Review and supply the target project's execution context after copying.

Archive a defect

Select Archive in the defect editor and review the confirmation.

After archiving, the defect leaves the active tracking list and cannot be edited or synchronized with the external system. There is no restore control in the current defect workspace.

Archiving does not erase historical evidence. A BUG-... key already stored in Test Run result history or a report's Run Case snapshot remains there, and the report's frozen defect-reference count is unchanged. The archived defect itself no longer appears in the report page's current active Defect Statistics section. Archive only when the record should leave current tracking.

Understand current open counts

Armoury considers an active defect currently open when:

  • It has no external Ticket link, or
  • Its linked Ticket status category is not Done or Completed.

This definition is used by project defect counters and the current assigned defects metric in Work Reports. It is based on the current record and external status, not on the date range selected in a report.

Permissions and limits

Viewing, creating, editing, and archiving defects are separate project permissions. Creating a defect from a failed result also requires defect creation access. Jira synchronization and link changes require defect editing access.

The organization's plan can enable or limit active defects. A plan limit can prevent a new local defect, a copy, a ticket import, or a failed-result conversion from creating another active record.

Defect Tracking

Synchronize Defects with Jira

Configure Jira context, create or import linked defects, understand synchronization direction, and resolve common ticket-link issues.

Jira integration boundaries

The Integration page shows the current user's Jira authorization, available sites, and project mapping context. Confirm the correct Atlassian site and Armoury organization before creating or synchronizing linked defects.

Jira authorization and available sites
Verify the connected Jira identity and site before configuring project mappings or synchronizing defects.

Armoury currently connects Defect Tracking to Jira Cloud. The person who starts an operation uses their own connected Jira account, so Jira permissions and accessible sites depend on that user.

Jira integration is available only when the organization's subscription includes Integration. When it is disabled, Armoury hides connection, configuration, import, and synchronization actions and rejects Jira integration API requests before contacting Atlassian. Existing authorizations, sites, project mappings, ticket links, and stored ticket snapshots remain saved; enabling Integration again makes them available without Armoury proactively disconnecting Jira.

The integration has two levels of setup:

  1. The user connects Jira from Integration and authorizes an accessible Jira site.
  2. A project manager opens Project Settings and maps the Armoury project to a Jira site, Jira project, and issue type.

Project Settings can also map Armoury's Critical, High, Medium, and Low priorities to priorities available for the selected Jira project and issue type. This mapping is used when Armoury creates a Jira ticket. It does not overwrite the local QA fields when Armoury reads an existing ticket.

If either the user connection or project mapping is missing, ticket operations cannot complete.

Understand the two data domains

The defect editor shows Jira data and Armoury data separately.

Jira supplies the linked ticket's:

  • Ticket key and URL
  • Title and description
  • Status and status category
  • Ticket priority
  • Ticket reporter
  • Created and updated times

Armoury continues to own:

  • BUG-... defect key
  • QA Severity and QA Priority
  • Test Run and linked Run Cases
  • Armoury assignees and reporter where applicable
  • Archive state
  • Last synchronization time, direction, state, and error metadata

For a linked defect, synchronization refreshes its Jira status, priority, reporter, and timestamps. A non-empty Jira title or description replaces the corresponding local value; an empty remote value leaves the existing local value unchanged. Editing the Armoury record later does not continuously push changes back to that existing Jira ticket.

Synchronize one defect

Open a defect and select Sync from External System.

The behavior depends on the current link:

The defect already has a valid Ticket link

Armoury retrieves that Jira ticket and updates the matching reporter, resolved timestamp, and displayed Jira snapshot. Non-empty Jira title and description values replace the local values; empty Jira values do not erase the existing local text. Jira remains the source of the linked ticket fields shown in the editor.

The defect has no Ticket link

Armoury asks for confirmation, then creates a new Jira ticket from the local defect. Confirm the title, description, Test Run, linked Run Cases, QA Priority, and QA Severity before continuing.

The ticket creation content includes the local defect context and Armoury links. If project priority mapping is available, Armoury writes the mapped Jira priority. After creation, it stores the new Ticket link and returned Jira snapshot.

The linked Jira ticket no longer exists

The sync operation creates a replacement Jira ticket from the local defect and updates the link to that new ticket. Review the result carefully before assuming the old Jira history remains connected.

Run Full Sync

Open the create split button and select Full Sync to process every active defect in the current project.

For each defect, Armoury:

  • Pulls current Jira data when a valid Ticket link exists
  • Creates a Jira ticket when no link exists
  • Creates a replacement when the linked Jira issue cannot be found
  • Records an error for an item that cannot be processed

The page shows Armoury's stored last full synchronization summary and timestamp. These are operation metadata recorded by Armoury, not a timestamp supplied by Jira. A partial failure does not mean that every item failed; review the returned counts and then inspect affected records.

If multiple active Armoury defects point to the same Jira ticket, Armoury skips those ambiguous links instead of guessing which defect should receive the ticket data.

How reporter matching works

Armoury always stores the Jira reporter display snapshot for the linked ticket. If that Jira account matches an organization user's connected Jira identity, Armoury can also set that member as the local Armoury reporter.

If no match exists, the external reporter is still shown as Jira data while the existing local reporter remains available for Armoury accountability.

How priority mapping works

QA Priority and Jira Ticket Priority are not synchronized as one shared field.

  • When Armoury creates a Jira ticket, the project mapping translates the local QA Priority to a Jira priority when the Jira create screen supports it.
  • When Armoury imports or refreshes a Jira ticket, it stores and displays the Jira priority name as external snapshot data.
  • Pulling Jira data does not replace local QA Priority or QA Severity.

If the available Jira priorities change, refresh and save the priority mapping in Project Settings before creating more tickets.

Resolved and open behavior

When the linked Jira status category is Done or Completed, Armoury records the defect as resolved for current counting. If a later synchronization returns a non-done category, the resolved timestamp is cleared.

The external status does not create a separate editable local workflow state. Current open defect counts are derived from the active record and the latest synchronized Jira category.

Archived defects

An archived defect cannot be synchronized, previewed for a link change, or connected to another ticket. Its existing external snapshot remains historical data.

Troubleshooting checklist

Connection or mapping is missing

Confirm that your own Jira account is connected, then ask a project manager to confirm the Jira site, project, and issue type in Project Settings.

Jira denies the operation

Confirm that your connected Jira user can browse the source issue and create issues in the mapped Jira project with the mapped issue type.

Ticket cannot be found

Try the exact issue key or standard Jira browse URL. Confirm that it belongs to an accessible Jira site.

Ticket is already imported

Open the existing linked Armoury defect instead of creating a duplicate. If the current association is wrong, review and change that record's Ticket link.

Priority was not written

Review the project priority mapping and whether the selected Jira project and issue type expose priority during ticket creation. Imported Jira priority is display data and does not change Armoury QA Priority.

Full Sync reports mixed results

Use the summary to distinguish pulled, newly created, and failed items. Open the affected defects individually to correct their connection, mapping, permission, or duplicate-link problem.

Project Administration

Project Tags

Create, color, search, archive, and restore Project Tags, and understand how active and archived tags affect Test Cases.

Project Tags

The Project Tags workspace shows active labels alongside their descriptions, colors, and usage. Select a tag to confirm its meaning and visual contrast before changing it or applying it to more Test Cases.

Project Tags list and selected tag editor
Review tag meaning, colors, and current usage before editing or expanding its use.

Project Tags classify Test Cases within one Project. They are not shared across Projects, even when two tags have the same name or colors.

Create a tag

  1. Open Project Tags for the current Project.
  2. Select New Tag.
  3. Armoury immediately creates an active tag named Tag with a white background and black text, then opens it in the editor.
  4. Change the name, description, background color, and text color.
  5. Select Save Tag.

The initial click is already a write. If the generated tag is not needed, archive it instead of leaving it as an unused placeholder.

Tag names are not unique. Two active or archived tags may have identical names, so use distinct color or description choices when users must tell them apart.

Choose colors

The editor shows the final tag preview. Choose a palette color or enter the background and text colors directly. Random Colors generates a pair with a contrast ratio of at least 4.5 so the label remains readable.

Color alone should not carry the tag's meaning. Use a clear name because the Test Case filter and editor also rely on tag text.

Search and case counts

The grid includes active and archived tags. Search matches name, description, background color, and text color. The columns show preview, name, status, colors, Test Case count, description, and last update.

The Test Case count includes linked archived cases. It is a relationship count, not a count of only cases visible in normal active lists.

Only active tags appear in Test Case tag selectors and satisfy the Dashboard's active-tag quality check. Archived tags are omitted from those selectors.

Archive a tag

  1. Select an active tag.
  2. Select Archive.
  3. Enter the case-sensitive confirmation text ARCHIVE.
  4. Confirm the action.

Archive removes the tag from normal Test Case editing choices and releases its active-tag allowance. It does not remove the existing many-to-many relationships from Test Cases.

The archived row remains in the Project Tags grid, where its editor is read-only. Restoring the tag makes preserved relationships visible on cases again and consumes active-tag allowance.

Viewing, creating, editing, and archiving use separate Project Tag permissions. In the current interface, restoring an archived tag uses the edit-tag capability. Plan settings can independently limit the number of active tags.

Project Administration

Project Settings

Maintain the Project's visible settings and Dashboard quality checks while respecting read-only access, permissions, and current product boundaries.

Project Settings

Project Settings combines presentation defaults, Dashboard quality metrics, access configuration, Jira mapping, and archive entry points. Verify the active tab and project name before saving because each area changes a different operational boundary.

Project settings and quality configuration
Confirm the project and settings tab before changing defaults, quality metrics, access, or integration mapping.

Project Settings combines general configuration, Dashboard quality checks, member and role administration, optional integration settings, and Archive Management for the current Project.

The selected Project matters. Changing the Project selector changes the settings context and updates the user's current Project context used by project navigation.

Who can open and edit settings

A user can open the page when they have at least one Project governance permission: manage members, roles, member permissions, owners, or settings. This does not mean every tab is editable.

Only users with Manage project settings can save the general Project fields or Dashboard quality metrics. Other governance users can inspect this configuration in read-only mode and use only the member, role, owner, or other controls their own permissions allow.

Project owners, the organization owner, and enabled support users receive full Project access under the current permission model. Their access source is locked in the member editor rather than represented as ordinary editable custom permissions.

General Project fields

FieldCurrent behavior
Project NameRenames the current Project.
DescriptionUpdates the Project description.
Default EnvironmentSelects Staging, Production, or UAT in the current interface. A newly created settings record starts at Staging.
Current Primary VersionStores a short Project version label. A newly created settings record starts at v1.0.0.
Show row numbersAdds row-number columns to supported grids, including Test Case grids. It is off by default.

The Default Environment and Current Primary Version values are stored as Project settings, but the current New Test Run form does not automatically populate its Environment or Version from them. Treat these fields as maintained Project metadata until that workflow is explicitly connected; enter the required values in each new Test Run.

After editing these general fields, select Save Changes. Name, description, environment, primary version, and row-number preference are saved together. Quality toggles use their own save action.

Dashboard Data Quality Metrics

The Quality Metrics tab contains six toggles, all enabled by default:

  1. Cases without owners.
  2. Cases without test steps.
  3. Cases without expected results.
  4. Cases without a Section.
  5. Cases without active tags.
  6. Archived cases still in active Test Runs.

Select Save Metric Settings after changing the toggles. Disabled metrics no longer contribute to the Dashboard's Data Quality total and cannot be opened there.

Some labels are intentionally concise. The current exact query rules, including how templates and Test Run status affect the result, are documented in Dashboard Data Rules.

Other settings tabs

TabPurpose
Members and PermissionsAdd Project members, assign a shared role or custom permissions, manage Project owners, and maintain custom roles.
Jira IntegrationAppears only when the relevant integration capability is available.
Archive ManagementReview and restore archived Test Groups, Test Cases, Project Tags, and Project Templates.

Use the dedicated Members and Permissions and Archive Management articles for their confirmation and ownership rules.

Project summary

The page also displays Project creation and update timestamps together with Test Case, Test Run, and open-defect counts. These are context indicators, not editable settings. Confirm that this summary belongs to the intended Project before making a change.

Work Reports

Review Work Reports

Analyze member activity and current workload for one project using date, timezone, and Test Run-aware metrics.

What Work Reports show

The populated report combines date-scoped member activity, a daily trend, detailed events, and current workload. Confirm the selected project, date range, and browser timezone before comparing members.

Member activity and workload report
Compare recorded activity and current workload only after confirming project, date range, and timezone.

Work Reports summarize member activity and current workload for one selected project. They combine Test Case creation and edits, Test Run result submissions, reported defects, current assigned defects, and current pending Run Cases.

The report is calculated from current Armoury records when it is requested. It is not a saved report snapshot, and it does not combine multiple projects.

Use Work Reports to answer questions such as:

  • Who created or edited Test Cases during the selected period?
  • How many result submissions did each member make?
  • How many distinct Run Cases did each member execute?
  • Who reported defects?
  • Who is currently assigned unresolved defects or Not Run cases?

Select the project

Work Reports open in the user's current default project. Use the project selector to switch context. Armoury saves the selected project as the new default and reloads the report for that project.

Every count, trend, member row, and detail item belongs to that one selected project. Changing the project changes the entire report scope.

Set the report range

The report provides:

  • Start Date
  • End Date
  • Test Run, with All Test Runs as the default

The default range is the most recent seven calendar days including today, subject to the organization's plan limits.

Armoury sends the browser's IANA timezone with the selected dates. Day boundaries and daily trend grouping use that same timezone, so a result near midnight is assigned to the date the user expects locally.

The date range must follow these rules:

  • Start Date cannot be after End Date.
  • End Date cannot be in the future.
  • Start Date cannot be earlier than the available history limit.
  • The inclusive range cannot exceed the maximum days allowed per query.

Open the range help tooltip after loading the report to see the active timezone, earliest available date, maximum range, and history allowance for the current plan.

Filter by Test Run

Choose a Test Run when the report should focus on one execution cycle.

This filter applies to result submissions, unique executed cases, reported defects linked to that run, current defects linked to that run, and current pending Run Cases in that run.

Test Case creation and edit activity remains project activity because those records belong to the reusable test library rather than to one Test Run.

Read the top metrics

MetricMeaning
MembersNumber of member rows included in the report.
Activity EventsNew cases + edited cases + all result submissions + reported defects.
Test ResultsNumber of saved Test Run result history entries in the date range.
Current WorkloadCurrently assigned open defects + currently assigned Not Run Run Cases.

Activity Events deliberately avoids adding derived or subtype columns again. For example, Failed and Blocked are already included in Test Results, and unique executed cases are derived from those same result submissions.

Understand the member columns

ColumnCounting rule
ActivityNew Cases + Edited Cases + Test Results + Reported Defects.
New CasesTest Cases created by the member during the date range.
Edited CasesStored Test Case versions created by the member during the range, excluding the initial creation version.
Test ResultsEvery result submission saved by the member. Repeated execution of the same Run Case counts again.
Executed CasesDistinct Run Cases with a result from that member during the range. Repeated submissions for the same Run Case count once.
FailedResult submissions whose saved status is Failed.
BlockedResult submissions whose saved status is Blocked.
Reported DefectsDefects opened during the selected range, attributed to their reporter. The reporter itself is not date-filtered.
Current DefectsActive, currently open defects assigned to the member at query time.
Currently PendingRun Cases currently assigned to the member whose latest status is Not Run. This includes cases in Completed or Archived Test Runs and priorities excluded from a Run's active execution scope.

Pass is available in the report's underlying metric definitions, but the current Member Summary grid does not display a separate Pass column.

Member rows include current project members and people needed to attribute matching activity. If an actor can no longer be resolved, Armoury can group that activity under an unknown member instead of dropping the event.

Historical events and current snapshots

New Cases, Edited Cases, Test Results, Failed, Blocked, Executed Cases, and Reported Defects are historical metrics constrained by the selected dates.

Current Defects and Currently Pending are snapshots of the state when the report is requested. They are not reconstructed as of the End Date and are not limited by the selected date range.

This means a report for an older week still shows today's current assignments in those two columns. Use them as present workload context, not as historical workload evidence.

Currently Pending is based on assignment and Not Run status only. It does not filter by the Test Run's Completed or Archived state or by its Priorities to Execute setting.

Open activity details

Select a clickable number in the Member Summary to load matching details on the right. The details grid shows:

  • Item
  • Priority
  • Source
  • Status
  • Time

Item links open the relevant Test Case, Run Case, or defect. Details load in groups of 100. Select Load More for the next group or Load All for every matching item.

The current-defect and currently-pending details describe current records. Their Time value comes from the current record's update time and can fall outside the selected date range. Their displayed state can change the next time the report is loaded.

Read the Daily Activity Trend

The stacked column chart shows daily counts for:

  • New Cases
  • Edited Cases
  • Test Results
  • Reported Defects

It excludes current workload because current snapshots cannot be assigned accurately to past days. When a member's detail metric is selected, the chart can focus on that member; otherwise it summarizes the selected project.

The chart uses the same browser timezone and date boundaries as the summary counts.

Example interpretation

Suppose one member has 14 Test Results but 6 Executed Cases. This means the member saved multiple result submissions for some of those six Run Cases, such as retests or corrections.

If that member also has 4 Current Defects and 8 Currently Pending cases, the 12 items describe present workload. They do not mean 12 events happened during the selected date range.

If Activity is high but Executed Cases is low, inspect the detail events before drawing a conclusion. The member may have edited many Test Cases, reported defects, or submitted repeated results for a small execution set.

Access and availability

Work Reports require the project permission to view member activity and a plan that enables the feature. The default Project Manager role has this access; other default project roles do not.

Customized roles and member-specific permissions can change availability. If the navigation entry is visible but the page is forbidden, ask a project administrator to review the current project's member-activity report permission and ask an organization administrator to review plan availability.

Review checklist

  • Confirm the selected project before interpreting any number.
  • Confirm the browser timezone shown in range help.
  • Distinguish result submissions from distinct executed Run Cases.
  • Do not add Failed and Blocked to Test Results again.
  • Treat Current Defects and Currently Pending as present-state snapshots.
  • Open detail rows before using activity counts for workload or performance decisions.
  • Apply a Test Run filter when the discussion is about one execution cycle.
Daily Reports

Write and Review Daily Reports

Record focused daily progress, plans, blockers, and support needs, then review team follow-up without mixing the workflow with project activity reports.

Write your report

Choose the reporting date, add concise items, and associate a project when the work belongs to one. Use the item type to distinguish progress, plans, blockers, risks, and support requests. Submit only after the day's entries accurately describe the current situation.

Personal Daily Report with populated work items
Record concrete progress, blockers, and next actions for the selected date before submitting.

Review the team

Team review is organization-scoped. Filter by date, project, member, item type, or manager status; then inspect unresolved and tracked items separately from the current activity list. Comments should identify the decision, owner, or next checkpoint rather than repeat the original item.

Team Daily Report review and follow-up queues
Use summary counts and focused queues to follow up on unresolved or tracked team items.

Daily Reports and Work Reports are different

Daily Reports are authored status updates. Work Reports calculate activity and current workload from product records such as Test Case versions, results, defects, and assignments. Use both when a manager needs stated context and system-recorded evidence.

API Testing

Organize API Testing Work

Create API Projects and Groups that keep request design, execution history, variables, and access boundaries understandable as coverage grows.

Choose an API Project

An API Project is the top-level container for API design and execution data. Use separate API Projects when systems require different ownership, access, variables, environments, or retention context. Product lines can keep a large portfolio navigable without merging its data.

API Projects organized by product line
Choose the API Project that owns the target system, access rules, and execution history.

Divide work into API Groups

API Groups are working boundaries inside one API Project. Group related services or domains together, then open a Group to arrange Collections and Requests. Names should describe stable service responsibilities rather than a temporary test date.

API Groups within an API Project
Use API Groups to keep related Collections and Requests together before authoring execution flows.

Practical structure

  1. Create one API Project for the system boundary.
  2. Add Groups for stable service domains.
  3. Build Collections around reusable flows and Requests around individual operations.
  4. Keep credentials in typed variables and environments rather than request names or descriptions.
API Testing

Author API Requests and Assertions

Build requests from explicit methods, URLs, parameters, headers, authentication, bodies, variables, and assertions, then inspect the response before saving the workflow.

Build the request deliberately

Select a Collection and Request, then review method, target URL, parameters, headers, authentication, cookies, and body as one configuration. Use variable placeholders for values that change by environment or contain secrets. Collection order should reflect the workflow dependencies that will exist during a full run.

API Request editor with a response pane and configured assertions
Author the request, review the response pane, and define the assertions that will evaluate each execution.

Define useful assertions

Assertions should express behavior the service contract promises: status, headers, body values, schema expectations, or timing limits. Give each assertion a specific purpose so a failed run explains what changed rather than only reporting a generic failure.

Save reusable flow behavior

Use pre-request and response processing only when the same behavior belongs to future runs. Review extracted or written-back variables carefully, because later Requests in the Collection may depend on those values.

Interrupt dependent flows on failure

Use the Interrupt tab when later Requests must not run after a failure. Enable it on a Request to stop when that specific Request fails, or on a Collection to cover every Request in that Collection and its descendants. An interrupt inside a nested Collection stops the whole run instead of returning to a parent Collection.

API Testing

Manage API Variables and Environments

Keep reusable API values typed, scoped, and reviewable while using environments for deployment-specific overrides.

Define project variables

Project Variables provide defaults shared across the API Project. Give each variable a stable name, correct type, clear description, and explicit enabled state. Store a value at the narrowest useful scope so Collection or Request overrides do not become difficult to trace.

Typed variables for an API Project
Review variable names, types, enabled state, and descriptions before using them in Requests.

Separate deployment environments

Environments hold values that differ between targets such as development, staging, and production. Select the intended environment before sending a Request or Collection, and verify that sensitive values are not copied into descriptions, screenshots, or assertion messages.

API environments and their variable sets
Keep target-specific values in named environments and select the correct target before execution.

Resolve unexpected values

When a Request resolves the wrong value, inspect the scopes from broadest to narrowest: Project, Environment, Collection, then Request. An enabled value in a narrower scope overrides the broader value with the same name.

API Testing

Review API Run History and Reports

Use date-scoped history, Request reports, and Collection reports to understand what ran, which checks failed, and how variables changed.

Start from daily history

History summarizes Request and Collection activity for one browser-local date. Use the hourly chart, activity list, and failure hotspots to find a run before opening its retained report. Retention limits control how far back raw execution evidence remains available.

API Testing daily history and failure hotspots
Use daily totals, the hourly result chart, and failure hotspots to locate the run that needs investigation.

Inspect one Request run

A Request report preserves the resolved request, response details, timing, attempts, redirects, assertion results, and variable activity available for that execution. Confirm the environment and source before comparing payloads or replaying a historical run.

Detailed API Request run report
Trace one Request from resolved inputs through response evidence, assertions, and variable changes.

Inspect the Collection execution tree

A Collection report shows ordered child Collections and Requests, aggregate results, skipped steps, iterations, and variable changes across the full flow. Follow the first failed or errored step before investigating later dependent failures.

API Collection run report and execution tree
Review the Collection execution tree in order and open the first failing step for root-cause evidence.
API Testing

Manage API Project Access and Settings

Maintain API Project metadata, members, roles, and owners while preserving a clear authorization boundary for request design and execution.

Review the access source

API Project access can come from ownership, organization-level authority, an API Project role, or a custom permission set. Confirm the displayed source before changing a member: assigning a role replaces that member's custom API Project permissions.

API Project settings, members, roles, and owners
Review metadata and each access tab before changing API Project membership or ownership.

Keep roles maintainable

Use reusable roles for common responsibilities and custom permissions only for justified exceptions. Separate read, authoring, execution, and access-management responsibilities when different team members own them.

Protect ownership

An API Project must retain an owner. Add the replacement owner and confirm their organization membership before removing another owner. Archive the API Project only when active design and execution work has ended.

AI and MCP Access

Control AI and MCP Access

Set the organization AI access policy, approve only required MCP scopes, and retain a clear boundary between AI clients and product permissions.

Start with the organization policy

AI access is both entitlement- and permission-controlled. An organization administrator should first confirm that AI access is enabled, then decide which MCP capabilities approved clients may use. A disabled scope remains unavailable even when the underlying user can perform the equivalent action in the browser.

Organization MCP access policy and scope audit
Review enabled MCP scopes and their access level before connecting an AI client.

Apply least privilege

Enable read scopes before write or execute scopes, and add broader capabilities only for a defined workflow. Product-level authorization still applies: an MCP client acts within the connected user's organization and project access rather than bypassing it.

Review changes

Treat policy updates as administrative security changes. Record why a scope was enabled, review the effective list after saving, and remove capabilities that are no longer required by an active integration.

Equipment Management

Equipment Management Overview

Understand the organization equipment workspace, its roles, states, and recommended operating flow.

What equipment management covers

The Equipment Overview is a personal work queue as well as an organization summary. Use the counts, pending tasks, notifications, assigned equipment, and recent changes to identify the next operational action.

Equipment overview with tasks and organization inventory
Review inventory totals, personal tasks, notifications, and recent changes before acting on equipment.

Equipment management is an organization-level workspace for shared devices and other test assets. Its records are not owned by one Project. A phone can therefore be registered once, loaned to members working in different Projects, transferred to a new long-term owner, and still keep one continuous history.

The workspace covers:

  • Categories, equipment types, custom attributes, and select options.
  • Equipment records, responsibility, current possession, condition, and availability.
  • Loan requests, approval, pickup, extensions, and return inspection.
  • Long-term responsibility transfers with handover and receipt confirmation.
  • Notifications, attachments, and immutable change history.
  • Full configuration export and controlled import.

Understand the navigation

Open Equipment from the application navigation. The available menu items depend on your organization permissions.

PagePurpose
OverviewReview totals, personal tasks, notifications, assigned equipment, and recent changes
Equipment LibrarySearch, open, and create equipment records
Loans & ReturnsRequest equipment and complete the approval, pickup, extension, and return flow
Equipment TransfersComplete long-term responsibility transfers
Change HistoryReview organization-level equipment events
Equipment SettingsConfigure categories, types, attributes, and options, or import and export equipment configuration

The Overview counters are links to filtered Equipment Library views. Active Equipment and Available are organization-wide inventory counts. My Equipment includes equipment for which you are the long-term responsible member or that you are currently borrowing. Borrowed equipment appears first by return deadline, with overdue items first, and the links select the visible My Equipment scope in the Equipment Library. Checked Out and Overdue include only equipment you are currently borrowing, while Inspection Required includes equipment that requires inspection and for which you are the long-term responsible member. Overdue is calculated from a checked-out or pending-return loan whose end time has passed; it is not a separate stored status.

Know the people fields

Every equipment record has two people fields with different meanings:

  • Long-term Responsible Member is accountable for the equipment over time.
  • Current Holder is the person physically holding it now.

A loan changes the current holder during checkout but does not transfer long-term responsibility. A completed transfer changes both fields to the receiving member. Keeping these concepts separate makes temporary borrowing and permanent reassignment auditable.

Read lifecycle, condition, and availability

These three states answer different questions.

StateQuestion answeredExamples
LifecycleIs the record in active organizational use?Draft, Active, Retired, Archived
ConditionIs the equipment physically usable?Good, Inspection required, Damaged, Under repair
AvailabilityCan a transaction use it now?Available, Reserved, Pending pickup, Checked out, Transferring, Unavailable

Availability is calculated by Armoury from lifecycle, condition, borrowability, active loans, and active transfers. Do not treat it as a manually maintained field. For example, an active device in good condition becomes unavailable when borrowing is disabled, and a returned damaged device remains unavailable until its condition is corrected.

Understand permissions

Equipment permissions are organization-scoped and can be assigned through organization roles.

PermissionAllows
View equipmentOpen the Overview, Library, and equipment details
Create and edit equipmentRegister records, edit them, and manage attachments
Request and confirm equipment loansOpen Loans & Returns and act on your loans
Approve equipment loans and transfersApprove or reject controlled transactions and extensions
Create and confirm equipment transfersRequest transfers and confirm relevant handover or receipt steps
Manage equipment categories, types, and attributesOpen Equipment Settings and import configuration
View sensitive equipment attributesReveal protected values and export complete configuration
View equipment historyOpen full history and recent change data

If a page or action is absent, first confirm the member's organization role rather than assuming the record is missing.

Practical example

A QA organization owns phones, tablets, and USB security keys. An administrator creates a Mobile Devices category with Phone and Tablet types, then adds OS Version and Environment attributes. Security keys use a separate type with Serial Profile as a sensitive attribute.

Members borrow phones for short test windows, so the current holder changes while the responsible lab owner remains the same. When one phone is permanently assigned to another team, the team uses a transfer instead of editing the responsible member directly. Every operation remains visible in the same equipment record and organization history.

Equipment Management

Configure Equipment Categories, Types, and Attributes

Build maintainable equipment forms and understand what can change after records exist.

Plan the configuration hierarchy

Equipment Settings presents Categories, Types, dynamic Attributes, options, and affected equipment as one hierarchy. Select a populated type before editing so dependencies and existing records remain visible.

Equipment settings hierarchy and dynamic attributes
Review the selected category, type, attributes, and existing equipment before changing shared configuration.

Equipment configuration has three levels:

  1. A Category groups related kinds of equipment, such as Mobile Devices.
  2. An Equipment Type defines one reusable form, such as Phone.
  3. An Attribute adds a type-specific field, such as OS Version.

Use categories for stable business groupings and types for records that need the same attributes. Avoid creating a type for each individual model or team unless its data requirements are genuinely different.

Create and organize categories and types

Open Equipment Settings. Select the plus icon above Categories, then edit the generated category name and description. Select the category before adding equipment types.

You can:

  • Drag categories and types to change their display order.
  • Edit names, descriptions, sort order, and active state.
  • Move a type to another category while editing it.
  • Copy a type when a new type needs nearly the same attributes and options.
  • Select a type to see every equipment record currently using it.

A category or type can be permanently deleted only when it has no equipment. Deleting an empty category also deletes its child types, attributes, and options. Use the confirmation dialog carefully.

Add type-specific attributes

Select an equipment type and choose Add Attribute. Supported data types are short text, long text, number, Yes/No, date, single select, and multiple select.

Attribute settings control how the field behaves:

SettingEffect
RequiredMarks equipment as data-incomplete until a value or allowed special state exists
FilterableMakes the attribute available under More Filters after selecting the type
Show in summaryLists the attribute as Name: value in the Equipment Library Attributes column
SensitiveMasks the value unless the member has permission and explicitly reveals it
Allow UnknownAdds an Unknown state distinct from an empty value
Allow Not applicableAdds a Not applicable state distinct from an empty value
ActiveControls whether the field appears on current equipment forms

Number attributes can have a unit. Single-select and multiple-select attributes must have at least one unique option.

Handle empty, unknown, and not-applicable values

Every attribute data type can be left empty. Empty means no value has been recorded. It is not the same as Unknown or Not applicable.

  • Use Unknown when a value exists conceptually but is not known yet.
  • Use Not applicable when the attribute does not apply to that equipment.
  • Leave the field empty when no value has been entered.

Required attributes do not prevent administrators from adding the definition to a type that already has equipment. Existing records without the new value receive a Data incomplete indicator in the Library and detail page so the team can complete them gradually.

Change settings after equipment exists

After any equipment uses a type, an existing attribute's data type is locked. This prevents stored text, dates, numbers, or option IDs from being reinterpreted incorrectly.

You can still:

  • Add new attributes.
  • Edit the attribute name, description, display behavior, and allowed special states.
  • Add, rename, reorder, activate, or deactivate select options.
  • Delete an attribute when its data is no longer needed.

Deleting an attribute is permanent. Armoury removes all recorded values and select options for that attribute, even when equipment exists. Export configuration first when the values may be needed for audit or recovery.

Use active state and deletion deliberately

Deactivating a category, type, attribute, or option preserves the record but removes it from current creation choices. Deletion removes configuration permanently where the interface allows it.

Prefer deactivation when a definition may still explain historical records. Prefer deletion only for an unused setup mistake or when the confirmation text accurately describes the intended data removal.

Practical example

An administrator creates Mobile Devices > Phone with Brand, OS Version, Rooted, and Test Environment attributes. Test Environment is a multiple-select field with Production, Staging, and Development options. OS Version is filterable, while a prototype identifier is marked sensitive.

After phones have been registered, the team decides to track Battery Health. The administrator adds it as a number attribute with percent as the unit. Existing phones remain available but display Data incomplete if Battery Health is required. The team updates values over time without rebuilding the type or changing existing attribute data types.

Equipment Management

Register and Maintain Equipment

Create equipment records, search the Library, and use the complete equipment detail view.

Find equipment in the Library

The Library provides organization-wide search and filters for category, type, lifecycle, condition, availability, responsibility, and holder. Use a narrow view before opening a record so similarly named assets are not confused.

Equipment Library with populated inventory and filters
Filter the organization inventory and verify the asset number before opening an equipment record.

Open Equipment Library to work with the organization's complete equipment list. Search matches asset numbers, equipment names, and recorded attribute display values.

Each active attribute marked Show in summary appears in the Attributes column as Name: value, one attribute per line. Unset values use a dash, and sensitive values remain masked.

Use the filters for Category, Equipment Type, Lifecycle, Condition, Availability, Long-term Responsible Member, and Current Holder. After selecting a type, More Filters becomes available when that type has active filterable attributes. Sensitive attributes appear as filters only for members allowed to view sensitive equipment data.

Choose Clear to remove all filters and return to the base Library view.

Create an equipment record

The creation form separates equipment type, fixed data, dynamic attributes, responsibility, and notes. Confirm the selected type first because it controls which organization-defined fields appear.

New equipment form with type-specific attributes
Choose the equipment type first, then complete fixed data, generated attributes, and responsibility.

Choose New Equipment and complete the form in order:

  1. Select a Category and Equipment Type.
  2. Enter a unique Asset Number and an Equipment Name.
  3. Set Lifecycle, Condition, and Ownership.
  4. Complete the type-specific attributes that are known.
  5. Select the Long-term Responsible Member and Current Holder.
  6. Decide whether the equipment can be borrowed and whether loans require approval.
  7. Add notes and create the record.

Type-specific fields come from Equipment Settings. Empty optional fields remain visible as empty values rather than disappearing from the equipment definition.

After creation, choose View Equipment to open the new record or Create Another to enter the next item. Label printing is not part of the creation-complete screen.

Configure borrowing behavior

Equipment can be borrowed is the primary switch. When it is off, Loan requires approval is disabled and stored as false because a non-borrowable item cannot enter a loan workflow.

When borrowing is enabled:

  • Enable approval for equipment that should be reviewed before reservation.
  • Disable approval for routine equipment that can be conflict-checked and approved automatically.

A multi-equipment request needs approval if any selected item requires it.

Edit equipment safely

Open an equipment detail and choose Edit. You can update basic data, responsibility, holder, borrowing settings, notes, and attribute values.

Changing the Long-term Responsible Member or Current Holder here is treated as an administrative reassignment, not a completed transfer. Full History adds a dedicated reassignment event with the previous member, new member, operator, time, and optional reason. Use the formal Transfer action for a normal handover that requires approval, physical handover, and receipt confirmation.

Changing the Equipment Type replaces the applicable custom attribute set. Armoury blocks a type change after the equipment has formal loan, transfer, or test-usage records, because moving it would make historical context ambiguous. In that case, correct the existing type configuration or create a new equipment record according to the organization's audit policy.

Lifecycle and condition affect calculated availability. A retired, archived, damaged, quarantined, missing, or repair-state item is not available for a new loan even if borrowing is enabled.

Read the equipment detail page

The detail page brings current state, responsibility, attributes, files, loan or transfer context, and history together. Treat the asset number and status badges as the identity check before taking an action.

Equipment detail with responsibility and lifecycle context
Verify asset identity, current state, responsibility, and related records before editing or transferring equipment.

The detail header shows availability, condition, lifecycle, and Data incomplete when required values are missing. The summary separates long-term responsibility from current possession.

The tabs provide:

TabContent
OverviewAsset number, category, type, ownership, and notes
Equipment AttributesCurrent and historical type attributes, including empty values
Loans & TransfersCurrent transfer plus up to ten recent loan records, with borrower and holder snapshots
AttachmentsPhotos and files associated with the equipment
Full HistoryEquipment, loan, return, and transfer events in time order

The first loan record is the current transaction when one exists. The remaining rows are the most recent past loans, regardless of their final status.

Work with sensitive values and attachments

Sensitive attributes are masked by default. A permitted member can choose Reveal; Armoury records that reveal in history. Do not place secrets in ordinary notes or non-sensitive attributes.

Members with equipment management permission can upload one photo or attachment at a time from the Attachments tab, download existing files, and remove files that are no longer needed.

Practical example

A lab administrator registers phone MOB-0042, sets its lifecycle to Active and condition to Good, assigns the lab lead as responsible member, and assigns the technician at the desk as current holder. The phone is borrowable and requires approval because it contains a limited carrier profile.

Later, the technician records a missing OS Version. The Library displays Data incomplete, making the record easy to find and correct. A permitted security reviewer reveals the protected prototype identifier only when necessary, and the reveal remains auditable.

Equipment Management

Borrow, Extend, and Return Equipment

Follow the complete loan lifecycle from a member request through approval, pickup, extension, and return inspection.

Check whether equipment can be borrowed

The Loans & Returns page combines lifecycle status, borrower and responsible-member filters, item details, and available actions. Select a transaction to confirm all equipment items and dates before approving, handing over, extending, or returning it.

Equipment loans and returns workspace
Review the selected loan's people, dates, items, and current state before performing the next action.

An item can enter a loan request only when it is active, in good condition, configured as borrowable, and not blocked by another transaction. Future approved reservations are also checked for overlapping time periods.

If an item is not shown in the request selector, review its detail page for lifecycle, condition, availability, and current transaction rather than creating a duplicate record.

Submit a loan request

Open Loans &amp; Returns and choose Request Loan.

The loan Grid shows the equipment name, asset number, borrower, and current long-term responsible member; select the equipment name to open its detail page. Use the toolbar to combine Status, Borrower, Long-term Responsible Member, and Equipment filters. The responsible-member filter uses the equipment's current long-term responsible member.

  1. Select one or more available equipment items.
  2. Choose the Start and End date and time.
  3. Enter a clear Purpose.
  4. Submit the request.

The borrower is always the currently signed-in organization member. The form cannot submit a request on behalf of another person. Each item stores the borrower and holder names at the time of the transaction so later member profile changes do not erase the audit context.

Selecting several items submits them together, but Armoury creates a separate loan record for each equipment item. Every loan therefore has one borrower, one equipment item, and its own status and approval decision.

The same equipment can remain selectable for other members while requests are waiting for approval. It is removed from your own selection after you already have an open request for it. If a multi-equipment submission still contains one of your open items, Armoury removes that item and creates separate loans for the remaining equipment; if every item is removed, no new loan is created.

Understand approval and reservation

Each equipment item follows its own approval setting. Armoury conflict-checks and automatically approves an approval-free item, while an item that requires approval creates a Pending approval loan. Members with approval permission receive a task. The equipment's current holder can also approve or reject that single-item loan without receiving organization-wide approval permission.

Different members may submit overlapping pending requests for the same equipment. Approving one request selects the winner and automatically rejects every other overlapping pending loan containing that equipment. The rejection reason identifies the approved loan. If another overlapping loan was already approved, attempting to approve the later request rejects it instead. Non-overlapping requests remain independent.

Approval also checks the equipment again. It cannot proceed when the equipment condition or lifecycle changed, borrowing was disabled, or an active transfer exists.

After approval:

  • A future loan is Reserved until its start time.
  • A loan whose start time has arrived is Pending pickup.
  • The borrower or an authorized manager chooses Confirm Pickup to check out the items.

Work from the loan detail panel

Select a loan row to open its detail panel. Available buttons depend on status and permission, including Approve, Reject, Confirm Pickup, Request Extension, Complete Return, and Cancel Loan.

After an action succeeds, the detail panel and Grid reload the newest server state automatically. Continue with the next valid action without selecting the row again. If a status filter excludes the updated loan, the detail panel still shows the returned action result so the state is not misleading.

Request and approve an extension

Choose Request Extension for an approved or checked-out loan and select a new end time. The requested time must be later than the current end time.

An extension does not immediately change the loan period. It creates a pending extension request while the current end time remains authoritative. A member with approval permission can approve or reject it. Approval rechecks the equipment's time conflicts before updating the loan and its item.

Only one extension request can be pending at a time. Returning or cancelling the loan clears a pending extension and records the cancellation in history.

Complete return inspection

Choose Complete Return and record the actual condition and inspection notes for each checked-out item. The return completes even when an item is damaged or incomplete.

After return:

  • The current holder returns to the long-term responsible member.
  • Good active borrowable equipment can become available again.
  • Damaged or inspection-required equipment remains unavailable for follow-up.
  • Return time, condition, notes, borrower, and holder snapshot remain in history.

Review past loans from equipment detail

Open an equipment record and select Loans &amp; Transfers. Armoury shows up to ten loan records across every status. The current loan appears first, followed by the nine most recent past records. Each row includes the effective times, borrower at the time, and holder at the time.

Use Full History when you need the action-by-action record. Chips beside timestamps distinguish Loan, Return, Transfer, and general Equipment events.

Practical example

A tester requests two phones for a three-day compatibility test. One phone requires approval, so the whole request waits for the lab approver. After approval, the tester confirms pickup and becomes the current holder.

Testing takes longer than expected, so the tester requests a two-day extension. The approver checks the pending request and approves it after Armoury confirms there is no overlap. On return, one phone has a cracked case. The tester records Inspection required and adds notes; the loan completes, but that phone stays unavailable until inspected.

Equipment Management

Transfer Equipment Responsibility

Move long-term equipment responsibility through approval, handover, and receipt confirmation.

Choose a transfer instead of a loan

The Transfers page tracks long-term responsibility changes through request, approval, handover, and receipt. Select a transfer to verify the current responsible member, recipient, equipment, and pending action.

Equipment responsibility transfer workspace
Confirm both people, the equipment identity, and transfer state before approving handover or receipt.

Use a loan when another member will hold equipment temporarily. Use a transfer when long-term accountability should move to another organization member.

Do not simulate a transfer by editing the responsible member during a handover. The transfer workflow records who requested, approved, handed over, and received the equipment, and changes responsibility only after receipt.

Start a transfer

Open the equipment detail and choose Transfer from the upper-right actions. The action is available when the equipment is active, has no open transfer, and the signed-in member is allowed to transfer it. A non-manager must currently be the responsible member. A pending loan request does not hide the Transfer action; an approved or active loan is checked later before handover.

Select the New Responsible Member, enter the reason, and submit. The receiving member must be an active member of the same organization and cannot already be the responsible member.

When an interface submits several selected equipment items together, Armoury creates a separate transfer request for each item. Every request can then be approved, handed over, received, or rejected independently.

Approve the transfer

A new request enters Pending approval. A member with equipment approval permission reviews the reason and selected equipment, then chooses Approve or Reject.

Approval moves the request to Pending handover. It does not change the responsible member or current holder yet.

Confirm handover

The requester, current responsible member, or an authorized manager chooses Confirm Handover. Armoury checks for active or future approved loans before accepting the handover. Resolve or cancel conflicting loan commitments first.

After handover, the transfer becomes Pending receipt and the receiving member is notified. The equipment is shown as transferring until the flow is completed or rejected.

Accept or reject receipt

The receiving member reviews the physical equipment and chooses one of the available actions:

  • Accept Transfer completes receipt.
  • Reject refuses the transfer and requires a reason.

If the handover condition or contents do not match expectations, reject the transfer and record the issue in the reason. Participants resolve any disagreement outside the transfer workflow before submitting another request.

On acceptance, Armoury updates both the Long-term Responsible Member and Current Holder to the receiving member. The recorded receipt condition becomes the equipment's current condition.

Pending loan requests stay open throughout the transfer. After acceptance, the new holder sees those loans in My Tasks and Loans & Returns and receives a current notification, so they can approve one request or reject it. The previous holder no longer receives holder-based access to those pending decisions.

Monitor transfer status

Open Equipment Transfers and select a row. The Grid shows the equipment name and asset number, and the equipment name opens its detail page. The right-side panel shows the request number, receiving member, overall status, item statuses, reason, and currently valid actions.

Equipment detail also shows an active transfer under Loans &amp; Transfers, and the Full History tab labels transfer actions with a Transfer chip. Notifications link the approver and receiving member directly to the relevant transfer.

Practical example

A mobile phone is permanently moving from the Taipei QA lab to the platform team. The current lab owner opens the phone detail, selects the platform lead, and explains the assignment change.

An approver accepts the request. Before handover, Armoury finds a future approved loan for the phone, so the team resolves that commitment first. The lab owner then confirms handover. The platform lead inspects the phone, accepts receipt, and becomes both responsible member and current holder. The full sequence remains visible without rewriting past ownership.

Equipment Management

Review Equipment Tasks, Notifications, and History

Use the Overview, equipment detail, and paged history to understand current work and past actions.

Use the Overview as a work queue

Change History provides the immutable organization event stream behind overview notifications and detail timelines. Filter by equipment or person when an operational change needs to be reconstructed.

Equipment change history and audit events
Filter immutable equipment events by asset or person to reconstruct responsibility and lifecycle changes.

The Equipment Overview combines operational status and personal work:

  • Summary counters open common filtered views.
  • My Tasks lists approvals, pickups, receipts, and other actions waiting for you.
  • Notifications lists loan and transfer updates addressed to you.
  • My Equipment lists records for which you are the long-term responsible member or that you are currently borrowing. Borrowed equipment appears first by return deadline.
  • Recent Changes shows the latest events in which you are the operator or target when you can view history. Full history opens the Change History Person filter preselected to you.

The Overview intentionally does not create equipment or transactions. Use the relevant Library, Loans & Returns, or equipment detail page after reviewing the work queue.

Open recent notifications

Overview shows the five most recent notifications. Select one to open its target loan or transfer. Equipment notifications do not use read or unread status, and opening one does not change the list except when newer activity arrives.

Notifications communicate that an action changed, but the transaction detail is authoritative. Always confirm the current status and available buttons after opening an older notification because another member may already have acted.

Review an equipment's recent transaction context

The Loans &amp; Transfers tab on equipment detail shows the active transfer, if present, and up to ten loan records. The current loan is first, followed by recent past loans in descending time order.

Borrower and holder names are transaction snapshots. They show who borrowed and held the item at that time, even if the equipment or member profile later changes.

Read the Full History tab

The Full History tab combines equipment events and events related through the equipment's loans and transfers. Each row includes the summary, operator or target context, timestamp, and an action chip:

ChipMeaning
LoanRequest, approval, pickup, extension, cancellation, or another loan action
ReturnCompleted return and recorded return condition
TransferApproval, handover, receipt, or rejection
EquipmentCreation, edit, attachment, sensitive reveal, or another equipment action

Use this view when a status label alone does not explain how the equipment reached its current state.

Direct administrative changes to the Long-term Responsible Member and Current Holder appear as explicit reassignment events. Their event data retains both the previous and new member so the correction cannot be mistaken for a completed transfer.

Search organization Change History

Open Change History for the organization-wide event Grid. Filter by Equipment or Person, sort supported columns, and use the refresh icon at the right side of the toolbar when another member has just completed an action.

When you open Change History from Overview, the Person filter is preselected to you so the complete list matches the personal Recent Changes feed. Clear or change that filter when you need to review other organization events.

The Grid loads 20 records per page by default. Use the page-size list to choose 20, 50, or 100. Its height adapts to the browser workspace while the Grid manages its own record scrolling and pagination.

Treat history as immutable evidence

Completed loan and transfer events are not rewritten to make a later correction appear as if it happened earlier. Armoury keeps additive events so the sequence remains auditable.

Revealing a sensitive attribute is also recorded. History output masks sensitive values, so authorized access does not expose the value again through ordinary event browsing.

Practical example

A manager sees an overdue task on Overview and opens the loan. The borrower has already submitted a return with Inspection required. The manager reviews the equipment's Full History and can distinguish the original Loan pickup from the later Return action by their chips.

To understand who handled the device, the manager checks the borrower and holder snapshots in Loans & Transfers. Then the manager opens organization Change History, filters by the equipment, and reviews the complete sequence without relying on current responsibility fields alone.

Equipment Management

Export and Import Equipment Configuration

Move or restore complete equipment settings and records with selection, duplicate policies, and transactional preview.

Understand what the export contains

Choose Export Configuration in Equipment Settings to download a versioned armoury.equipment JSON file. The package contains:

  • Every category and equipment type, including active state and ordering.
  • Every attribute and select option, including sensitivity and validation settings.
  • Every equipment record and its portable attribute values.
  • Responsible member and current holder email references.

The package does not contain loans, transfers, notifications, attachments, test-usage snapshots, or event history. Those records are organization audit data, not reusable configuration.

Because the file contains sensitive attribute values, export requires equipment management, settings management, and sensitive-value permissions. Store the JSON with the same care as other protected operational data.

Open the import Wizard

Import requires equipment management and settings management permission. Open Equipment Settings, choose Import Configuration, and complete four stages.

  1. Upload File - Select an Armoury equipment JSON export, or choose Import Defaults to prepare Armoury's current default catalog. The Wizard shows category, type, attribute, and equipment totals.
  2. Choose Content - Check the categories and types to import. Checking a category selects its descendant types; individual types can be selected without overwriting an existing parent category.
  3. Duplicates - Choose Skip existing records or Overwrite existing records. Skip is the default.
  4. Import Preview - Review every create, overwrite, skip, and error result before importing.

The original file is uploaded once when it is selected. Armoury keeps it in shared temporary object storage under an import job, and both preview and commit read that same validated file. This lets the workflow continue correctly even when different application instances handle consecutive steps. Closing the Wizard cancels the pending job, while successful and expired jobs are cleaned up automatically.

Import Defaults generates the catalog in the current interface language and uploads it directly to the same temporary object storage without downloading it through the browser first. It contains categories for mobile and tablet devices, personal computers, displays, physical servers, cloud and virtual compute, embedded and edge devices, network and security appliances, storage, media and gaming devices, and wearable or spatial-computing devices. Its types include reusable attributes and options, but its equipment lists are empty, so importing it never creates placeholder assets. The default catalog and the JSON transport format are versioned independently.

Understand duplicate matching

Matching is case-insensitive and uses business identifiers rather than source UUIDs:

RecordDuplicate key
CategoryCategory name in the organization
Equipment TypeType name within the matched category
AttributeAttribute name within the matched type
Select optionOption label within the matched attribute
EquipmentAsset number in the organization

Source category and type IDs must be unique because the selection tree uses them. Names and asset numbers may repeat inside the file; they use the selected policy in file order.

Choose Skip or Overwrite

Skip existing records preserves a matching record. New descendants are still processed. For example, skipping an existing Phone type does not prevent a new attribute or new equipment under Phone from being imported.

Overwrite existing records updates the matching record with imported data. If the same name or asset number appears more than once in the package, later entries update the record created or matched earlier. Existing equipment constraints still apply. In particular, an attribute data type cannot change after the target type has equipment.

Use Skip for additive migration and a cautious first import. Use Overwrite only when the package is intended to be authoritative for selected records.

Review the transactional preview

Preview runs the same create and update services as a real import inside a database transaction, then rolls everything back. This makes validation results representative without leaving partial records.

The result Grid shows Kind, Item path, Action, and Result. Any error prevents commit. Common errors include:

  • A referenced responsible member or holder email is not an active member of the target organization.
  • A lifecycle, condition, ownership value, attribute state, or select option is invalid.
  • An overwrite attempts a forbidden attribute data-type change.
  • Active equipment would violate required configuration or another equipment rule.

Resolve errors in the source organization, target membership, or selected scope, export again when needed, and rerun preview.

Commit and verify

Choose Import only after the preview matches the intended scope. A successful commit is atomic: either the complete selected import succeeds or no selected changes remain. Armoury records a configuration-import event and reloads Equipment Settings.

After commit:

  1. Confirm category and type counts in Equipment Settings.
  2. Open representative types and inspect attributes and options.
  3. Filter the Library by imported types.
  4. Open equipment with sensitive, select, and empty attributes.
  5. Confirm responsible members, holders, lifecycle, and borrowing settings.
  6. Review Change History for the import event.

Practical example

An organization wants to restore Mobile Devices and Security Keys from a controlled export without changing Lab Fixtures. The administrator opens Import Configuration, selects only the two required categories, and keeps Skip for the first preview.

The preview shows existing categories skipped, new equipment created, and two errors because former holders are not active target members. The administrator corrects membership mapping and exports again. A second preview has no errors. After import, the administrator checks representative equipment and then uses Overwrite in a later controlled run only for the category whose package should replace current settings.

Import

Import Test Cases

Turn an existing spreadsheet or CSV into maintainable Armoury Test Cases.

Before you import

Import is not just a way to upload a spreadsheet. Its real purpose is to turn test content from Excel, CSV, an older tool, or a handoff file into Armoury Test Cases that your team can maintain, assign, filter, execute, and reuse.

Before you open the import workflow, make sure the Project already exists and that you have created the Test Group that should own this batch of cases. If you already know the first Section, create it before importing. If your source file contains Section information, you can map those fields during import so Armoury can place or create Sections from the file.

Use import only when the cases should become part of the reusable test library. If the file is only a one-time checklist and will not be maintained later, importing it as Test Cases may create unnecessary cleanup work.

When import is a good fit

Import is a good fit when you already have a batch of cases outside Armoury and the team expects to keep using those cases after the import.

Common examples:

  • Test cases exported from an older test management tool.
  • Regression cases previously maintained in Excel.
  • Acceptance cases delivered by an external testing team.
  • Early product test notes that are now ready to become the official Armoury test library.

If the source file mixes unrelated product areas, split it before importing. Import is scoped to one Test Group, so a file that contains Login, Checkout, Notifications, and Admin cases may need to become several imports.

Prepare the source file

Armoury accepts .xlsx and .csv files. CSV files can use common encodings such as utf-8, utf-8-sig, or cp950.

The most important field is the title. A row without a usable title cannot become a Test Case. A good title should be readable in the case grid, such as Guest can apply a valid coupon before payment. Avoid titles like Case 001 or Payment test because they force the next person to open the case before understanding it.

Before uploading, review the file for these fields:

  • Section: where the case should live inside the Test Group.
  • Preconditions: account state, data, environment, or setup required before step one.
  • Steps: what the tester should do.
  • Expected Result: what the tester should observe.
  • Priority: how important the case is for planning and execution.
  • Owner Email: who should maintain the case after import.
  • Tags: useful slices such as Smoke, Regression, Mobile, or API.

Do not map every spreadsheet column just because it exists. Remove stale notes, duplicate fields, and labels that will not help future planning.

Open the import workflow

Open the Project, then open the Test Group that should receive the cases. Use the Import action from the Test Group case list.

This matters because imported cases are created inside the current Test Group. If you import into the wrong Test Group, the cases may be structurally valid but operationally confusing.

Map fields deliberately

Field mapping is the point where you tell Armoury what each source column means.

Start with the required and executable fields:

  1. Map Title first because it is required.
  2. Map Preconditions, Steps, and Expected Result so the case can be executed.
  3. Map Section fields so the case lands in the correct place.
  4. Map Priority, Owner Email, and Tags after the case content and placement are clear.

Section mapping needs extra care. If you provide only a Section Name, Armoury can place cases under that name, but a name alone is not always enough to express hierarchy. For a multi-level Section tree, provide stable source_section_id and source_parent_section_id values.

Use source_section_id for the Section the row belongs to. Use source_parent_section_id for that Section's parent. This lets Armoury understand parent and child relationships instead of guessing from names.

For example:

  • checkout has no parent and is named Checkout.
  • checkout_coupon has parent checkout and is named Coupon.
  • checkout_coupon_valid has parent checkout_coupon and is named Valid Coupon.

If a case belongs under Valid Coupon, map that row to source_section_id = checkout_coupon_valid. Armoury can then understand the intended path as Checkout > Coupon > Valid Coupon, not as a separate flat Section called Valid Coupon.

If your source file has no Section IDs, Section Name mapping can still work for a simple one-level structure. When names repeat, when the structure is nested, or when you expect to import similar files again later, add Section ID and Parent ID columns before importing.

Be conservative with tags. Old spreadsheets often contain columns for platform, release, owner, testing phase, or temporary status. Not every label should become a tag. Too many tags make filtering noisy instead of useful.

Treat preview as the review step

Preview is the most important part of import. It is the last chance to stop bad structure or noisy data before Armoury creates records.

Check these items before committing:

  • Every imported row has a clear title.
  • Cases are placed in the intended Sections.
  • Nested Sections use the expected parent and child structure.
  • Priority values are valid and not accidentally defaulted everywhere.
  • Owner emails match real organization members.
  • Tags are useful for future filtering.
  • Steps and expected results are still readable after parsing.
  • Skipped rows are understood and acceptable.

If preview looks wrong, do not commit and clean up later. Fix the source file or mapping, then preview again. Repeating preview is usually faster than cleaning a bad import across many cases.

Commit and inspect the result

Commit only after preview matches the library structure you want. Armoury will create the Test Cases inside the current Test Group and place them into the mapped or selected Sections.

After commit, return to the Test Group case list and inspect a few records:

  • Click a case title to confirm the edit page opens correctly.
  • Click elsewhere in the row to confirm the right-side detail panel shows useful content.
  • Check cases from different Sections, especially nested Sections.
  • Review title, steps, expected result, owner, priority, and tags.

This quick inspection helps you catch a systematic mapping mistake before the team starts using the imported cases in Test Runs.

Practical scenario

A QA lead has an old Checkout regression workbook. The team has already created the Project and a Checkout Test Group.

Before importing the full workbook, the QA lead creates a root Section named Checkout Flow and prepares a small sample file. They clean up the titles, separate preconditions from steps, make expected results readable, and remove columns that should not become Armoury data.

During mapping, they connect the case name to Title, setup notes to Preconditions, action rows to Steps, expected behavior to Expected Result, and email to Owner Email. The workbook also contains a nested Section structure, so they map source_section_id and source_parent_section_id rather than relying only on Section names.

In preview, a few owner emails point to former team members. The QA lead stops, fixes the file, and previews again. The second preview shows readable titles, correct Section hierarchy, valid owners, and useful tags, so they commit.

After commit, they return to the Test Group list, open a few titles to check the edit page, and click other rows to inspect the right-side detail panel. At that point, the spreadsheet has become a maintainable Armoury test library, not just uploaded data.

Import

Test Case Import Rules

Understand the exact file, mapping, Section, owner, tag, validation, preview, and commit rules used by the Test Case import wizard.

Test Case Import Rules

The import wizard creates new Sections and Test Cases inside one active Test Group. It does not update existing cases and does not merge imported Sections with existing Sections of the same name.

Import requires the Test Case import permission, an enabled import feature, and enough active-Section, active-case, and active-tag quota for the records the commit will create.

File rules

Supported files are .xlsx and .csv. For CSV, choose UTF-8, UTF-8 BOM, or CP950/Big5 before parsing. XLSX import reads the workbook's active worksheet and uses its first row as headers.

Default deployment limits are 10 MB per file, 5,000 data rows, 80 columns, and 1,000 planned Sections. An uploaded import job expires after 24 hours by default. These file-shape limits are deployment configuration, not plan-based import row entitlements; the plan separately controls the feature and active records created at commit.

Wizard flow

  1. Upload File - Choose the file and CSV encoding, then select Upload and Parse.
  2. Field Mapping - Map source headers to Armoury fields. Same-name fields can be applied automatically and then reviewed.
  3. Section Check - Inspect the Sections Armoury plans to create and their parent relationships.
  4. Import Preview - Review creatable counts, skipped rows, warnings, and errors.
  5. Import Complete - Select Start Import to commit the previewed plan.

Generating a preview does not create cases. Commit creates the entire accepted plan in one transaction.

Available mappings

GroupFields
Sectionsource_section_id, source_parent_section_id, section_name, section_description
Case texttitle, description, reference, preconditions, notes, step_details, steps_json, expected_result
Classificationpriority, status, case_type, owner_email, tags

The title column mapping is required before preview, even though a row may intentionally contain only Section data.

Row creation rules

Source rowResult
Entirely blankSkipped as a blank row.
Blank title with Section fieldsCreates or contributes to a planned Section only.
Blank title with other case data but no Section dataSkipped with a warning; no case is created.
Title with valid case dataCreates a Test Case under its planned Section.
Title with no Section dataCreates the case under a newly planned root Section named default.

The lowercase default Section is specific to that import plan. It is newly created and is not the Test Group's existing default Section.

Section identity and hierarchy

source_section_id is the primary grouping key when present. Without it, exact section_name is used as the grouping key. When repeated rows provide conflicting names or parents for one source ID, the first usable value wins and preview reports a warning. For descriptions, the first non-empty value is used without a conflict warning.

A parent relationship is built only when a child's source_parent_section_id resolves to another source_section_id in the same file. A missing parent makes the Section a root and produces a warning. A name-only Section cannot use a parent source ID and is also created at root. Cycles are errors; invalid cyclic Sections and their cases are excluded from the accepted plan.

Every accepted Section is newly created in the target Test Group, even if an active or archived Section already has the same name.

Case values

  • Priority accepts the stored value or the translated choice label, case-insensitively. Blank defaults to Medium.
  • Status accepts the stored value or translated label. Blank defaults to Active.
  • Case type currently accepts Manual. Blank defaults to Manual.
  • steps_json must be a JSON list of step objects. Every item, including {}, requires an Action; Expected Result is optional. Use an empty list when there are no structured steps.
  • Overlong titles, Section names, and tag names can be truncated with preview warnings.
  • Invalid priority, status, case type, or step JSON makes that row an error and skips the case.

Owners and tags

Owner matching uses the exact, case-sensitive email of an active organization member. An unmatched email silently creates an unassigned case; it does not produce an owner warning in the preview. Verify owner assignments after import when source email capitalization or membership may differ.

Tag matching is also exact and case-sensitive. An existing tag with the same name is reused; otherwise a new active Project Tag is created with a white background and black text. If duplicate existing tags share the same exact name, the most recently matched record is used. Only active tags are candidates for reuse.

The tags cell supports CSV-style multiple values, which is also the format produced by Armoury export.

Preview and commit behavior

Warnings describe recoverable changes such as selected truncation, a missing parent, conflicting Section name or parent metadata, or a row without a title. Errors identify rows or Section structures that cannot be imported. A preview can contain errors and still have valid Sections and cases ready to commit.

Preview does not fully run every model-length validation or truncate every long text field. A file can therefore pass preview and then fail during commit because description, reference, or other stored text exceeds a model constraint.

Commit is atomic: either the accepted preview plan is created together or that commit fails, including all records already attempted in that transaction. Each imported Test Case receives an initial version when versioning is enabled. A commit can also be blocked if Project data or active-record quota changed after preview, so generate a new preview when the source or target conditions change.